Migrating to OpsCode Hosted Chef
Now that we got a working local testing instance of our app running in VirtualBox using Vagrant/Chef Solo, we’re going to want to start deploying testing/staging instances out in the world for other users to mess with (technical term). To do that, we’ll probably want to deploy some servers in the cloud, and before we do that, we’re going to want to setup a Chef server for those cloud servers to get their configuration from.
While you can create and host your own Chef server locally, for now we’ll take an easier route by signing up for a hosted Chef account at OpsCode.
- Sign Up for Hosted Chef
- Configure Knife for Hosted Chef
- Upload Your Cookbooks/Roles
- Provision Vagrant Instances w/Chef Client
- Deploy Myapp. Again!
- Commit Our Work
Sign Up for an OpsCode Account
First, open your browser and head over to http://opscode.com/
Click the “Sign Up” link in the top right corner of the page.
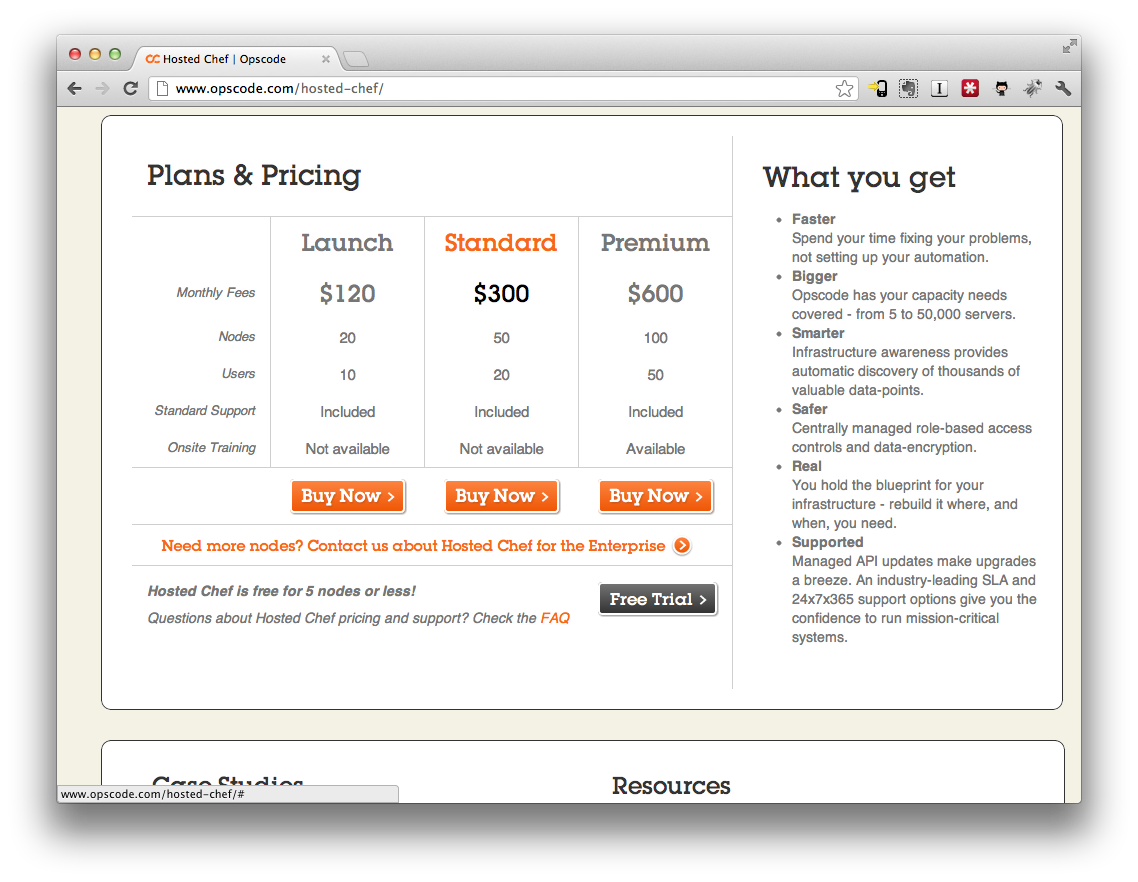
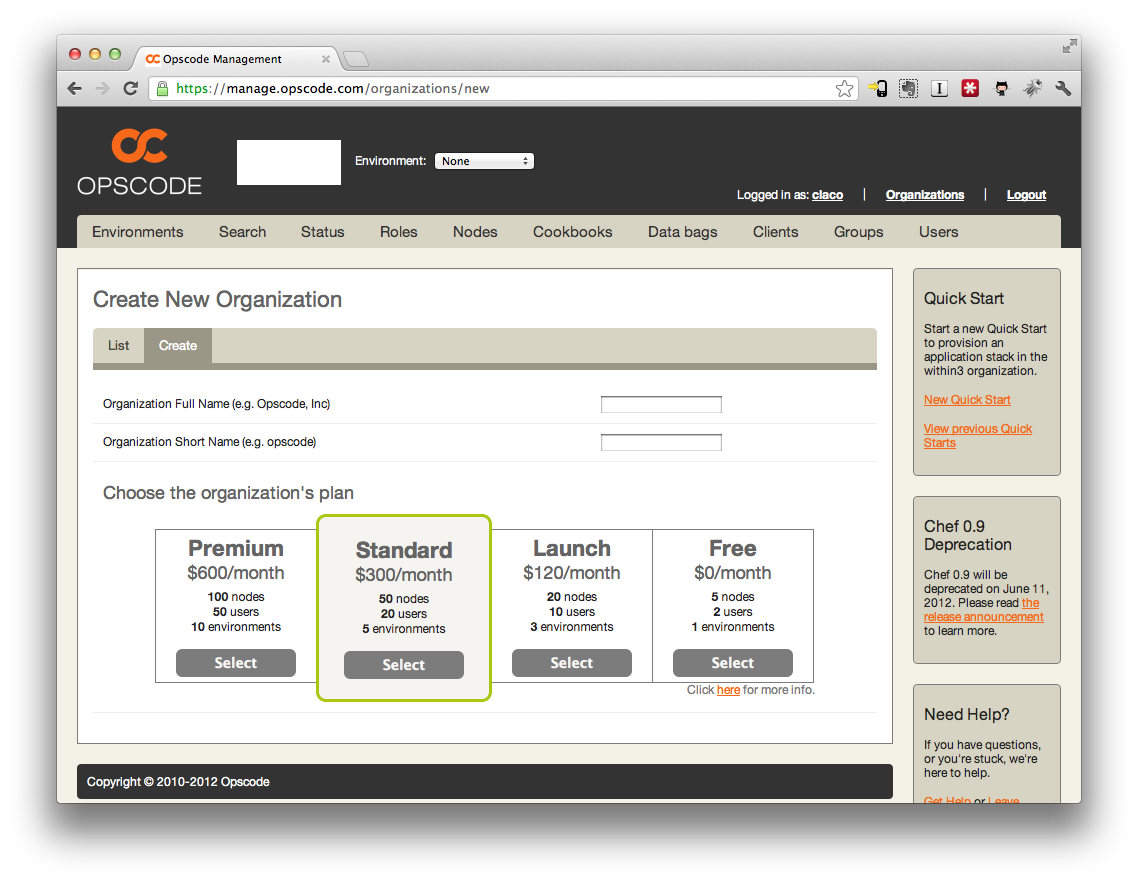
Click on the “Free Trial” button. This will give us up to 5 nodes, which is more than plenty for for our two vagrant instances, and later our two RackCloud instances.
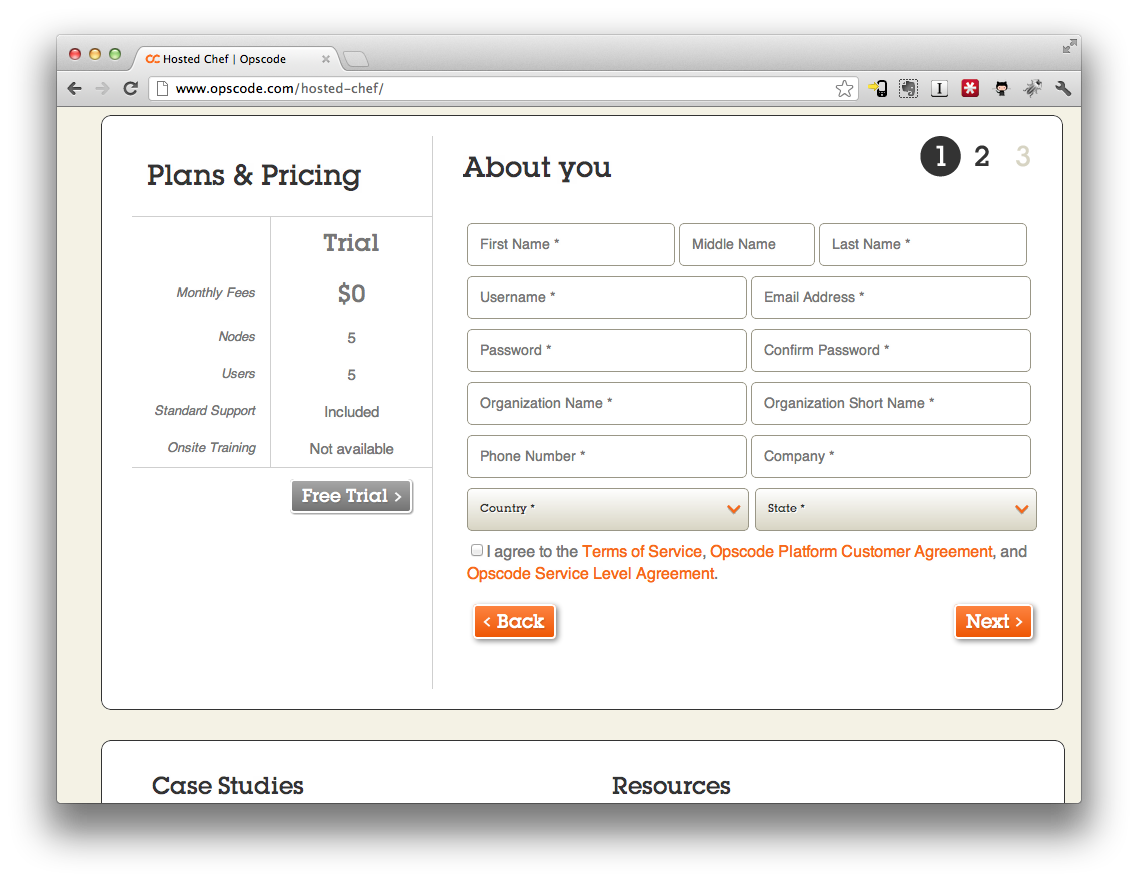
Enter all of the required information. And click “Next”. Once you’ve filled everything out correctly, you’ll be prompted to download your personal key and sent to the organizations page. Save your personal key to .chef/yourusername.pem.
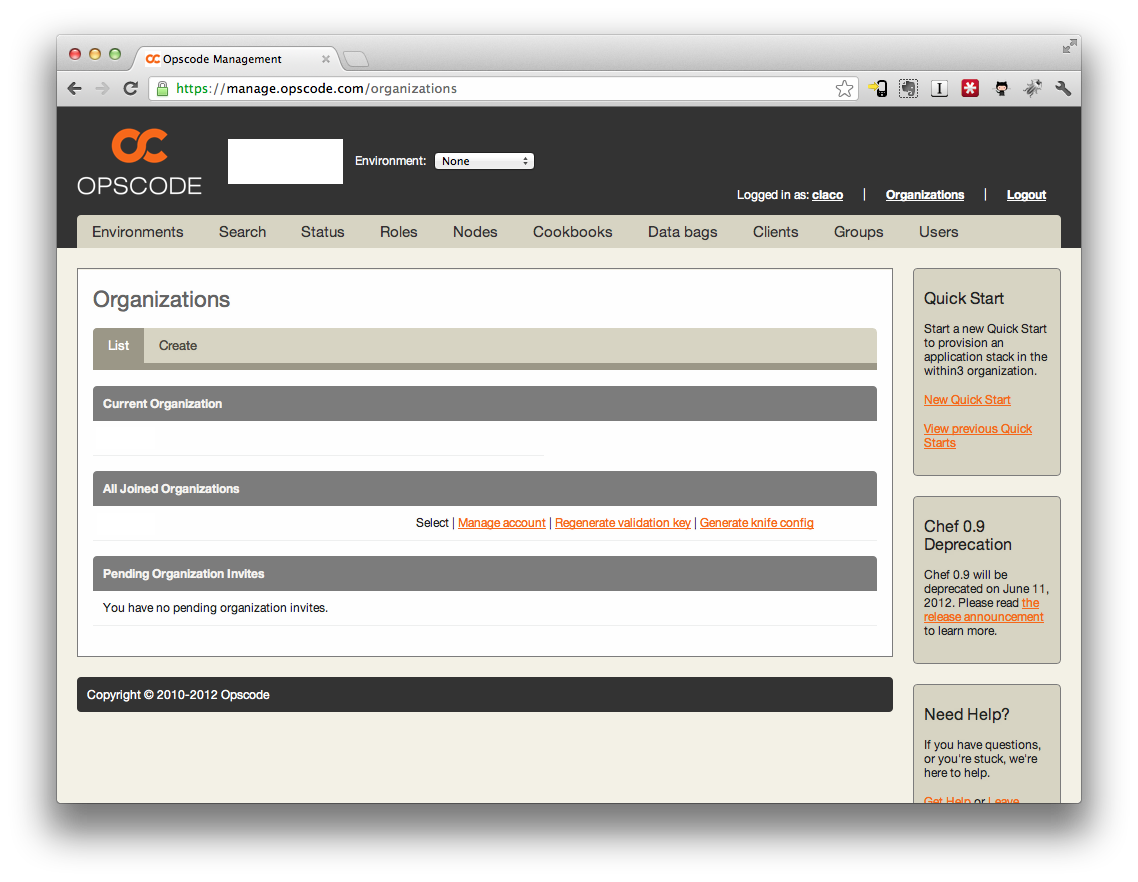
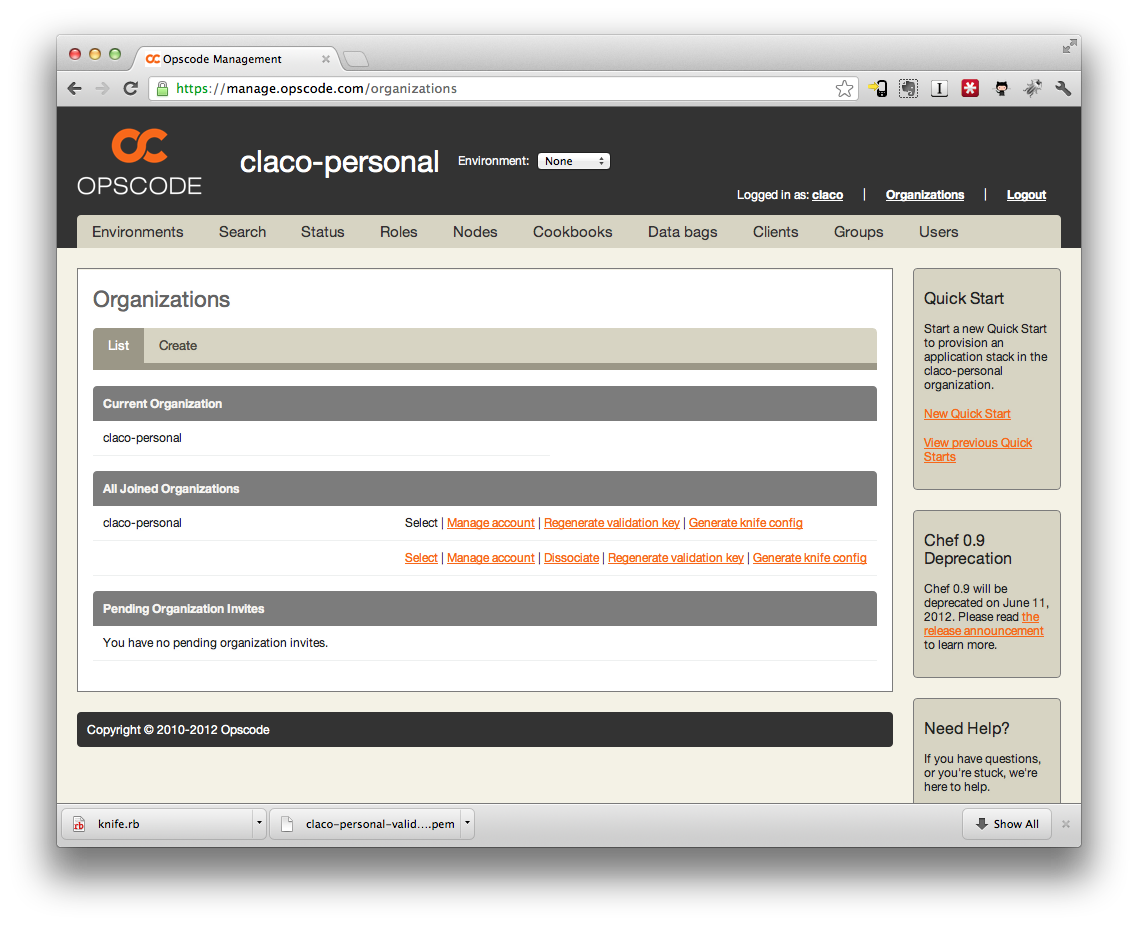
If you already have an OpsCode account like I did, you can just create a new organization within the Organization management page. You can get to that page via the “Organizations” link at the top right of the page once you’re signed in.
Ogranization names and short names must be unique across every everywhere in OpsCode Land. For this demo, I chose claco-personal.
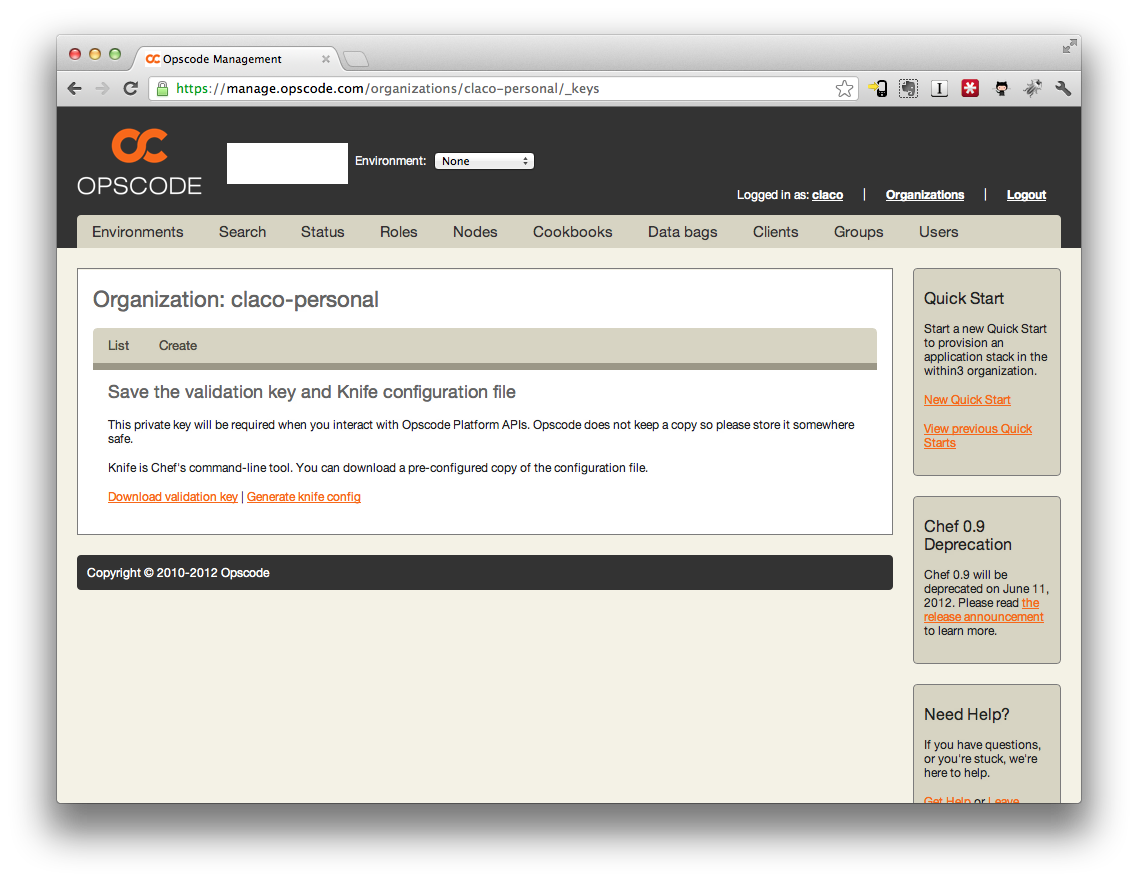
Once you’ve created an organization for the demo, download the validation key and the knife.rb config file.
Save the validation key to /.chef/yourorgname-validator.pem and knife config to .chef/knife.rb
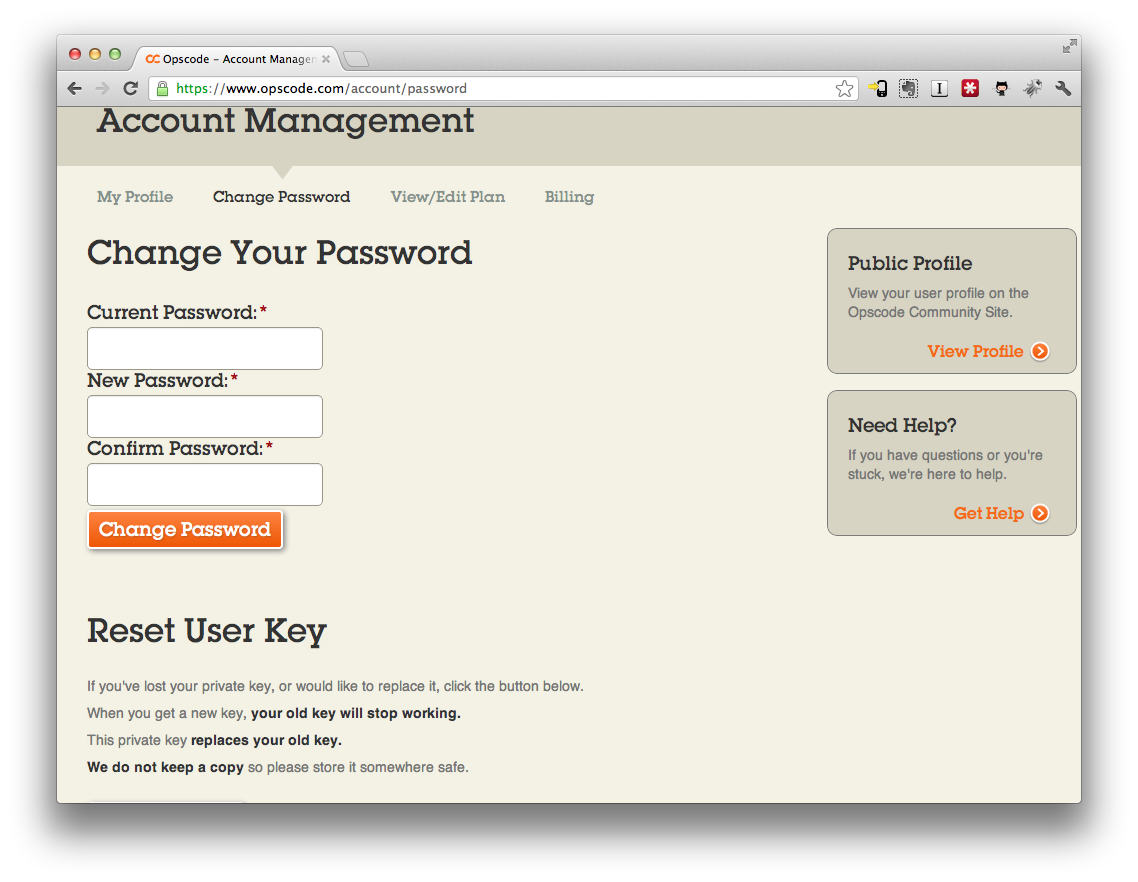
If you don’t have your user key, or didn’t download it, you can reset it and get a new one on your profile page:
Configure Knife for Hosted Chef
Now that we’ve signed up and created an OpsCode account/organization and downloaded a new knife.rb config, let’s tweak it and make sure it points to our local chef cookbooks folder.
Open ./chef/knife.rb on your editor. It should look like this. Most of the file was pre confiigured for your ogranization when you downloaded it. Check the cookbook_path option and ensure it is correct.
 1 current_dir = File.dirname(__FILE__)
 2 log_level                :info
 3 log_location             STDOUT
 4 node_name                "claco"
 5 client_key               "#{current_dir}/claco.pem"
 6 validation_client_name   "claco-personal-validator"
 7 validation_key           "#{current_dir}/claco-personal-validator.pem"
 8 chef_server_url          "https://api.opscode.com/organizations/claco-personal"
 9 cache_type               'BasicFile'
10 cache_options( :path => "#{ENV['HOME']}/.chef/checksums" )
11 cookbook_path            ["#{current_dir}/../chef/cookbooks"]
Just to ensure you’re properly setup, run the knife cookbook list command. This will connect to OpsCode and list the existing cookbooks, which is currently empty. But, it should not return any errors if you’re properly setup.
1 $ knife cookbook list
Upload Cookbooks/Roles
Now that we are connected to a Hosted Chef account, we need to upload our existing cookbooks and roles.
To upload your cookbooks, use the knife cookbook upload command. This wil upload all cookbooks in your chef/cookbooks directory to the OpsCode servers.
1 $ knife cookbook upload -all
2 Uploading apache2      [1.1.16]
3 Uploading build-essential [1.1.2]
4 Uploading database     [1.3.4]
5 ERROR: Chef::Exceptions::CookbookNotFoundInRepo: Cannot find a cookbook named postgresql; did you forget to add metadata to a cookbook? (http://wiki.opscode.com/display/chef/Metadata)
Uh oh? Wat? Don’t panic. Now’s a great time to talk about Chef Solo cookbooks vs HostedChef Cookbooks. :-)
In each cookbook, there’s a metadata.rb file that tells chef that other cookbooks the current cookbook depends on. In this case, the metadata for the database cookbook says that it depends on the postgres cookbook, which we don’t have in our chef/cookbooks directory. Whenbrunning Chef Solo, it maps the entire chef/cookboks directory to the server so we didn’t have to worry about cookbook dependencies too much. When using Hosted Chef or your Chef Server, the Chef Client will inspect metadata files and ensure all of the required cookbooks are downloaded. Making sure your metadata file reflects your cookbook dependencies and any include_recipe statements you’ve used is pretty important.
So, with that in mind, we’re not really interested in postgres a the moment. Let’s open up chef/cookbooks/database/metadata.rb and tweak it a bit to suit our needs. In our case, we’re only using mysql, so let’s comment out the other dependencies for now:
 1 name             "database"
 2 maintainer       "Opscode, Inc."
 3 maintainer_email "cookbooks@opscode.com"
 4 license          "Apache 2.0"
 5 description      "Sets up the database master or slave"
 6 long_description IO.read(File.join(File.dirname(__FILE__), 'README.md'))
 7 version          "1.3.4"
 8
 9 recipe "database", "Empty placeholder"
10 recipe "database::ebs_backup", "Considered deprecated, older way of backing up EBS volumes"
11 recipe "database::ebs_volume", "Sets up an EBS volume in EC2 for the database"
12 recipe "database::master", "Creates application specific user and database"
13 recipe "database::snapshot", "Locks tables and freezes XFS filesystem for replication, assumes EC2 + EBS"
14
15 depends "mysql", ">= 1.3.0"
16 # depends "postgresql", ">= 1.0.0"
17 # depends "aws"
18 # depends "xfs"
19
20 %w{ debian ubuntu centos suse fedora redhat scientific }.each do |os|
21   supports os
22 end
While we’re fixing metadata files, let’s ensure that our chef/cookbooks/myapp/metadata.rb cookbook file properly declares that it needs the iptables, openssh, apache2, and other recipes:
1 depends "iptables"
2 depends "apache2"
3 depends "passenger_apache2"
4 depends "openssh"
5 depends "mysql"
6 depends "database"
Now let’s try uploading our cookbooks again:
 1 $ knife cookbook upload -all
 2 Uploading apache2      [1.1.16]
 3 Uploading build-essential [1.1.2]
 4 Uploading database     [1.3.4]
 5 Uploading iptables     [0.10.0]
 6 Uploading myapp        [0.0.1]
 7 Uploading mysql        [1.3.0]
 8 Uploading openssh      [1.0.0]
 9 Uploading openssl      [1.0.0]
10 Uploading passenger_apache2 [1.0.1]
11 Uploaded all cookbooks.
12
13 $ knife cookbook list
14   apache2             1.1.16
15   build-essential     1.1.2
16   database            1.3.4
17   iptables            0.10.0
18   myapp               0.0.1
19   mysql               1.3.0
20   openssh             1.0.0
21   openssl             1.0.0
22   passenger_apache2   1.0.1
Now, if you go to the cookbooks tab of your ogranization on the OpsCode site, you should now see your uploaded cookbooks:
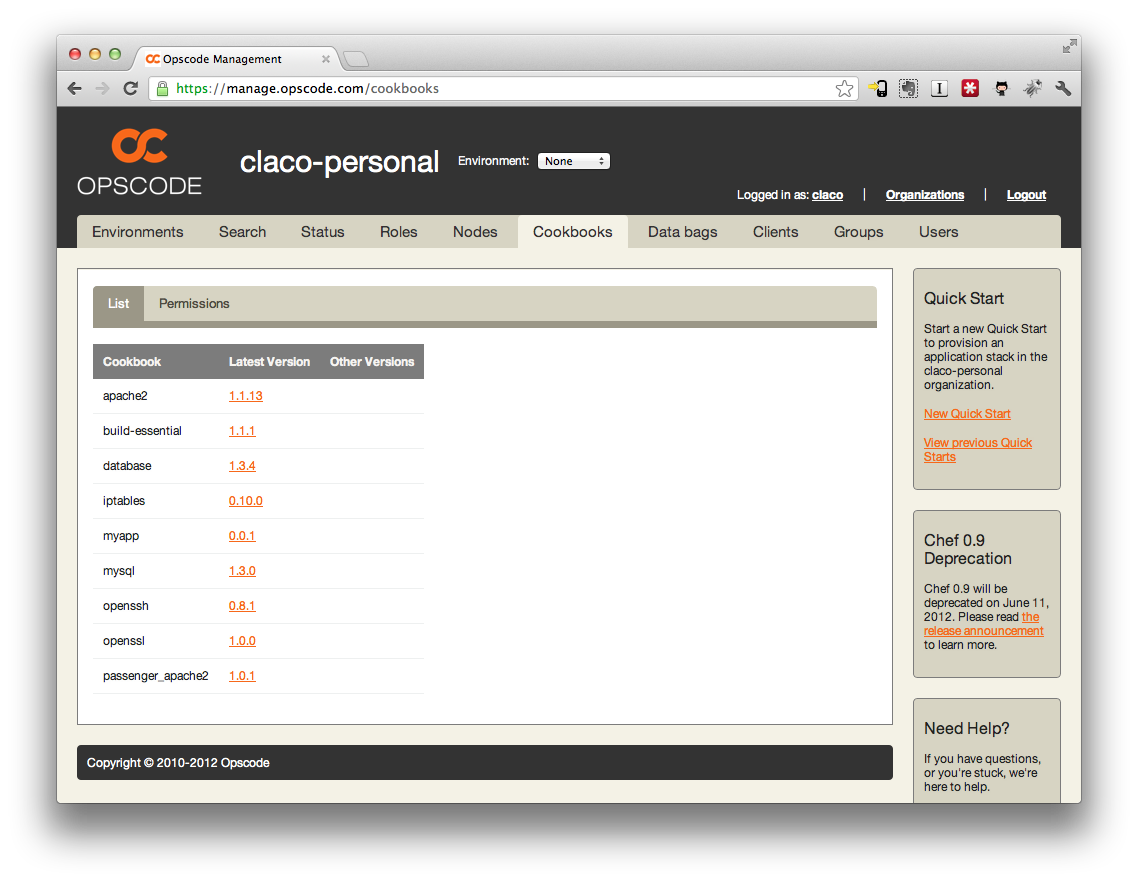
Now, let’s upload our)roles to OpsCode. To do that, just issue the knife role from file command for each role we have locally. This will load, convert and upload the role to Opscode:
1 $ knife role from file chef/roles/web.rb
2 Updated Role web!
3
4 $ knife role from file chef/roles/db.rb
5 Updated Role db!
6
7 $ knife role list
8   db
9   web
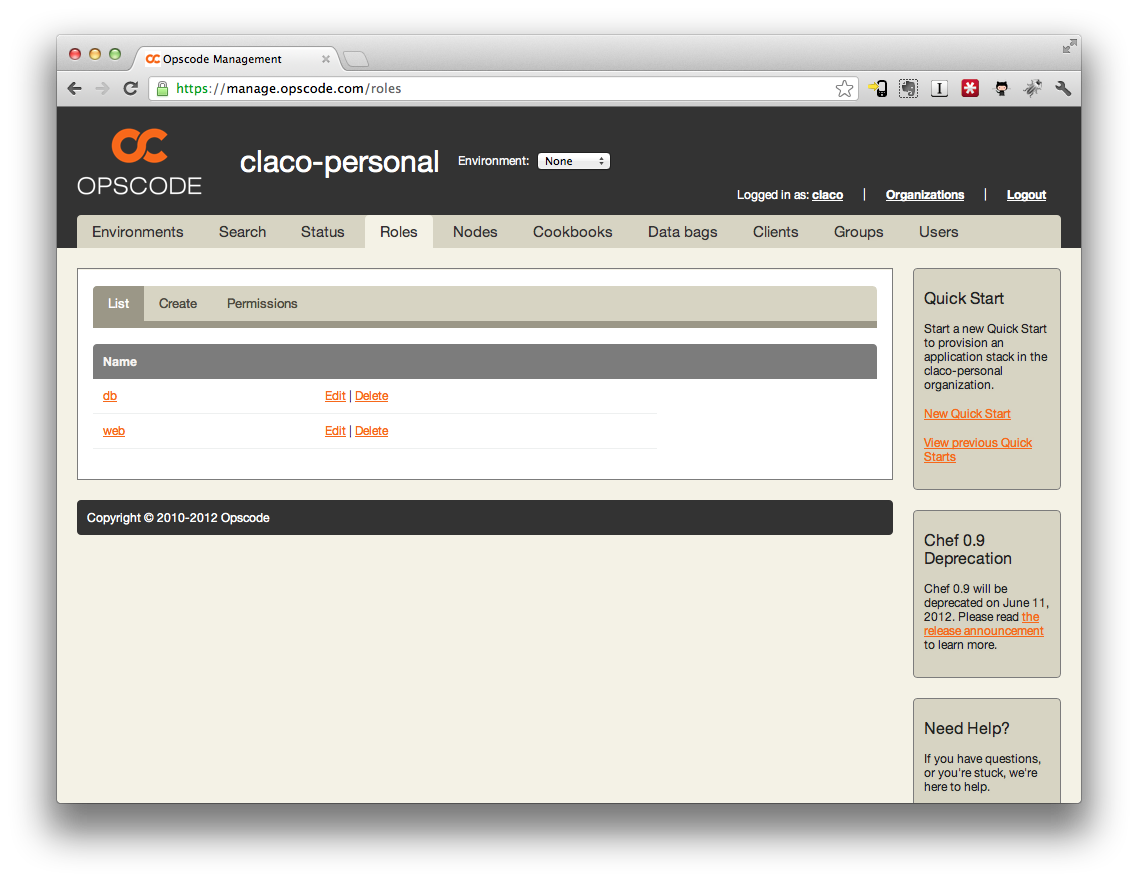
Go to the roles tab in your organization o the OpsCode site. You should now see your roles listed!
Provision Vagrant Instances w/Chef Client
Now that all of our cooksbooks and roles are hosted up in the cloud at OpsCode, we just need to change our Vagrantfile to use Chef CLient instead of Chef Solo. This is pretty straight forward. We just need to change the chef blocks for both instances to use the chef client and point it to the proper keys and settings:
 1     web_config.vm.provision :chef_client do |chef|
 2       chef.chef_server_url = "https://api.opscode.com/organizations/claco-personal"
 3       chef.validation_client_name = "claco-personal-validator"
 4       chef.validation_key_path = "../../.chef/claco-personal-validator.pem"
 5       chef.node_name = "vagrant-web"
 6
 7       chef.add_role "web"
 8
 9 ...
10
11     db_config.vm.provision :chef_client do |chef|
12       chef.chef_server_url = "https://api.opscode.com/organizations/claco-personal"
13       chef.validation_client_name = "claco-personal-validator"
14       chef.validation_key_path = "../../.chef/claco-personal-validator.pem"
15       chef.node_name = "vagrant-db"
16
17       chef.add_role "db"
*From the top:" For in both the
web_configanddb_configblocks, we’re removing the cookbook/rols path settings, and instead replaced them with the chef server url, the validation key, validation client name, and given each instance a node name.
Now for the moment of truth. Let’s re provision our vagrant machine instances!
 1 $ vagrant provision db
 2 [db] Running provisioner: Vagrant::Provisioners::ChefClient...
 3 [db] Creating folder to hold client key...
 4 [db] Uploading chef client validation key...
 5 [db] Generating chef JSON and uploading...
 6 [db] Running chef-client...
 7 [2012-09-28T15:19:59+01:00] INFO: *** Chef 10.12.0 ***
 8 [2012-09-28T15:19:59+01:00] INFO: Client key /etc/chef/client.pem is not present - registering
 9 [2012-09-28T15:20:03+01:00] INFO: Setting the run_list to ["role[db]"] from JSON
10 [2012-09-28T15:20:04+01:00] INFO: Run List is [role[db]]
11 [2012-09-28T15:20:04+01:00] INFO: Run List expands to [mysql::server, myapp::db]
12 [2012-09-28T15:20:04+01:00] INFO: Starting Chef Run for vagrant-db
13 [2012-09-28T15:20:04+01:00] INFO: Running start handlers
14 [2012-09-28T15:20:04+01:00] INFO: Start handlers complete.
15 [2012-09-28T15:20:05+01:00] INFO: Loading cookbooks [apache2, build-essential, database, iptables, myapp, mysql, openssh, openssl, passenger_apache2]
16 [2012-09-28T15:20:08+01:00] INFO: Storing updated cookbooks/mysql/recipes/client.rb in the cache.
17 [2012-09-28T15:20:09+01:00] INFO: Storing updated cookbooks/mysql/recipes/default.rb in the cache.
18 ...
19 [2012-09-28T15:26:06+01:00] INFO: Processing package[gcc] action install (build-essential::default line 48)
20 [2012-09-28T15:26:09+01:00] INFO: Processing package[gcc-c++] action install (build-essential::default line 48)
21 [2012-09-28T15:26:09+01:00] INFO: Processing package[kernel-devel] action install (build-essential::default line 48)
22 [2012-09-28T15:26:09+01:00] INFO: Processing package[make] action install (build-essential::default line 48)
23 ...
24 [2012-09-28T15:26:16+01:00] INFO: Chef Run complete in 58.172269 seconds
25 [2012-09-28T15:26:16+01:00] INFO: Running report handlers
26 [2012-09-28T15:26:16+01:00] INFO: Report handlers complete
From the top: This time, the provisioner is ChefClient, which then downloads all the cookbooks it needs base on the recipes we’ve specified in roles and in those cookbooks metadata. Then it runs those just as it did when using Chef Solo.
And the web instance:
 1 $ vagrant provision web
 2 [web] Running provisioner: Vagrant::Provisioners::ChefClient...
 3 [web] Creating folder to hold client key...
 4 [web] Uploading chef client validation key...
 5 [web] Generating chef JSON and uploading...
 6 [web] Running chef-client...
 7 [2012-09-28T15:28:41+01:00] INFO: *** Chef 10.12.0 ***
 8 [2012-09-28T15:28:41+01:00] INFO: Client key /etc/chef/client.pem is not present - registering
 9 [2012-09-28T15:28:44+01:00] INFO: Setting the run_list to ["role[web]"] from JSON
10 [2012-09-28T15:28:45+01:00] INFO: Run List is [role[web]]
11 [2012-09-28T15:28:45+01:00] INFO: Run List expands to [apache2, passenger_apache2::mod_rails, mysql::client, myapp::web]
12 [2012-09-28T15:28:45+01:00] INFO: Starting Chef Run for vagrant-web
13 [2012-09-28T15:28:45+01:00] INFO: Running start handlers
14 [2012-09-28T15:28:45+01:00] INFO: Start handlers complete.
15 [2012-09-28T15:28:47+01:00] INFO: Loading cookbooks [apache2, build-essential, database, iptables, myapp, mysql, openssh, openssl, passenger_apache2]
16 [2012-09-28T15:28:47+01:00] INFO: Storing updated cookbooks/passenger_apache2/recipes/default.rb in the cache.
17 [2012-09-28T15:28:48+01:00] INFO: Storing updated cookbooks/passenger_apache2/recipes/mod_rails.rb in the cache.
18 [2012-09-28T15:28:48+01:00] INFO: Storing updated cookbooks/passenger_apache2/attributes/default.rb in the cache.
19 [2012-09-28T15:28:49+01:00] INFO: Storing updated cookbooks/passenger_apache2/.gitignore in the cache.
20 ...
21 [2012-09-28T15:34:00+01:00] INFO: Processing package[apache2] action install (apache2::default line 20)
22 [2012-09-28T15:34:02+01:00] INFO: Processing service[apache2] action enable (apache2::default line 25)
23 [2012-09-28T15:34:02+01:00] INFO: Processing directory[/var/log/httpd] action create (apache2::default line 60)
24 [2012-09-28T15:34:02+01:00] INFO: Processing package[perl] action install (apache2::default line 65)
25 [2012-09-28T15:34:02+01:00] INFO: Processing cookbook_file[/usr/local/bin/apache2_module_conf_generate.pl] action create (apache2::default line 67)
26 [2012-09-28T15:34:02+01:00] INFO: Processing directory[/etc/httpd/sites-available] action create (apache2::default line 75)
27 ...
28 [2012-09-28T15:34:34+01:00] INFO: Chef Run complete in 348.888283 seconds
29 [2012-09-28T15:34:34+01:00] INFO: Running report handlers
30 [2012-09-28T15:34:34+01:00] INFO: Report handlers complete
Woot! Now that we’ve provisioned our instances using hosted Chef, let’s look arounf knife and the OpsCode site for anew clients/nodes.
A “node” is just a machine instances. A “client” is the pem keypair that is used to authenticated the node to the OpsCode APIs. Later, if you decide to share this setup repository with co workers, you can and should remove your personal pem file and instead use another client keypair with enough access to create/provision nodes.
Also, if you destroy your instances, and try to reprovision them, you will get an error fromn OpsCode that the client/node already exists. This is because Vagrant has created a new machine instance without those specific nodes client keys and it’s trying to recreate them. You can simple delete the node/client no the OpsCode site, or tweak the Vagrant file to use the existing keys and download them to your .chef directory.
1 $ knife client list
2   claco-personal-validator
3   vagrant-db
4   vagrant-web
5
6 $ knife node list
7   vagrant-db
8   vagrant-web
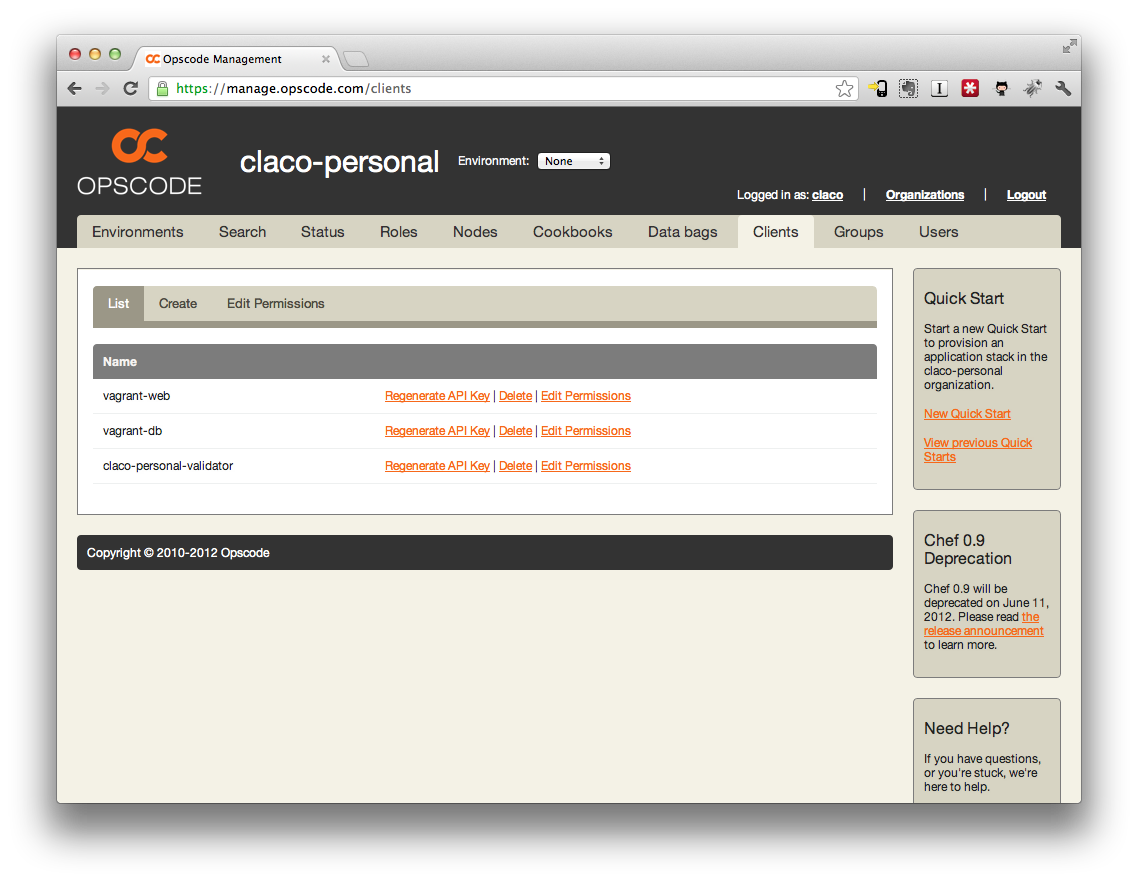
If you check the clients and nodes tabs on the OpsCode site, you should now see the two new nodes and their clients:

Deploy Your Application. Again.
Now that we’ve provisioned our machines using Chef Client and Hosted Chef, let’s redeploy our Rails application and make sure it still works.
 1 $ cd myapp
 2 $ cap deploy:cold
 3   * executing `deploy:cold'
 4   * executing `deploy:update'
 5  ** transaction: start
 6   * executing `deploy:update_code'
 7   * getting (via checkout) revision  to /var/folders/nf/zwnznxhj35n_143061ppg9rr0000gn/T/20120928145003
 8     executing locally: cp -R ./ /var/folders/nf/zwnznxhj35n_143061ppg9rr0000gn/T/20120928145003
 9     command finished in 50ms
10   * Compressing /var/folders/nf/zwnznxhj35n_143061ppg9rr0000gn/T/20120928145003 to /var/folders/nf/zwnznxhj35n_143061ppg9rr0000gn/T/20120928145003.tar.gz
11     executing locally: tar czf 20120928145003.tar.gz 20120928145003
12     command finished in 87ms
13     servers: ["10.10.10.10"]
14 Password:
15  ** sftp upload /var/folders/nf/zwnznxhj35n_143061ppg9rr0000gn/T/20120928145003.tar.gz -> /tmp/20120928145003.tar.gz
16     [10.10.10.10] /tmp/20120928145003.tar.gz
17     [10.10.10.10] done
18   * sftp upload complete
19   * executing "cd /var/www/myapp/releases && tar xzf /tmp/20120928145003.tar.gz && rm /tmp/20120928145003.tar.gz"
20     servers: ["10.10.10.10"]
21     [10.10.10.10] executing command
22     command finished in 33ms
23   * executing `deploy:finalize_update'
24     triggering before callbacks for `deploy:finalize_update'
25   * executing `bundle:install'
26   * executing "cd /var/www/myapp/releases/20120928145003 && bundle install --gemfile /var/www/myapp/releases/20120928145003/Gemfile --path /var/www/myapp/shared/bundle --deployment --quiet --without development test"
27     servers: ["10.10.10.10"]
28     [10.10.10.10] executing command
29     command finished in 352ms
30   * executing "chmod -R g+w /var/www/myapp/releases/20120928145003"
31     servers: ["10.10.10.10"]
32     [10.10.10.10] executing command
33     command finished in 18ms
34   * executing "rm -rf /var/www/myapp/releases/20120928145003/public/system && mkdir -p /var/www/myapp/releases/20120928145003/public/"
35     servers: ["10.10.10.10"]
36     [10.10.10.10] executing command
37     command finished in 16ms
38   * executing "ln -s /var/www/myapp/shared/system /var/www/myapp/releases/20120928145003/public/system"
39     servers: ["10.10.10.10"]
40     [10.10.10.10] executing command
41     command finished in 19ms
42   * executing "rm -rf /var/www/myapp/releases/20120928145003/log"
43     servers: ["10.10.10.10"]
44     [10.10.10.10] executing command
45     command finished in 16ms
46   * executing "ln -s /var/www/myapp/shared/log /var/www/myapp/releases/20120928145003/log"
47     servers: ["10.10.10.10"]
48     [10.10.10.10] executing command
49     command finished in 16ms
50   * executing "rm -rf /var/www/myapp/releases/20120928145003/tmp/pids && mkdir -p /var/www/myapp/releases/20120928145003/tmp/"
51     servers: ["10.10.10.10"]
52     [10.10.10.10] executing command
53     command finished in 17ms
54   * executing "ln -s /var/www/myapp/shared/pids /var/www/myapp/releases/20120928145003/tmp/pids"
55     servers: ["10.10.10.10"]
56     [10.10.10.10] executing command
57     command finished in 16ms
58   * executing "find /var/www/myapp/releases/20120928145003/public/images /var/www/myapp/releases/20120928145003/public/stylesheets /var/www/myapp/releases/20120928145003/public/javascripts -exec touch -t 201209281450.09 {} ';'; true"
59     servers: ["10.10.10.10"]
60     [10.10.10.10] executing command
61 *** [err :: 10.10.10.10] find:
62 *** [err :: 10.10.10.10] /var/www/myapp/releases/20120928145003/public/images
63 *** [err :: 10.10.10.10] : No such file or directory
64 *** [err :: 10.10.10.10]
65 *** [err :: 10.10.10.10] find:
66 *** [err :: 10.10.10.10] /var/www/myapp/releases/20120928145003/public/stylesheets
67 *** [err :: 10.10.10.10] : No such file or directory
68 *** [err :: 10.10.10.10]
69 *** [err :: 10.10.10.10] find:
70 *** [err :: 10.10.10.10] /var/www/myapp/releases/20120928145003/public/javascripts
71 *** [err :: 10.10.10.10] : No such file or directory
72 *** [err :: 10.10.10.10]
73     command finished in 22ms
74     triggering after callbacks for `deploy:finalize_update'
75   * executing `deploy:copy_database_yml'
76   * executing "cp /var/www/myapp/shared/database.yml /var/www/myapp/releases/20120928145003/config/database.yml"
77     servers: ["10.10.10.10"]
78     [10.10.10.10] executing command
79     command finished in 16ms
80   * executing `deploy:create_symlink'
81   * executing "rm -f /var/www/myapp/current && ln -s /var/www/myapp/releases/20120928145003 /var/www/myapp/current"
82     servers: ["10.10.10.10"]
83     [10.10.10.10] executing command
84     command finished in 16ms
85  ** transaction: commit
86   * executing `deploy:migrate'
87   * executing "cd /var/www/myapp/releases/20120928145003 && bundle exec rake RAILS_ENV=development  db:migrate"
88     servers: ["10.10.10.10"]
89     [10.10.10.10] executing command
90     command finished in 2436ms
91   * executing `deploy:start'
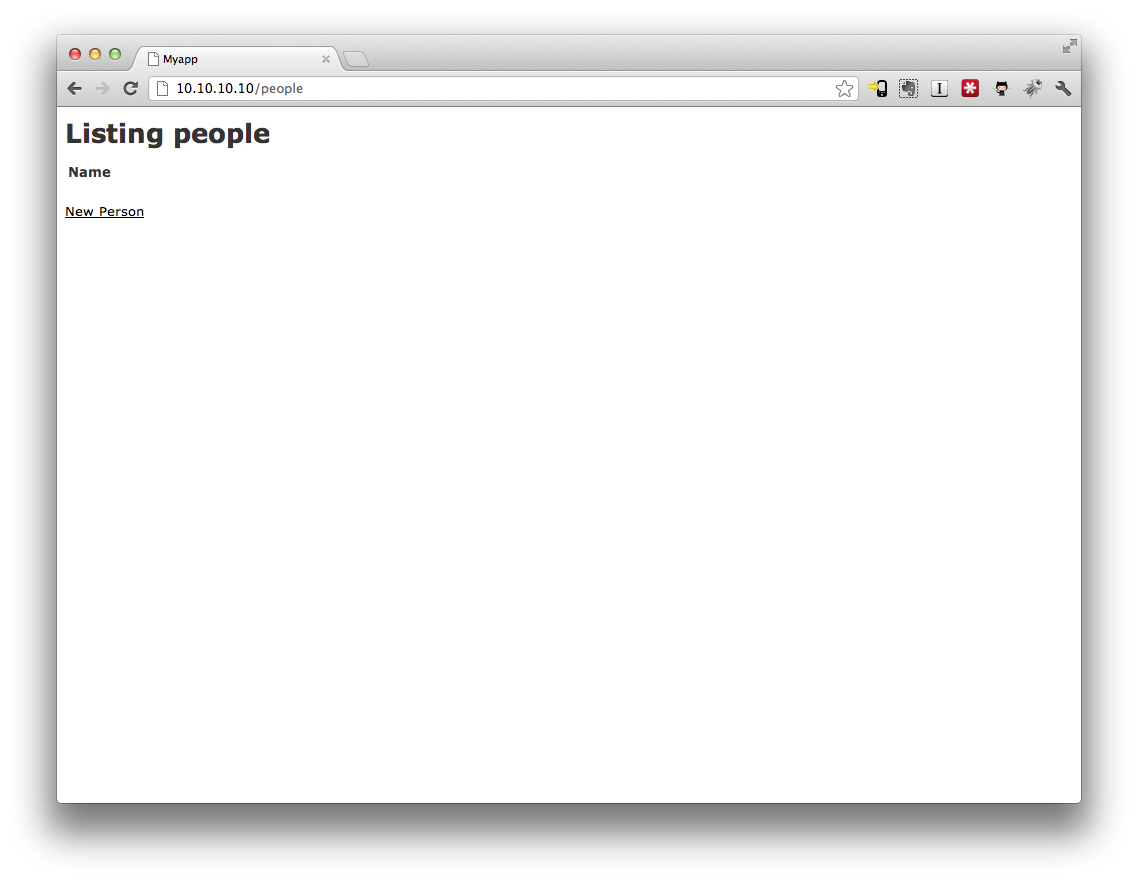
And in your browser:
Commit Our Work
Let’s commit our new application and other changes into the git repo.
1 $ cd ..
2 $ git add .
3 $ git commit -m "Converted to Hosted Chef"
4 [master bfd62b8] Converted to Hosted Chef
5  6 files changed, 87 insertions(+), 13 deletions(-)
6  create mode 100644 .chef/claco-personal-validator.pem
7  create mode 100644 .chef/claco.pem
8  rewrite .chef/knife.rb (100%)
To Continue…
- Introduction – Introduction
- Installing Prerequisites – XCode, CommandLineTools, Homebrew, RVM, Ruby, and VirtualBox
- Project Setup – Create the git repository and directory structure for Vagrant, Chef, etc.
- Vagrant/Veewee Installation – Install Vagrant/Vewee to create/control VirtualBox machines
- Define/Create a Vagrant Box – Define and Create a Vagrant Box for use i VirtualBox
- Provisioning Machines with Vagrant – Provision a cluster (Web/DB) of machines using Vagrant
- Configuring Machines Using Chef Solo – Configuring our new machine instances using Chef Solo
- Customizing Recipes for Our Application – Customize the recipes we have to prepare for our application deployment
- Create and Deploy a Rails Applications – Create a simple Rails application and deploy it to our Vagrant instances
- Migrate from Chef Solo to Hosted Chef – Migrate from using Chef Solo to hosted Chef at OpsCode
- Migrate Servers to RackCloud – Migrate your servers from VirtualBox to “The Cloud” using Rackspace.