Defining/Creating a Vagrant Box
Technically, you can skip this step. But don’t! There are quite a few preconfigured boxes you can download to get you started quicker, but it’s important to understand how boostrapping a local box works because the same techniques apply to creating images in the cloud.
The goal is to have a machine with just enough install to run the chef-client successfully. Everything beyond that should be put into cookbooks/recipes themselves, keeping the machine create as simple as possible.
First, let’s clarify a few of the terms you’ll be seeing. A definition is a set of files that tells veewee how to create a box from the raw .iso install disc. A basebox is the completed virtual machine image with the install completed. The basebox is then exported to a box, that vagrant then creates new VirtualBox instances from.
See also Base Boxes on the Vagrant website.
- Create a New Box Definition
- Customize the Definition
- Building the Box
- Validating the Box
- Export the Box
- Commit Our Work
Create a New Box Definition
First, let’s see what basebox definitions are available by running vagrant basebox templates:
 1 $ vagrant basebox templates
 2 The following templates are available:
 3 vagrant basebox define '<boxname>' 'CentOS-4.8-i386'
 4 vagrant basebox define '<boxname>' 'CentOS-5.5-x86_64-netboot'
 5 vagrant basebox define '<boxname>' 'CentOS-5.6-i386'
 6 vagrant basebox define '<boxname>' 'CentOS-5.6-i386-netboot'
 7 vagrant basebox define '<boxname>' 'CentOS-5.6-x86_64-netboot'
 8 vagrant basebox define '<boxname>' 'CentOS-5.7-i386-netboot'
 9 vagrant basebox define '<boxname>' 'CentOS-5.7-x86_64-netboot'
10 vagrant basebox define ')boxname>' 'CentOS-6.0-i386'
11 vagrant basebox define '<boxname>' 'CentOS-6.0-i386-netboot'
12 vagrant basebox define '<boxname>' 'CentOS-6.0-x86_64'
13 vagrant basebox define '<boxname>' 'CentOS-6.0-x86_64-minimal'
14 vagrant basebox define '<boxname>' 'CentOS-6.0-x86_64-netboot'
15 vagrant basebox define '<boxname>' 'CentOS-6.1-x86_64-minimal'
16 vagrant basebox define '<boxname>' 'CentOS-6.2-x86_64-minimal'
17 vagrant basebox define '<boxname>' 'Debian-5.0.8-amd64-netboot'
18 vagrant basebox define '<boxname>' 'Debian-5.0.8-i386-netboot'
19 vagrant basebox define '<boxname>' 'Debian-6.0.3-amd64-netboot'
20 vagrant basebox define '<boxname>' 'Debian-6.0.3-i386-netboot'
21 vagrant basebox define '<boxname>' 'Fedora-14-amd64'
22 vagrant basebox define '<boxname>' 'Fedora-14-amd64-netboot'
23 vagrant basebox define '<boxname>' 'Fedora-14-i386'
24 vagrant basebox define '<boxname>' 'Fedora-14-i386-netboot'
25 vagrant basebox define '<boxname>' 'Fedora-15-i386'
26 vagrant basebox define '<boxname>' 'Fedora-15-i386-netboot'
27 vagrant basebox define '<boxname>' 'Fedora-15-x86_64'
28 vagrant basebox define '<boxname>' 'Fedora-15-x86_64-netboot'
29 vagrant basebox define '<boxname>' 'Fedora-16-i386'
30 vagrant basebox define '<boxname>' 'Fedora-16-x86_64'
31 vagrant basebox define '<boxname>' 'SLES-11-SP1-DVD-i586-GM'
32 vagrant basebox define '<boxname>' 'SLES-11-SP1-DVD-x86_64-GM'
33 vagrant basebox define '<boxname>' 'Sysrescuecd-2.0.0-experimental'
34 vagrant basebox define '<boxname>' 'archlinux-i386'
35 vagrant basebox define '<boxname>' 'archlinux-i386-netboot'
36 vagrant basebox define '<boxname>' 'archlinux-x86_64'
37 vagrant basebox define '<boxname>' 'archlinux-x86_64-netboot'
38 vagrant basebox define '<boxname>' 'freebsd-8.2-experimental'
39 vagrant basebox define '<boxname>' 'freebsd-8.2-pcbsd-i386'
40 vagrant basebox define '<boxname>' 'freebsd-8.2-pcbsd-i386-netboot'
41 vagrant basebox define '<boxname>' 'funtoo-latest-generic_64-stable'
42 vagrant basebox define '<boxname>' 'gentoo-latest-i386-experimental'
43 vagrant basebox define '<boxname>' 'gentoo-latest-x86_64-experimental'
44 vagrant basebox define '<boxname>' 'openSUSE-11.4-DVD-i586'
45 vagrant basebox define '<boxname>' 'openSUSE-11.4-DVD-x86_64'
46 vagrant basebox define '<boxname>' 'openSUSE-11.4-NET-i586'
47 vagrant basebox define '<boxname>' 'openSUSE-11.4-NET-x86_64'
48 vagrant basebox define '<boxname>' 'openSUSE-12.1-DVD+NET-i586'
49 vagrant basebox define '<boxname>' 'openSUSE-12.1-DVD+NET-x86_64'
50 vagrant basebox define '<boxname>' 'openbsd50_amd64'
51 vagrant basebox define '<boxname>' 'openbsd50_i386'
52 vagrant basebox define '<boxname>' 'openindiana-148-ai-x86'
53 vagrant basebox define '<boxname>' 'opensuse-11.4-i386-experimental'
54 vagrant basebox define '<boxname>' 'scientificlinux-6.1-i386-netboot'
55 vagrant basebox define '<boxname>' 'scientificlinux-6.1-x86_64-netboot'
56 vagrant basebox define '<boxname>' 'solaris-11-express-i386'
57 vagrant basebox define '<boxname>' 'ubuntu-10.04.2-amd64-netboot'
58 vagrant basebox define '<boxname>' 'ubuntu-10.04.2-server-i386-netboot'
59 vagrant basebox define '<boxname>' 'ubuntu-10.04.3-server-amd64'
60 vagrant basebox define '<boxname>' 'ubuntu-10.04.3-server-amd64-alt'
61 vagrant basebox define '<boxname>' 'ubuntu-10.04.3-server-i386'
62 vagrant basebox define '<boxname>' 'ubuntu-10.10-server-amd64'
63 vagrant basebox define '<boxname>' 'ubuntu-10.10-server-amd64-netboot'
64 vagrant basebox define '<boxname>' 'ubuntu-10.10-server-i386'
65 vagrant basebox define '<boxname>' 'ubuntu-10.10-server-i386-netboot'
66 vagrant basebox define '<boxname>' 'ubuntu-11.04-server-amd64'
67 vagrant basebox define '<boxname>' 'ubuntu-11.04-server-i386'
68 vagrant basebox define '<boxname>' 'ubuntu-11.10-server-amd64'
69 vagrant basebox define '<boxname>' 'ubuntu-11.10-server-amd64-ishaya'
70 vagrant basebox define '<boxname>' 'ubuntu-11.10-server-amd64-ruby192'
71 vagrant basebox define '<boxname>' 'ubuntu-11.10-server-i386'
72 vagrant basebox define '<boxname>' 'ubuntu-8.04.4-server-amd64'
73 vagrant basebox define '<boxname>' 'ubuntu-8.04.4-server-i386'
74 vagrant basebox define '<boxname>' 'windows-2008R1-serverstandard-amd64'
75 vagrant basebox define '<boxname>' 'windows-2008R2-amd64'
76 vagrant basebox define '<boxname>' 'windows-2008R2-serverstandard-amd64'
77 vagrant basebox define '<boxname>' 'windows-7-enterprise-amd64'
78 vagrant basebox define '<boxname>' 'windows-7-enterprise-i386'
79 vagrant basebox define '<boxname>' 'windows-7-premium-amd64'
80 vagrant basebox define '<boxname>' 'windows-7-professional-amd64'
81 vagrant basebox define '<boxname>' 'windows-7-ultimate-amd64'
82 vagrant basebox define '<boxname>' 'windows-7sp1-ultimate-amd64'
83 vagrant basebox define '<boxname>' 'windows-8-preview-dev-amd64'
Just because it’s what I’m most familiar with at the moment, and because it will highlight some of the issues with older OSes, I’m going to create a CentOS 5.6 x64 basebox. To do that, we run the vagrant basebox define command:
1 $ vagrant basebox define 'MyServer' 'CentOS-5.6-x86_64-netboot'
2 The basebox 'MyServer' has been successfully created from the template 'CentOS-5.6-x86_64-netboot'
3 You can now edit the definition files stored in definitions/MyServer
4 or build the box with:
5 vagrant basebox build 'MyServer'
Now that we have a new basebox definition, let’s take a look at the files it created:
ls definitions/MyServer
total 24
-rw-r--r--  1 claco  staff   923 Sep 23 21:25 definition.rb
-rw-r--r--  1 claco  staff  1396 Sep 23 21:25 ks.cfg
-rw-r--r--  1 claco  staff  1884 Sep 23 21:25 postinstall.sh
From the top:
definition.rbis the file that tells vagrant how to create a VirtualBox image (memory, disk size, etc).ks.cfgis the Linux KickStart file, which tells the OS installer what to install and what to enable. *postinstall.sh@ is a shell script to run once the install has finished in order to perform any last minute configuration.
Customize the Definition
Now that we have a new definition, let’s inspect the definition files customize them a little where needed.
First, open definitions/MyServer/definition.rb in your favorite editor:
 1 Veewee::Session.declare({
 2   :cpu_count => '1', :memory_size=> '384',
 3   :disk_size => '10140', :disk_format => 'VDI', :hostiocache => 'off', :ioapic => 'on', :pae => 'on',
 4   :os_type_id => 'RedHat_64',
 5   :iso_file => "CentOS-5.6-x86_64-netinstall.iso",
 6   :iso_src => "http://vault.centos.org/5.6/isos/x86_64/CentOS-5.6-x86_64-netinstall.iso",
 7   :iso_md5 => "02cf3a5e32aaa5eed27af775ad292beb",
 8   :iso_download_timeout => 1000,
 9   :boot_wait => "10", :boot_cmd_sequence => [ 'linux text ks=http://%IP%:%PORT%/ks.cfg<Enter>' ],
10   :kickstart_port => "7122", :kickstart_timeout => 10000, :kickstart_file => "ks.cfg",
11   :ssh_login_timeout => "100", :ssh_user => "vagrant", :ssh_password => "vagrant", :ssh_key => "",
12   :ssh_host_port => "7222", :ssh_guest_port => "22",
13   :sudo_cmd => "echo '%p'|sudo -S sh '%f'",
14   :shutdown_cmd => "/sbin/halt -h -p",
15   :postinstall_files => [ "postinstall.sh"], :postinstall_timeout => 10000
16 })
It’s just a plain old Ruby file with settings that tell Vagrant how to configure the VirtualBox image when it is created. For example, line 2 tells it to create 1 CPU with a memory size of 384MB. That’s not a terrible large machine, but it will do for the purposes of learning. IF your developers all have 4-8 core machines installed with 8GB of memory, making the default CPU setting a 2 and increasing memory to 1GB might make more sense.
Close that file, and open definitions/MyServer/ks.cfg:
 1 # Kickstart file automatically generated by anaconda.
 2
 3 install
 4 url --url=http://vault.centos.org/5.6/os/x86_64
 5 lang en_US.UTF-8
 6 langsupport --default=en_US.UTF-8 en_US.UTF-8
 7 keyboard us
 8 xconfig --card "VMWare" --videoram 16384 --hsync 31.5-37.9 --vsync 50-70 --resolution 800x600 --depth 16
 9 network --device eth0 --bootproto dhcp
10 rootpw --iscrypted $1$vSG8FjAu$ekQ0grf16hS4G93HTPcco/
11 firewall --enabled --trust eth0 --ssh
12 selinux --enforcing
13 authconfig --enableshadow --enablemd5
14 timezone Europe/London
15 bootloader --location=mbr
16 # The following is the partition information you requested
17 # Note that any partitions you deleted are not expressed
18 # here so unless you clear all partitions first, this is
19 # not guaranteed to work
20 clearpart --all --drives=sda --initlabel
21 part /boot --fstype ext3 --size=100 --ondisk=sda
22 part pv.2 --size=0 --grow --ondisk=sda
23 volgroup VolGroup00 --pesize=32768 pv.2
24 logvol swap --fstype swap --name=LogVol01 --vgname=VolGroup00 --size=528 --grow --maxsize=1056
25 logvol / --fstype ext3 --name=LogVol00 --vgname=VolGroup00 --size=1024 --grow
26 reboot
27
28 %packages
29 #@ admin-tools
30 #@ text-internet
31 #@ dialup
32 #@ smb-server
33 #@ web-server
34 #@ printing
35 #@ server-cfg
36 @ core
37 grub"
38 e2fsprogs
39 lvm2
40
41 %post
42 /usr/sbin/groupadd vagrant
43 /usr/sbin/useradd vagrant -g vagrant -G wheel
44 echo "vagrant"|passwd --stdin vagrant
45 echo "vagrant        ALL=(ALL)       NOPASSWD: ALL" >> /etc/sudoers
Fron the top: As expected, this file is full of mostly readable commands that the OS installer follows to set the defaults. Line 9 turns on DHCP. Line 10 sets the default root password. Line 11 enables the firewall, etc. The last 5 lines create a vagrant user/group and adds that user to sodoers. When the install completes, vagrant will log in as this user to run the postinstall.sh script.
If you were to run this script as is, a few obvious and not so obvious things would happen. First, your time zone would be “Europe/London”, which would be nice, but not real. Next, SeLinux (Secure Linux) would be enabled, which is something that Chef cookbooks and recipes do not yet support. (In fact, cloud instances of CentOS 5.6 have SeLinux disabled already) To make matters even more interesting, while we will disabled selinux here, there’s a KickStart bug in certain versions of CentOS, where the installer ignores the setting and enables it anyways. :-/ These are the kinds of things you run into depending on the OS you choose. Each has their own quirks.
So, let’s update the timezone and selinux settings in this file:
 1 # Kickstart file automatically generated by anaconda.
 2
 3 install
 4 url --url=http://vault.centos.org/5.6/os/x86_64
 5 lang en_US.UTF-8
 6 langsupport --default=en_US.UTF-8 en_US.UTF-8
 7 keyboard us
 8 xconfig --card "VMWare" --videoram 16384 --hsync 31.5-37.9 --vsync 50-70 --resolution 800x600 --depth 16
 9 network --device eth0 --bootproto dhcp
10 rootpw --iscrypted $1$vSG8FjAu$ekQ0grf16hS4G93HTPcco/
11 firewall --enabled --trust eth0 --ssh
12 selinux --disabled
13 authconfig --enableshadow --enablemd5
14 timezone America/New_York
15 bootloader --location=mbr
16 # The following is the partition information you requested
17 # Note that any partitions you deleted are not expressed
18 # here so unless you clear all partitions first, this is
19 # not guaranteed to work
20 clearpart --all --drives=sda --initlabel
21 part /boot --fstype ext3 --size=100 --ondisk=sda
22 part pv.2 --size=0 --grow --ondisk=sda
23 volgroup VolGroup00 --pesize=32768 pv.2
24 logvol swap --fstype swap --name=LogVol01 --vgname=VolGroup00 --size=528 --grow --maxsize=1056
25 logvol / --fstype ext3 --name=LogVol00 --vgname=VolGroup00 --size=1024 --grow
26 reboot
27
28 %packages
29 #@ admin-tools
30 #@ text-internet
31 #@ dialup
32 #@ smb-server
33 #@ web-server
34 #@ printing
35 #@ server-cfg
36 @ core
37 grub"
38 e2fsprogs
39 lvm2
40
41 %post
42 /usr/sbin/groupadd vagrant
43 /usr/sbin/useradd vagrant -g vagrant -G wheel
44 echo "vagrant"|passwd --stdin vagrant
45 echo "vagrant        ALL=(ALL)       NOPASSWD: ALL" >> /etc/sudoers
Lastly, save and close that file and open definitions/MyServer/postinstall.sh:
 1 #http://chrisadams.me.uk/2010/05/10/setting-up-a-centos-base-box-for-development-and-testing-with-vagrant/
 2
 3 date > /etc/vagrant_box_build_time
 4
 5 fail()
 6 {
 7   echo "FATAL: $*"
 8   exit 1
 9 }
10
11 #kernel source is needed for vbox additions
12 yum -y install gcc bzip2 make kernel-devel-`uname -r`
13 #yum -y update
14 #yum -y upgrade
15
16 yum -y install gcc-c++ zlib-devel openssl-devel readline-devel sqlite3-devel
17 yum -y erase gtk2 libX11 hicolor-icon-theme avahi freetype bitstream-vera-fonts
18 yum -y clean all
19
20 #Installing ruby
21 cd /tmp
22 wget http://ftp.ruby-lang.org/pub/ruby/1.9/ruby-1.9.2-p180.tar.gz || fail "Could not download Ruby source"
23 tar xzvf ruby-1.9.2-p180.tar.gz
24 cd ruby-1.9.2-p180
25 ./configure
26 make && make install
27 cd /tmp
28 rm -rf /tmp/ruby-1.9.2-p180
29 rm /tmp/ruby-1.9.2-p180.tar.gz
30 ln -s /usr/local/bin/ruby /usr/bin/ruby # Create a sym link for the same path
31 ln -s /usr/local/bin/gem /usr/bin/gem # Create a sym link for the same path
32
33 #Installing chef & Puppet
34 echo "Installing chef and puppet"
35 /usr/local/bin/gem install chef --no-ri --no-rdoc || fail "Could not install chef"
36 /usr/local/bin/gem install puppet --no-ri --no-rdoc || fail "Could not install puppet"
37
38 #Installing vagrant keys
39 mkdir /home/vagrant/.ssh
40 chmod 700 /home/vagrant/.ssh
41 cd /home/vagrant/.ssh
42 wget --no-check-certificate 'https://raw.github.com/mitchellh/vagrant/master/keys/vagrant.pub' -O authorized_keys
43 chown -R vagrant /home/vagrant/.ssh
44
45 #Installing the virtualbox guest additions
46 VBOX_VERSION=$(cat /home/vagrant/.vbox_version)
47 cd /tmp
48 wget http://download.virtualbox.org/virtualbox/$VBOX_VERSION/VBoxGuestAdditions_$VBOX_VERSION.iso
49 mount -o loop VBoxGuestAdditions_$VBOX_VERSION.iso /mnt
50 sh /mnt/VBoxLinuxAdditions.run
51 umount /mnt
52
53 rm VBoxGuestAdditions_$VBOX_VERSION.iso
54
55
56 sed -i "s/^.*requiretty/#Defaults requiretty/" /etc/sudoers
57 sed -i "s/^\(.*env_keep = \"\)/\1PATH /" /etc/sudoers
58
59 #poweroff -h
60
61 exit
From the top: The
postinstall.shstill is just a simple shell script that performs the rest of the machine configuration, including installing the required yum packages, installing Ruby, Chef, and the VirtualBox guess additions for mapping/sharing directories.
As with the ks.cfg file, leaving this file as it exist now will present a few problems down the road. For example, on Line 16:
yum -y install gcc bzip2 make kernel-devel-`uname -r`
This distro is so old that yum will fail to find kernel-devel-2.6.18-238.el5.x86_64.rpm on the remote repository, which will then cause the VirtualBox Guest Additions install to fail, which in turn will cause vagrant to not be able to map a shared folder, which will make chef-client fail. :-/
It also installs an older Ruby than we’re using, sqlite3-devel is now sqlite-devel, and as mentioned before, we still have to disable SeLinux for real after KickStart has mucked it up for us.
So, let’s point yum to a newer rpm repository (Line 12), get the right devel headers (Line 14), sqlite (Line 15), ruby-shadow (Line 40), add Ruby 1.9.3 (Line 25), and disable selinuix (Line 65):
 1 #http://chrisadams.me.uk/2010/05/10/setting-up-a-centos-base-box-for-development-and-testing-with-vagrant/
 2
 3 date > /etc/vagrant_box_build_time
 4
 5 fail()
 6 {
 7   echo "FATAL: $*"
 8   exit 1
 9 }
10
11 #kernel source is needed for vbox additions
12 rpm -Uvh http://dl.fedoraproject.org/pub/epel/5/x86_64/epel-release-5-4.noarch.rpm
13 rpm -i http://vault.centos.org/5.6/os/x86_64/CentOS/kernel-devel-2.6.18-238.el5.x86_64.rpm
14 yum -y install gcc bzip2 make
15 #yum -y update
16 #yum -y upgrade
17
18 yum -y install gcc-c++ zlib-devel openssl-devel readline-devel sqlite-devel libyaml-devel
19 yum -y erase gtk2 libX11 hicolor-icon-theme avahi freetype bitstream-vera-fonts
20 yum -y clean all
21
22 #Installing ruby
23 cd /tmp
24 wget http://ftp.ruby-lang.org/pub/ruby/1.9/ruby-1.9.3-p194.tar.gz || fail "Could not download Ruby source"
25 tar xzvf ruby-1.9.3-p194.tar.gz
26 cd ruby-1.9.3-p194
27 ./configure
28 make && make install
29 cd /tmp
30 rm -rf /tmp/ruby-1.9.3-p194
31 rm /tmp/ruby-1.9.3-p194.tar.gz
32 ln -s /usr/local/bin/ruby /usr/bin/ruby # Create a sym link for the same path
33 ln -s /usr/local/bin/gem /usr/bin/gem # Create a sym link for the same path
34
35 #Installing chef & Puppet
36 echo "Installing chef and puppet"
37 /usr/local/bin/gem install chef --no-ri --no-rdoc || fail "Could not install chef"
38 /usr/local/bin/gem install puppet --no-ri --no-rdoc || fail "Could not install puppet"
39
40 #Installing shadow password support for chef
41 echo "Installing ruby shadow password support for chef"
42 /usr/local/bin/gem install ruby-shadow --no-ri --no-rdoc || fail "Could not install ruby-shadow"
43
44 #Installing vagrant keys
45 mkdir /home/vagrant/.ssh
46 chmod 700 /home/vagrant/.ssh
47 cd /home/vagrant/.ssh
48 wget --no-check-certificate 'https://raw.github.com/mitchellh/vagrant/master/keys/vagrant.pub' -O authorized_keys
49 chown -R vagrant /home/vagrant/.ssh
50
51 #Installing the virtualbox guest additions
52 VBOX_VERSION=$(cat /home/vagrant/.vbox_version)
53 cd /tmp
54 wget http://download.virtualbox.org/virtualbox/$VBOX_VERSION/VBoxGuestAdditions_$VBOX_VERSION.iso
55 mount -o loop VBoxGuestAdditions_$VBOX_VERSION.iso /mnt
56 sh /mnt/VBoxLinuxAdditions.run
57 umount /mnt
58
59 rm VBoxGuestAdditions_$VBOX_VERSION.iso
60
61
62 sed -i "s/^.*requiretty/#Defaults requiretty/" /etc/sudoers
63 sed -i "s/^\(.*env_keep = \"\)/\1PATH /" /etc/sudoers
64
65 # Disabling SELinux in config since kickstart ignores the flag
66 echo "Disabling SELinux"
67 sed -i "s/^SELINUX=enforcing/SELINUX=disabled/" /etc/selinux/config
68
69 #poweroff -h
70
71 exit
Yes, the ruby-shadow gem could be installed by a recipe in a cookbook within Chef using gem_package. I just like having it preinstalled and close to the machine. Feel free to experiment. :-)
Creating the Box
Now that we’ve configured our basebox, it’s time to let vagrant/veewee use their magic to download the iso, create a new VM image, install the OS, configure it, and leave us with a nice fresh login screen and ssh session that can run chef.
To create a basebox, run the vagrant basebox build command:
 1 $ vagrant basebox build MyServer
 2
 3 We did not find an isofile in <currentdir>/iso.
 4
 5 The definition provided the following download information:
 6 - Download url: http://vault.centos.org/5.6/isos/x86_64/CentOS-5.6-x86_64-netinstall.iso
 7 - Md5 Checksum: 02cf3a5e32aaa5eed27af775ad292beb
 8
 9
10 Download? (Yes/No)  |No|
11 Yes
12 Creating an iso directory
13 Setting VM Flag ioapic to onooooooooooooooooooooooooooooooooo|  10.4MB 133.7KB/s ETA:   0:00:00
14 Setting VM Flag pae to on
15 Creating vm OLF2012 : 384M - 1 CPU - RedHat_64
16 Creating new harddrive of size 10140
17 VBoxManage createhd --filename '/Users/claco/VirtualBox VMs/MyServer/MyServer.vdi' --size '10140' --format vdi > /dev/null
18 Attaching disk: /Users/claco/VirtualBox VMs/MyServer/MyServer.vdi
19 Mounting cdrom: /Users/claco/devops_toolbox/iso/CentOS-5.6-x86_64-netinstall.iso
20 Waiting for the machine to boot
21
22 Typing:[1]: linux text ks=http://192.168.10.18:7122/ks.cfg<Enter>
23 Done typing.
24
25 Starting a webserver on port 7122
26 Serving file /Users/claco/devops_toolbox/definitions/MyServer/ks.cfg
27
28 Waiting for ssh login with user vagrant to sshd on port => 7222 to work
29 ............................................................................................
30 Transferring /var/folders/nf/zwnznxhj35n_143061ppg9rr0000gn/T/vbox.version20120901-40343-1321urf to .vbox_version
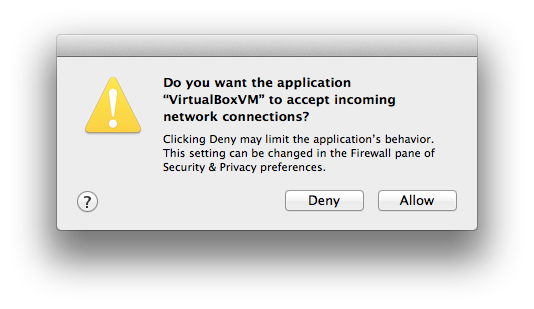
Once the VM image is started and the install process kicks off, you’ll be prompted to allow VirtualBox to listen for incoming connections by OSX. Click Allow.
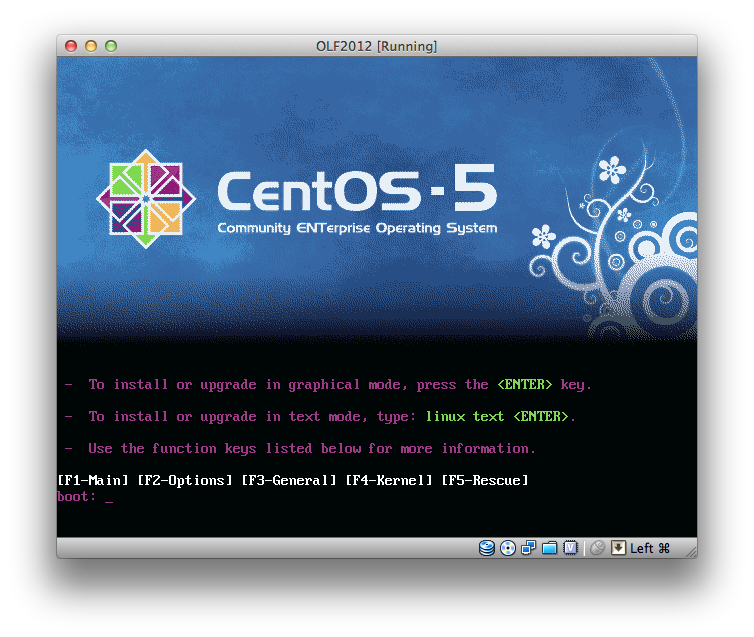
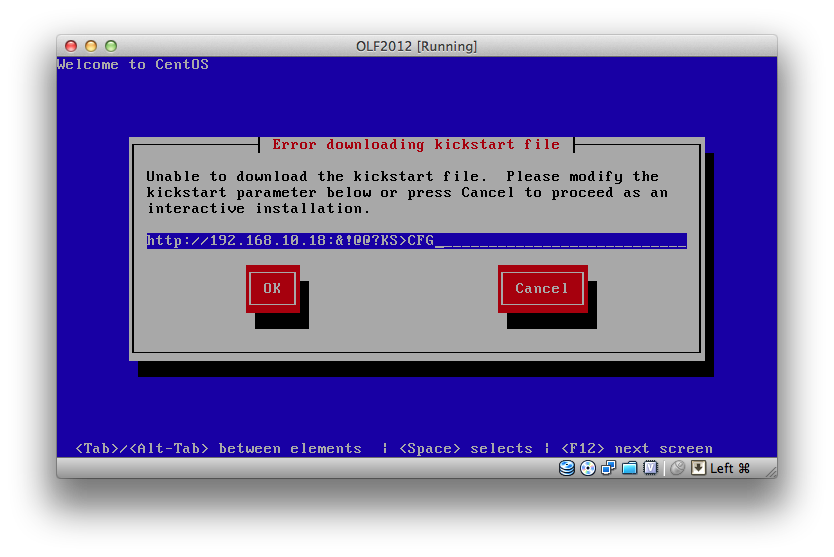
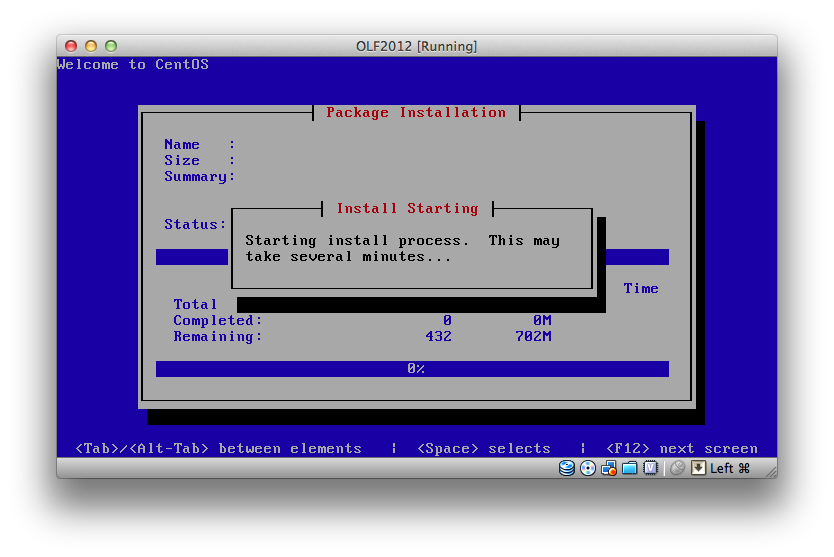
The installer will start and process to use the ks.cfg file uploaded by vagrant. If took too long to approve the incoming connection request, you might get an error that looks like this:
Don’t panic. Just quick the process and try again, and the install should continue this time.
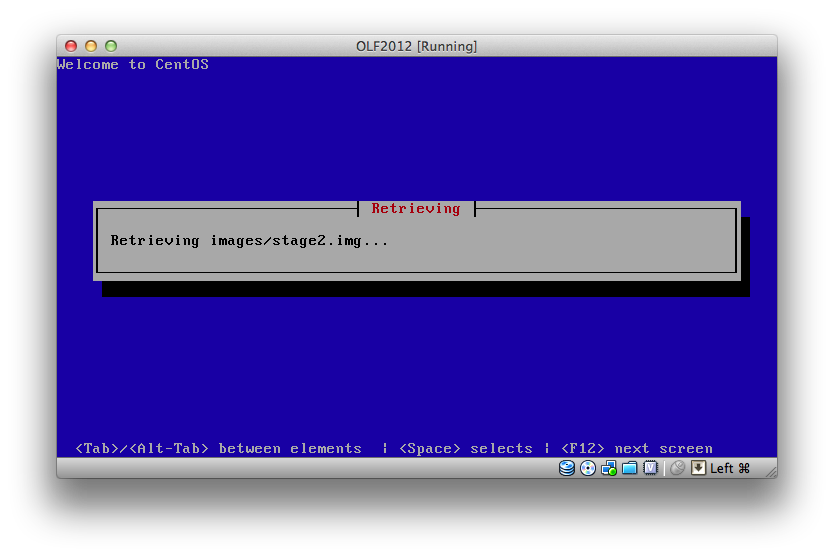
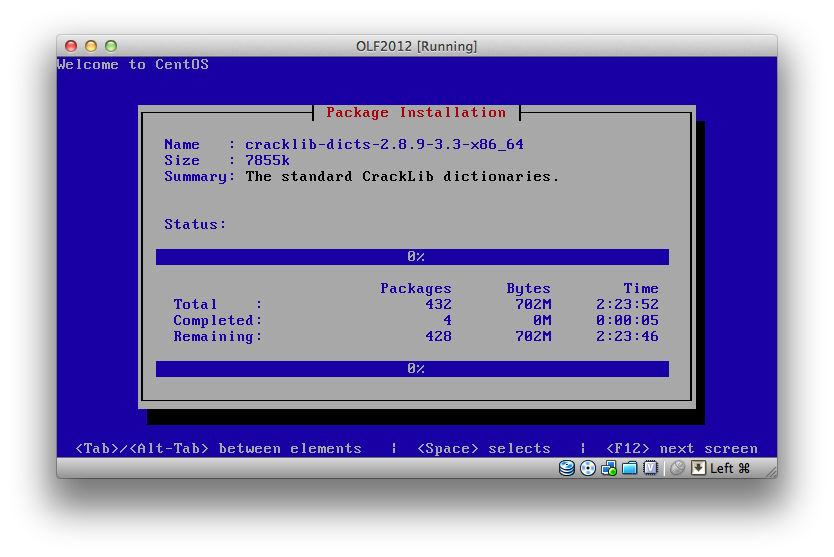
If you are using the “net install” option like I am here, you occasionally my get an error while the installer is downloadings a file. Hitting “Retry” will prompt the installer to rety the download, and that always seems to work.
Once the KickStart is done running, you should see a login prompt like this.
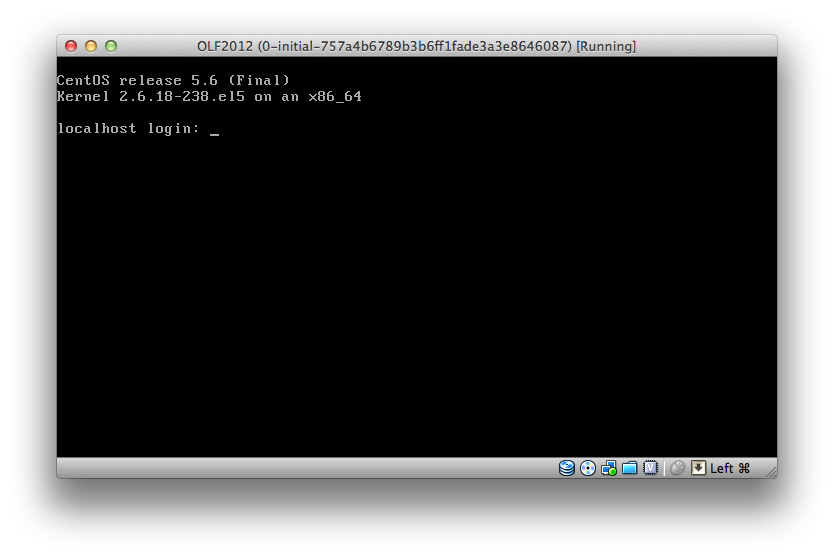
At this point, vagrant will upload the postinstall.sh script, which it will then run. You’ll then see a metric tonne of ssh output in your terminal as the script does it’s thing:
 1 Waiting for ssh login with user vagrant to sshd on port => 7222 to work
 2 .Transferring /Users/claco/devops_toolbox/definitions/MyServer/postinstall.sh to postinstall.sh
 3 ..
 4 ***echo 'vagrant'|sudo -S sh 'postinstall.sh'
 5 Executing command: echo 'vagrant'|sudo -S sh 'postinstall.sh'
 6 Retrieving http://dl.fedoraproject.org/pub/epel/5/x86_64/epel-release-5-4.noarch.rpm
 7 warning: /var/tmp/rpm-xfer.KooZeM: Header V3 DSA signature: NOKEY, key ID 217521f6
 8 Preparing...                ########################################### [100%]
 9    1:epel-release           ########################################### [100%]
10 .....
11
12 --2012-09-01 17:08:20--  http://ftp.ruby-lang.org/pub/ruby/1.9/ruby-1.9.3-p194.tar.gz
13 Resolving ftp.ruby-lang.org... 221.186.184.68
14 Connecting to ftp.ruby-lang.org|221.186.184.68|:80... connected.
15 HTTP request sent, awaiting response... 200 OK
16 Length: 12432239 (12M) [application/x-tar]
17 Saving to: `ruby-1.9.3-p194.tar.gz'
18
19 100%[======================================>] 12,432,239  81.5K/s   in 6m 16s
20
21 2012-09-01 17:14:37 (32.3 KB/s) - `ruby-1.9.3-p194.tar.gz' saved [12432239/12432239]
22
23 ruby-1.9.3-p194/
24 ruby-1.9.3-p194/doc/
25 ruby-1.9.3-p194/defs/
26 ....
27
28 Installing chef and puppet
29 Fetching: mixlib-config-1.1.2.gem (100%)
30 Fetching: mixlib-cli-1.2.2.gem (100%)
31 Fetching: mixlib-log-1.4.1.gem (100%)
32 ....
33
34 --2012-09-01 17:19:36--  https://raw.github.com/mitchellh/vagrant/master/keys/vagrant.pub
35 Resolving raw.github.com... 207.97.227.243
36 Connecting to raw.github.com|207.97.227.243|:443... connected.
37 HTTP request sent, awaiting response... 200 OK
38 Length: 409 [text/plain]
39 Saving to: `authorized_keys'
40
41 100%[======================================>] 409         --.-K/s   in 0s
42
43 2012-09-01 17:19:37 (55.7 MB/s) - `authorized_keys' saved [409/409]
44
45 --2012-09-01 17:19:37--  http://download.virtualbox.org/virtualbox/4.2.1/VBoxGuestAdditions_4.2.1.iso
46 Resolving download.virtualbox.org... 137.254.16.69
47 Connecting to download.virtualbox.org|137.254.16.69|:80... connected.
48 HTTP request sent, awaiting response... 302 Moved Temporarily
49 Location: http://dlc.sun.com.edgesuite.net/virtualbox/4.2.1/VBoxGuestAdditions_4.2.1.iso [following]
50 --2012-09-01 17:19:37--  http://dlc.sun.com.edgesuite.net/virtualbox/4.2.1/VBoxGuestAdditions_4.2.1.iso
51 Resolving dlc.sun.com.edgesuite.net... 65.197.244.75, 65.197.244.10
52 Connecting to dlc.sun.com.edgesuite.net|65.197.244.75|:80... connected.
53 HTTP request sent, awaiting response... 200 OK
54 Length: 52207616 (50M) [application/octet-stream]
55 Saving to: `VBoxGuestAdditions_4.2.1.iso'
56
57 100%[======================================>] 52,207,616   179K/s   in 4m 54s
58
59 2012-09-01 17:24:32 (174 KB/s) - `VBoxGuestAdditions_4.2.1.iso' saved [52207616/52207616]
60
61 Verifying archive integrity... All good.
62 Uncompressing VirtualBox 4.2.1 Guest Additions for Linux.........
63 VirtualBox Guest Additions installer
64 Removing existing VirtualBox DKMS kernel modules[  OK  ]
65 Removing existing VirtualBox non-DKMS kernel modules[  OK  ]
66 Building the VirtualBox Guest Additions kernel modules
67 Not building the VirtualBox advanced graphics driver as this Linux version is
68 too old to use it.
69 Building the main Guest Additions module[  OK  ]
70 Building the shared folder support module[  OK  ]
71 Doing non-kernel setup of the Guest Additions[  OK  ]
72 Starting the VirtualBox Guest Additions [  OK  ]
73 Installing the Window System drivers[FAILED]
74 (Could not find the X.Org or XFree86 Window System.)
75
76 Step [1] was successfully - saving state
77 MyServer was built successfully.
78
79 Now you can:
80 - verify your box by running               : vagrant basebox validate MyServer
81 - export your vm to a .box file by running : vagrant basebox export   MyServer
Validate the Box
Once the base box is created, vagrant can run a series of tests to ensure it is configured properly using the vagrant basebox validate command:
 1 $ vagrant basebox validate MyServer
 2 Feature: vagrant box validation
 3   As a valid vagrant box
 4   I need to comply to a set of rules
 5
 6   Scenario: Checking login                                    # /Users/claco/.rvm/gems/ruby-1.9.3-p125@devops_toolbox/gems/veewee-0.2.3/lib/veewee/../../validation/vagrant.feature:5
 7 .    When I ssh to "127.0.0.1" with the following credentials: # veewee-0.2.3/validation/features/steps/ssh_steps.rb:56
 8       | username | password |
 9       | vagrant  | vagrant  |
10     And I run "whoami"                                        # veewee-0.2.3/validation/features/steps/ssh_steps.rb:98
11       done!
12       vagrant
13     Then I should see "vagrant" in the output                 # veewee-0.2.3/validation/features/steps/ssh_steps.rb:167
14
15   Scenario: Checking sudo                                     # /Users/claco/.rvm/gems/ruby-1.9.3-p125@devops_toolbox/gems/veewee-0.2.3/lib/veewee/../../validation/vagrant.feature:12
16 .    When I ssh to "127.0.0.1" with the following credentials: # veewee-0.2.3/validation/features/steps/ssh_steps.rb:56
17       | username | password |
18       | vagrant  | vagrant  |
19     And I run "sudo whoami"                                   # veewee-0.2.3/validation/features/steps/ssh_steps.rb:98
20       done!
21       root
22     Then I should see "root" in the output                    # veewee-0.2.3/validation/features/steps/ssh_steps.rb:167
23
24   Scenario: Checking ruby                                                          # /Users/claco/.rvm/gems/ruby-1.9.3-p125@devops_toolbox/gems/veewee-0.2.3/lib/veewee/../../validation/vagrant.feature:19
25 .    When I ssh to "127.0.0.1" with the following credentials:                      # veewee-0.2.3/validation/features/steps/ssh_steps.rb:56
26       | username | password |
27       | vagrant  | vagrant  |
28     And I run ". /etc/profile ;ruby --version 2> /dev/null 1> /dev/null;  echo $?" # veewee-0.2.3/validation/features/steps/ssh_steps.rb:98
29       done!
30       0
31     Then I should see "0" in the output                                            # veewee-0.2.3/validation/features/steps/ssh_steps.rb:167
32
33   Scenario: Checking gem                                                          # /Users/claco/.rvm/gems/ruby-1.9.3-p125@devops_toolbox/gems/veewee-0.2.3/lib/veewee/../../validation/vagrant.feature:26
34 .    When I ssh to "127.0.0.1" with the following credentials:                     # veewee-0.2.3/validation/features/steps/ssh_steps.rb:56
35       | username | password |
36       | vagrant  | vagrant  |
37     And I run ". /etc/profile; gem --version 2> /dev/null 1> /dev/null ; echo $?" # veewee-0.2.3/validation/features/steps/ssh_steps.rb:98
38       done!
39       0
40     Then I should see "0" in the output                                           # veewee-0.2.3/validation/features/steps/ssh_steps.rb:167
41
42   Scenario: Checking chef                                                               # /Users/claco/.rvm/gems/ruby-1.9.3-p125@devops_toolbox/gems/veewee-0.2.3/lib/veewee/../../validation/vagrant.feature:33
43 .    When I ssh to "127.0.0.1" with the following credentials:                           # veewee-0.2.3/validation/features/steps/ssh_steps.rb:56
44       | username | password |
45       | vagrant  | vagrant  |
46     And I run ". /etc/profile ;chef-client --version 2> /dev/null 1>/dev/null; echo $?" # veewee-0.2.3/validation/features/steps/ssh_steps.rb:98
47       done!
48       0
49     Then I should see "0" in the output                                                 # veewee-0.2.3/validation/features/steps/ssh_steps.rb:167
50
51   Scenario: Checking puppet                                                         # /Users/claco/.rvm/gems/ruby-1.9.3-p125@devops_toolbox/gems/veewee-0.2.3/lib/veewee/../../validation/vagrant.feature:40
52 .    When I ssh to "127.0.0.1" with the following credentials:                       # veewee-0.2.3/validation/features/steps/ssh_steps.rb:56
53       | username | password |
54       | vagrant  | vagrant  |
55     And I run ". /etc/profile ; puppet --version 2> /dev/null 1>/dev/null; echo $?" # veewee-0.2.3/validation/features/steps/ssh_steps.rb:98
56       done!
57       0
58     Then I should see "0" in the output                                             # veewee-0.2.3/validation/features/steps/ssh_steps.rb:167
59
60   Scenario: Checking shared folders                           # /Users/claco/.rvm/gems/ruby-1.9.3-p125@devops_toolbox/gems/veewee-0.2.3/lib/veewee/../../validation/vagrant.feature:47
61 .    When I ssh to "127.0.0.1" with the following credentials: # veewee-0.2.3/validation/features/steps/ssh_steps.rb:56
62       | username | password | keyfile             |
63       | vagrant  | vagrant  | vagrant-private.key |
64     And I run "mount|grep veewee-validation"                  # veewee-0.2.3/validation/features/steps/ssh_steps.rb:98
65       done!
66       veewee-validation on /media/sf_veewee-validation type vboxsf (gid=501,rw)
67     Then I should see "veewee-validation" in the output       # veewee-0.2.3/validation/features/steps/ssh_steps.rb:167
68
69 7 scenarios (7 passed)
70 21 steps (21 passed)
71 0m2.238s
Export the Box
If you’re still awake (that is a long process!), the last thing we need to do is export this basebox as a starting point for working with vagrant machine instances. To do that, run the vagrant basebox export command:
 1 $ vagrant basebox export MyServer
 2 Vagrant requires the box to be shutdown, before it can export
 3 Sudo also needs to work for user vagrant
 4 Performing a clean shutdown now.
 5 Executing command: sudo /sbin/halt -h -p
 6
 7 Broadcast message from root (pts/0) (Sat Sep  1 22:40:41 2012):
 8
 9 The system is going down for system halt NOW!
10 ...........................
11 Machine MyServer is powered off cleanly
12 Executing vagrant voodoo:
13 vagrant package --base 'MyServer' --output 'MyServer.box'
14
15 To import it into vagrant type:
16 vagrant box add 'MyServer' 'MyServer.box'
17
18 To use it:
19 vagrant init 'MyServer'
20 vagrant up
21 vagrant ssh
22
23 # Move it into the boxes folder
24 $ mv ./MyServer.box ./boxes
During that processing, vagrant will shut down your base box and export the image.

Commit Our Work
Let’s add our basebox definition to the repository.
1 $ git add .
2 $ git commit -m "Added MyServer basebox definition"
3 [master daada45] Added MyServer basebox definition
4  3 files changed, 132 insertions(+)
5  create mode 100644 definitions/MyServer/definition.rb
6  create mode 100644 definitions/MyServer/ks.cfg
7  create mode 100644 definitions/MyServer/postinstall.sh
To Continue…
- Introduction – Introduction
- Installing Prerequisites – XCode, CommandLineTools, Homebrew, RVM, Ruby, and VirtualBox
- Project Setup – Create the git repository and directory structure for Vagrant, Chef, etc.
- Vagrant/Veewee Installation – Install Vagrant/Vewee to create/control VirtualBox machines
- Define/Create a Vagrant Box – Define and Create a Vagrant Box for use i VirtualBox
- Provisioning Machines with Vagrant – Provision a cluster (Web/DB) of machines using Vagrant
- Configuring Machines Using Chef Solo – Configuring our new machine instances using Chef Solo
- Customizing Recipes for Our Application – Customize the recipes we have to prepare for our application deployment
- Create and Deploy a Rails Applications – Create a simple Rails application and deploy it to our Vagrant instances
- Migrate from Chef Solo to Hosted Chef – Migrate from using Chef Solo to hosted Chef at OpsCode
- Migrate Servers to RackCloud – Migrate your servers from VirtualBox to “The Cloud” using Rackspace.