OpenStack Home Lab Part 5: Bootstrapping The Bootstrapping
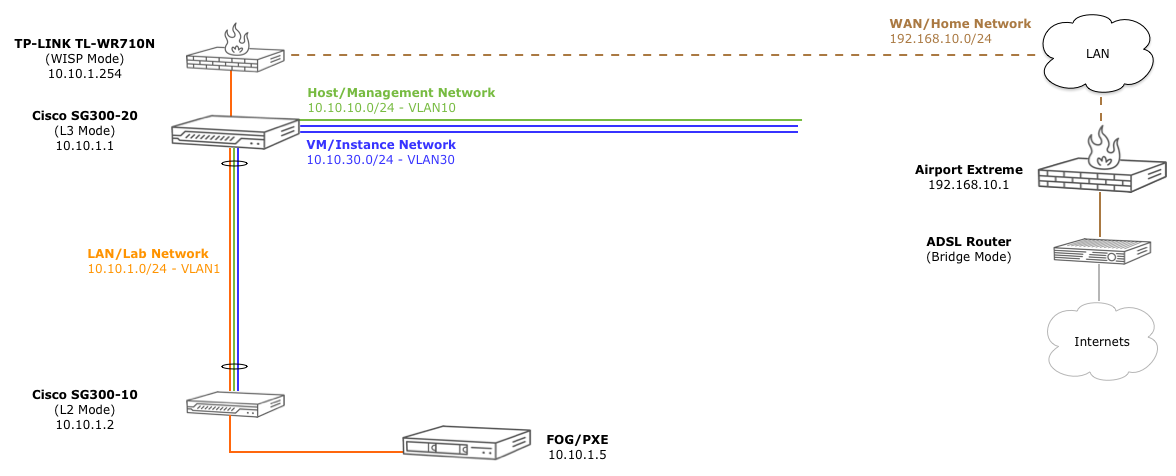
In the last post, we configured our SG300-10 from scratch with all the vlans, internet access, trunked port to our SG300-20. Now it’s time to get some operating systems installed. At this point, we have a problem. We have no os installed an any of the machines and thus, no where to run tftp, to PXE boot our other machines.
How to get a job without experience. How to get experience without a job.
Sure, we can drop an Ubuntu iso on a USB stick and install it that way, but where’s the fun in that?! What we do have is a perfectly capable laptop that we can use to PXE boot the 4th server [used for FOG later] to install Ubuntu from the internets. This also gives us a chance to test out all of our network configurations so far and really understand how this all works with, and without FOG in the mix.
PXE (DHCP + “Options” + TFTP)
In a super simplified nutshell, PXE booting a machine is really just a matter of a server getting a DHCP response w/ an ip address and information about what file to load and from where; loading that file over the network, and starting the boot process from that newly loaded image.
When a machine PXE boots, it asks any DHCP server on the network for an address. Any DHCP server that offers an ip address without boot file/server information is ignored. Only offers that include boot file/server information are accepted.
Booting Server 4
If we boot up the 4th N54L server, assuming all of the cables are plugged in correctly (vlan10, 20, and 30), we should get to a failed PXE boot screen.

So, while we have a 10.10.10.0/24 DHCP pool configured, it does not yet hand out any information about what file to use for PXE booting and where to load it from. As such, the machine will just sit and wait with something like “No boot filename received” for an offer that meets its needs.
Add Boot File/Server to DHCP
After logging into the SG300-20, adding the boot file and server to the vlan10 pool is pretty easy.
SG300-20#conf t
SG300-20(config)#int vlan 10
SG300-20(config-if)#ip dhcp pool network oshost
SG300-20(config-dhcp)#?
  address              Define range of addresses allowed for allocation
  bootfile             Configure DHCP option 67 (boot file name).
  default-router       Configure DHCP option 3 (Default router list)
  dns-server           Configure DHCP option 6 (DNS servers list)
  do                   execute an EXEC-level command
  domain-name          Configure DHCP option 15 (Domain name).
  end                  Exit from configure mode
  exit                 Exit from current context
  lease                Configure the lease time
  netbios-name-server  Configure DHCP option 44 (NetBios name server list)
  netbios-node-type    Configure DHCP option 46 (NetBios node type)
  next-server          Configure the next server IP address
  next-server-name     Configure DHCP option 66 ( next server name).
  no                   Negate command
  option               Configure DHCP server options
  time-server          Configure DHCP option 4 (Time server)
SG300-20(config-dhcp)#bootfile pxelinux.0
SG300-20(config-dhcp)#next-server ?
  A.B.C.D              Specify the IP address
SG300-20(config-dhcp)#next-server 10.10.1.5
SG300-20(config-dhcp)#exit
SG300-20(config)#exit
For the vlan10/oshost pool, all we have to do is set the bootfile to pxelinux.0 and point the next-server to the 10.10.1.5 ip address from our diagram.
You can verify your work:
SG300-20#show ip dhcp pool network oshost

       Name                Address range            Mask         Lease
------------------- --------------------------- ------------- -----------
      oshost         10.10.10.100-10.10.10.150  255.255.255.0 24855d:3h:1
                                                              4m

Statistics:

 All-range   Available   Free   Pre-allocated   Allocated   Expired    Declined
----------- ----------- ------ --------------- ----------- ---------- ----------
    51          51        49          0             2          0          0


Default router: 10.10.10.1
DNS server: 208.67.220.220;208.67.222.222
Domain name: lab
Next server: 10.10.1.5
Bootfile: pxelinux.0
Time server 129.6.15.29
no options are configured
Again, don’t forget to save your work.
Boot Server 4: Again.
If we reboot server 4 again, we should now get a PXE boot screen that now accepts an ip address from the vlan10 pool and tries to load the bootfile pxelinux.0 from the next-server 10.10.1.5:

Now we’re getting somewhere. But now we have no tftp server listening on 10.10.1.5 to serve up our bootfile. :-/
TFTP Server on the MBP
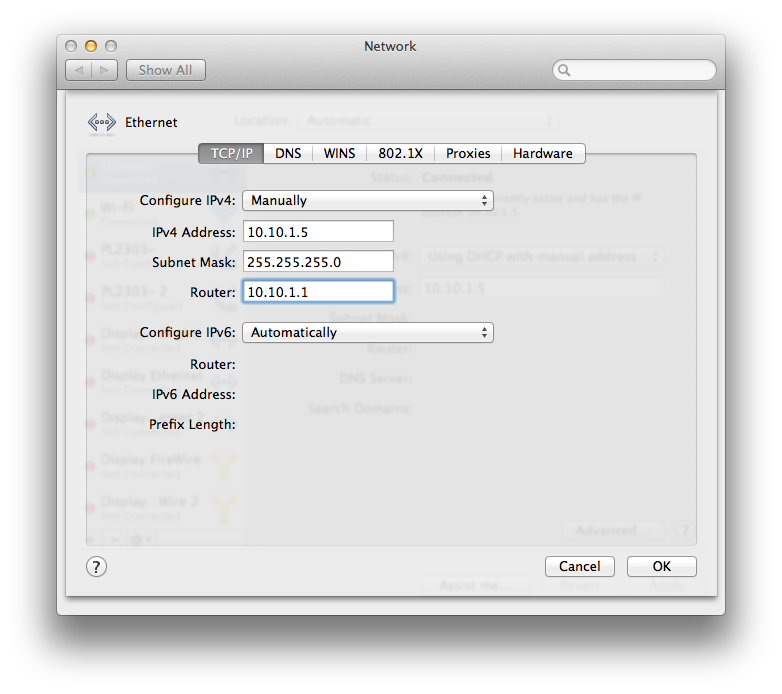
So, in order to bootstrap our bootstrapping bootstrapper, we’ll configure our laptop, a Macbook Pro in my case, to serve up the files over tftp.
First, we need to plugin in an ethernet cable from the laptop into one of the vlan1 ports on either of the switches, and manually configure our network settings to become the 10.10.1.5 machine temporarily:
In OSX, a tftpd server is already installed, but we’ll need to tweak the configuration a bit, create a directory for, and download the Ubuntu netboot installer. You can follow the guide from http://ruby-journal.com/install-ubuntu-with-pxe-via-osx/
The various netboot installs can be found on the Ubuntu Archive
For the impatient, a quick breakdown of those steps are:
# Download the installer
$ cd /tmp
$ curl -O http://archive.ubuntu.com/ubuntu/dists/precise-updates/main/installer-amd64/current/images/saucy-netboot/netboot.tar.gz

# Unpack that into a directory
$ mkdir ~/Downloads/tftp
$ tar -xvzf netboot.tar.gz -C ~/Downloads/tftp

# Fix file/folder permissions
$ sudo chown -R nobody:nogroup ~/Downloads/tftp

# Backup tftpd config
cp /System/Library/LaunchDaemons/tftp.plist /tmp

# Edit tftpd config
mvim /tmp/tftp.plist

# Change
<key>Disabled</key>
<false/>

# to
<key>Disabled</key>
<true/>

# Add the directory to serve
<array>
  <string>/usr/libexec/tftpd</string>
  <string>-s</string>
  <string>/Users/yourusername/Downloads/tftp</string>
</array>

# Backup the original config and replace it
$ sudo mv /System/Library/LaunchDaemons/tftp.plist /System/Library/LaunchDaemons/tftp.plist.backup
# sudo mv /tmp/tftp.plist /System/Library/LaunchDaemons

# Start tftpd
sudo launchctl load -F /System/Library/LaunchDaemons/tftp.plist
TFTPD Ahoy!
Reboot Server 4. One Last Time.
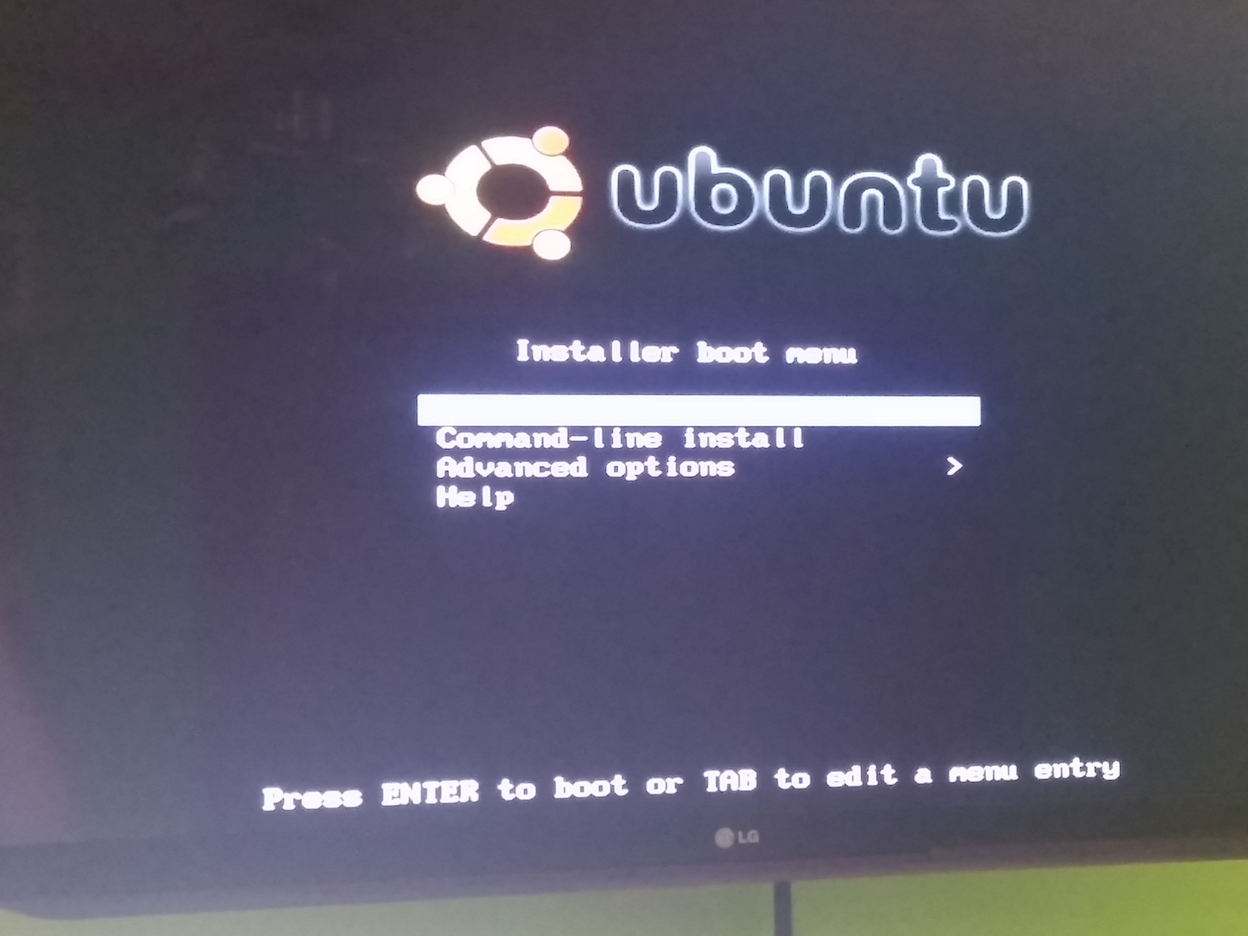
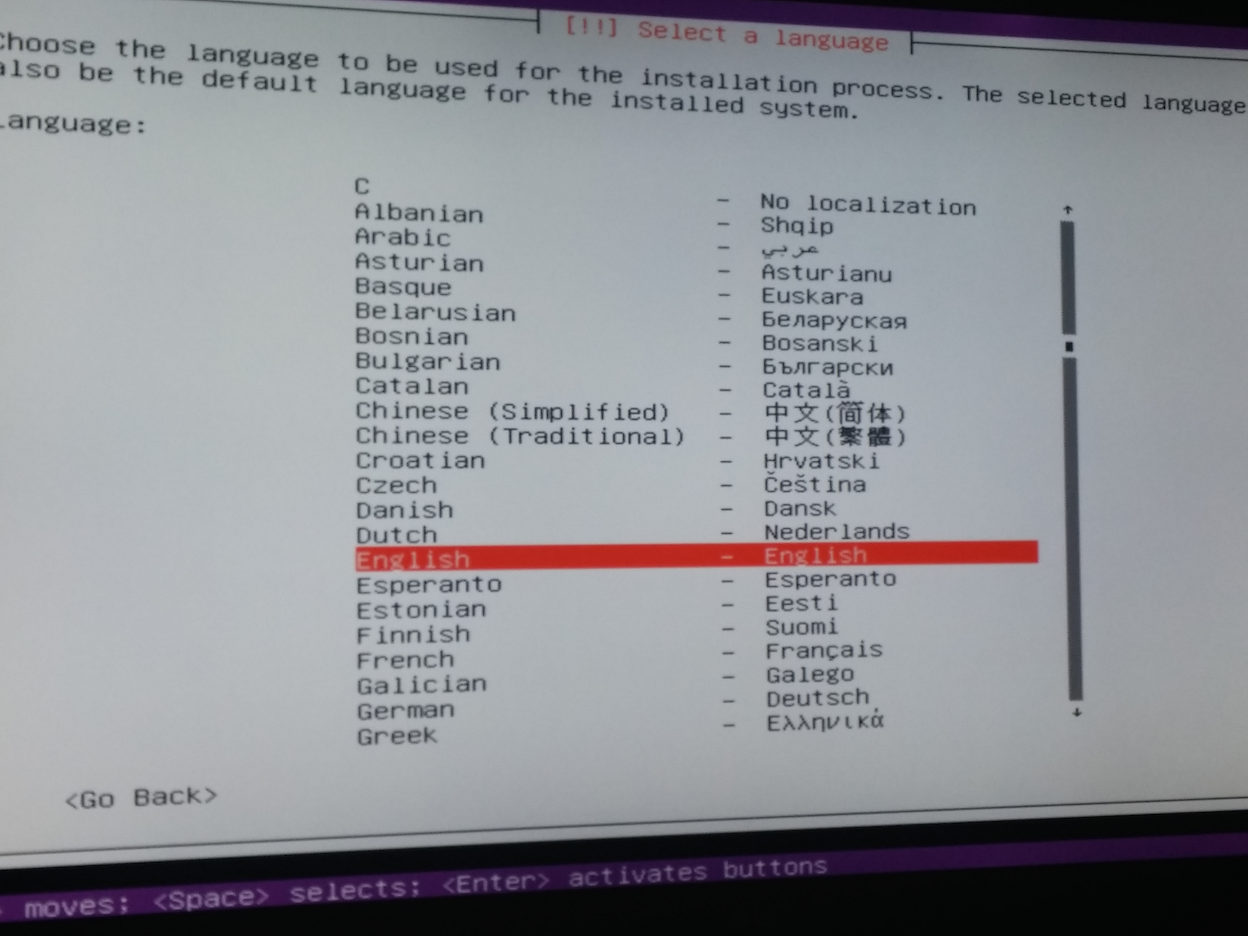
If all is well, the server should now load the Ubuntu install from the MBP at 10.10.1.5, and you can install Ubuntu Precise as you would normally. Depending on your network, this could take a while.
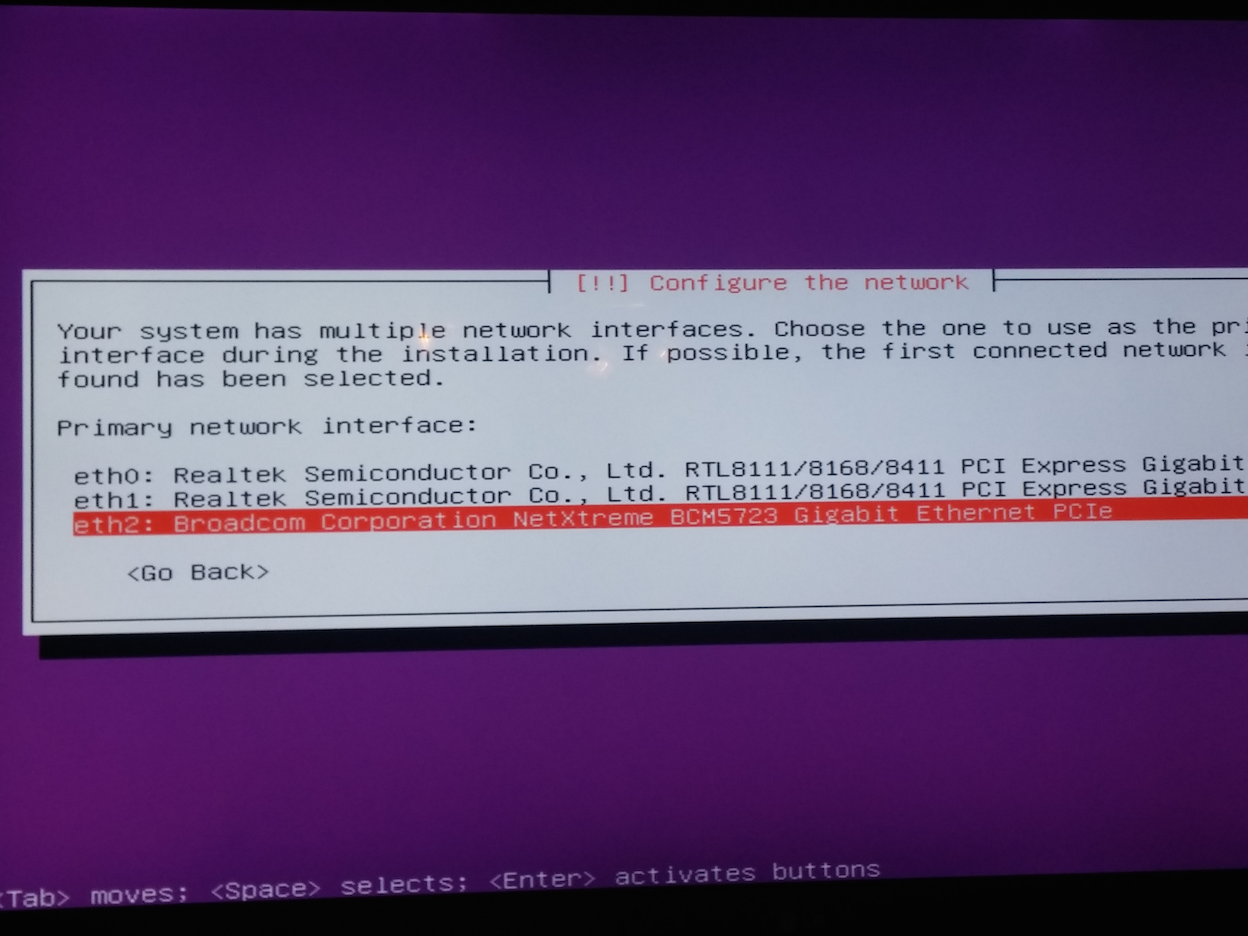
Take note of that last screenshot. Due to how the slots are ordered, the onboard NIC is being assigned to eth2, which is not ideal in my brain. Ideally, the onboard nic would be eth0 since it is also vlan10, the host network. We’ll fix that shortly. But first…
Create Static DHCP Address
Now that we’ve bootstrapped our soon to be FOG server, let’s make sure DHCP gives it the static address of 10.10.1.5.
First, make sure you unplug your laptop from the switch and remove 10.10.1.5 from it. :-)
Now, log into the SG300-20, and update the dhcp pool to assign 10.10.1.5 to the mac address of that onboard controller:
SG300-20#conf t
SG300-20(config)#ip dhcp ?
  excluded-address     Exclude range of addresses for allocation
  information          Dhcp information configuration commands
  pool                 Configure pool of addresses.
  relay                Configure DHCP relay
  server               Enable DHCP server
  snooping             Dhcp Snooping set enable status
  tftp-server          IP DHCP client tftp server configuration
SG300-20(config)#ip dhcp pool ?
  host                 Configure single static address.
  network              Configure pool of network addresses.
SG300-20(config)#ip dhcp pool host ?
  WORD<1-32>           Specify the host address name.
SG300-20(config)#ip dhcp pool host n54l-4
SG300-20(config-dhcp)#?
  address              Define client IP address and client identifier.
  bootfile             Configure DHCP option 67 (boot file name).
  client-name          Configure DHCP option 12 (Client's name)
  default-router       Configure DHCP option 3 (Default router list)
  dns-server           Configure DHCP option 6 (DNS servers list)
  do                   execute an EXEC-level command
  domain-name          Configure DHCP option 15 (Domain name).
  end                  Exit from configure mode
  exit                 Exit from current context
  netbios-name-server  Configure DHCP option 44 (NetBios name server list)
  netbios-node-type    Configure DHCP option 46 (NetBios node type)
  next-server          Configure the next server IP address
  next-server-name     Configure DHCP option 66 ( next server name).
  no                   Negate command
  option               Configure DHCP server options
  time-server          Configure DHCP option 4 (Time server)
SG300-20(config-dhcp)#address ?
  A.B.C.D              Specify the IP address
SG300-20(config-dhcp)#address 10.10.1.5 ?
  A.B.C.D or /n        Specify the IP subnet mask or IP prefix length
SG300-20(config-dhcp)#address 10.10.1.5 255.255.255.0 ?
  hardware-address     Identify client by MAC address.
  client-identifier    Identify client by unique identifier. The identifier
                       is inserted in dotted hexadecimal notation. The
                       minimal length is 2 bytes. The maximal length is 32
                       bytes
SG300-20(config-dhcp)#address 10.10.1.5 255.255.255.0 hardware-address ?
  H.H.H or H:H:H:H:H:H or H-H-H-H-H-H Identify client by MAC address.
SG300-20(config-dhcp)#$255.255.0 hardware-address 9c:b6:54:07:e0:80
SG300-20(config-dhcp)#default-router 10.10.1.1
SG300-20(config-dhcp)#dns-server 8.8.8.8
SG300-20(config-dhcp)#time-server 129.6.15.29
SG300-20(config-dhcp)#domain-name lab
SG300-20(config-dhcp)#exit
We assigned the ip to the mac address, and also supplied the same information for default router, time server, and domain name as the rest of the pool. Checking our work:
SG300-20#show ip dhcp pool host
The number of host pools is 1

          Name              IP address     Hardware address   Client identifier
------------------------ ---------------- ------------------ -------------------
         n54l-4             10.10.1.5     9c:b6:54:07:e0:80
Before you reboot server 4, unplug the nics, and connect the primary host nic (onboard) to a vlan10 port so it will be on the correct network going forward.
Now if you reboot server 4 once again, it should now get 10.10.1.5 as the ip address and you should be able to ssh into that machine now.
Fixing NIC Ordering
Back to the nic ordering problem. It seems natural to me that the onboard nic should be at eth0 as it’s the primary nic used for the host nanetwork. To do that, we will need to take a gander at the current udev rules and futz them around a bit.
root@n54l-4:~# vi /etc/udev/rules.d/70-persistent-net.rules

...
SUBSYSTEM=="net", ACTION=="add", DRIVERS=="?*", ATTR{address}=="c0:4a:00:04:00:df", ATTR{dev_id}=="0x0", ATTR{type}=="1", KERNEL=="eth*", NAME="eth0"

# PCI device 0x14e4:/sys/devices/pci0000:00/0000:00:06.0/0000:04:00.0 (tg3)
SUBSYSTEM=="net", ACTION=="add", DRIVERS=="?*", ATTR{address}=="9c:b6:54:07:e0:80", ATTR{dev_id}=="0x0", ATTR{type}=="1", KERNEL=="eth*", NAME="eth2"

# PCI device 0x10ec:/sys/devices/pci0000:00/0000:00:04.0/0000:03:00.0 (r8169)
SUBSYSTEM=="net", ACTION=="add", DRIVERS=="?*", ATTR{address}=="c0:4a:00:04:35:6d", ATTR{dev_id}=="0x0", ATTR{type}=="1", KERNEL=="eth*", NAME="eth1"
As we can see from the file, we could just swap the NAME option from eth2 to eth0 in this file and reboot. While this will work, we’re going to want to do something that is non mac address specific. That way, when we restore the same image across multiple machines, we reorder the nics properly regardless of what the mac addresses are on each machine.
We can do this by tweaking the rules to instead use the pci bus locations from lspci:
$ lspci

...
02:00.0 Ethernet controller: Realtek Semiconductor Co., Ltd. RTL8111/8168/8411 PCI Express Gigabit Ethernet Controller (rev 06)
03:00.0 Ethernet controller: Realtek Semiconductor Co., Ltd. RTL8111/8168/8411 PCI Express Gigabit Ethernet Controller (rev 06)
04:00.0 Ethernet controller: Broadcom Corporation NetXtreme BCM5723 Gigabit Ethernet PCIe (rev 10)
So with this info, it’s pretty clear why the onboard nic is eth2: because it’s in pci bus 4, after the eth0/1 nics. All we need to do to have our nics in a more preferred order is to swap the first and last controllers using this modified udev rule:
SUBSYSTEM=="net", ACTION=="add", DRIVERS=="?*", KERNELS=="0000:04:00.0", ATTR{dev_id}=="0x0", ATTR{type}=="1", KERNEL=="eth*", NAME="eth0"
SUBSYSTEM=="net", ACTION=="add", DRIVERS=="?*", KERNELS=="0000:03:00.0", ATTR{dev_id}=="0x0", ATTR{type}=="1", KERNEL=="eth*", NAME="eth1"
SUBSYSTEM=="net", ACTION=="add", DRIVERS=="?*", KERNELS=="0000:02:00.0", ATTR{dev_id}=="0x0", ATTR{type}=="1", KERNEL=="eth*", NAME="eth2"
We’ve taken out the ATTR{address} line matching the mac address, and added KERNELS with the corresponding pci location
Before we reboot, we need to also ensure that DHCP is set on the correct interface now in our /etc/network/interfaces file:
# comment out
# auto eth2
# iface eth2 inet dhcp

auto eth0
iface eth0 inet dhcp
Now reboot one last time. At this point, your eth0 nic should be the onboard nic, with the same 10.10.1.5 ip address from DHCP:
$ ip a

1: lo: <LOOPBACK,UP,LOWER_UP> mtu 65536 qdisc noqueue state UNKNOWN
    link/loopback 00:00:00:00:00:00 brd 00:00:00:00:00:00
    inet 127.0.0.1/8 scope host lo
       valid_lft forever preferred_lft forever
    inet6 ::1/128 scope host
       valid_lft forever preferred_lft forever
2: eth2: <BROADCAST,MULTICAST> mtu 1500 qdisc noop state DOWN qlen 1000
    link/ether c0:4a:00:04:00:df brd ff:ff:ff:ff:ff:ff
3: eth1: <BROADCAST,MULTICAST> mtu 1500 qdisc noop state DOWN qlen 1000
    link/ether c0:4a:00:04:35:6d brd ff:ff:ff:ff:ff:ff
4: eth0: <BROADCAST,MULTICAST,UP,LOWER_UP> mtu 1500 qdisc mq state UP qlen 1000
    link/ether 9c:b6:54:07:e0:80 brd ff:ff:ff:ff:ff:ff
    inet 10.10.1.5/24 brd 10.10.1.255 scope global eth0
       valid_lft forever preferred_lft forever
    inet6 fe80::9eb6:54ff:fe07:e080/64 scope link
       valid_lft forever preferred_lft forever
Bingo!
Next Time on This Old Homelab
Next up, we’ll start configuring FOG to get our OS installed on server 1 and get it cloned to server 2 and 3.