Migrating to RackCloud
As a final exercise, we’re going to migrate our servers out into the cloud. For this, I’ve chosen Rackspace RackCloud because a) it’s what I know worked at the moment, and b) even after a day of creating and destroying instances in the clouse, it cost me nothing. :-)
- Create a Rackspace Account
- Configure Knife for Rackspace
- Boostrap a Cloud Instances
- Convert Deployment Process
- Commit Our Work
Create a Rackspace Account
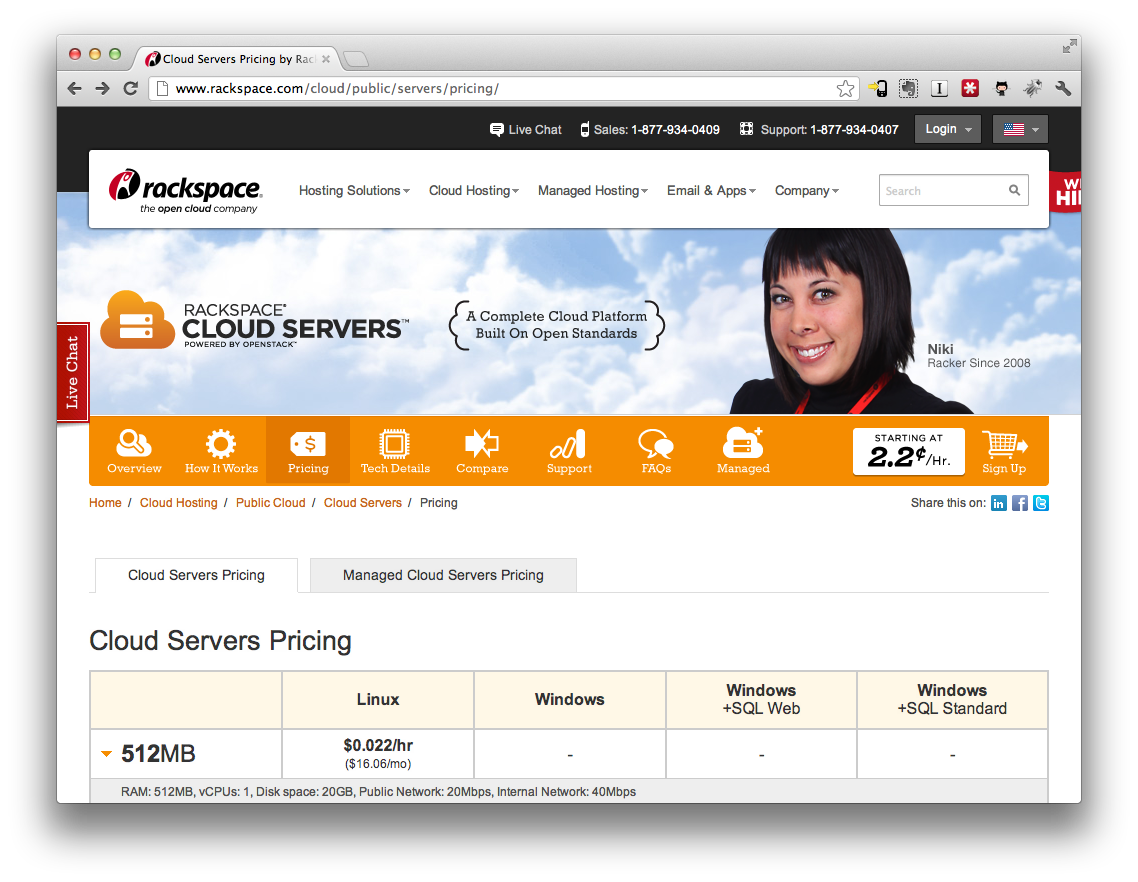
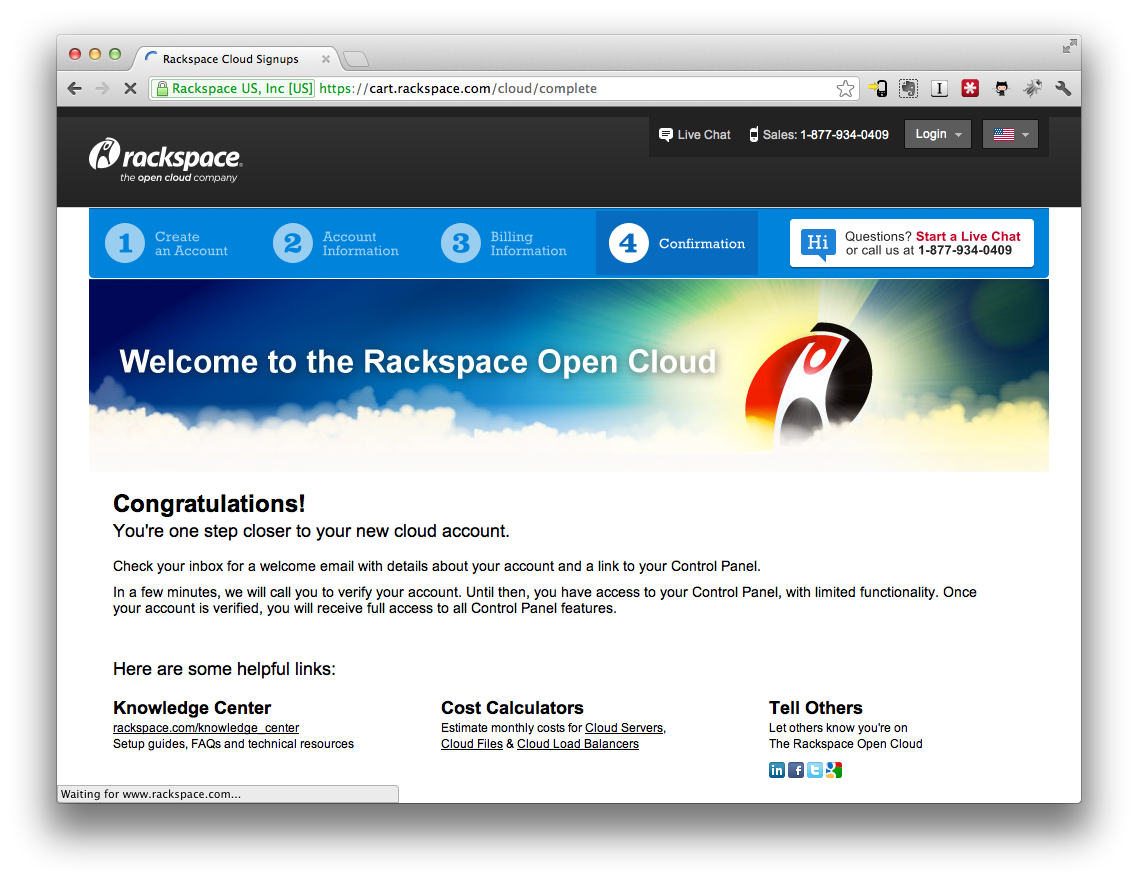
Signing up for a cloud account is pretty easy. Point your browser to the pricing page and click on the cart icon in the middle of the page.
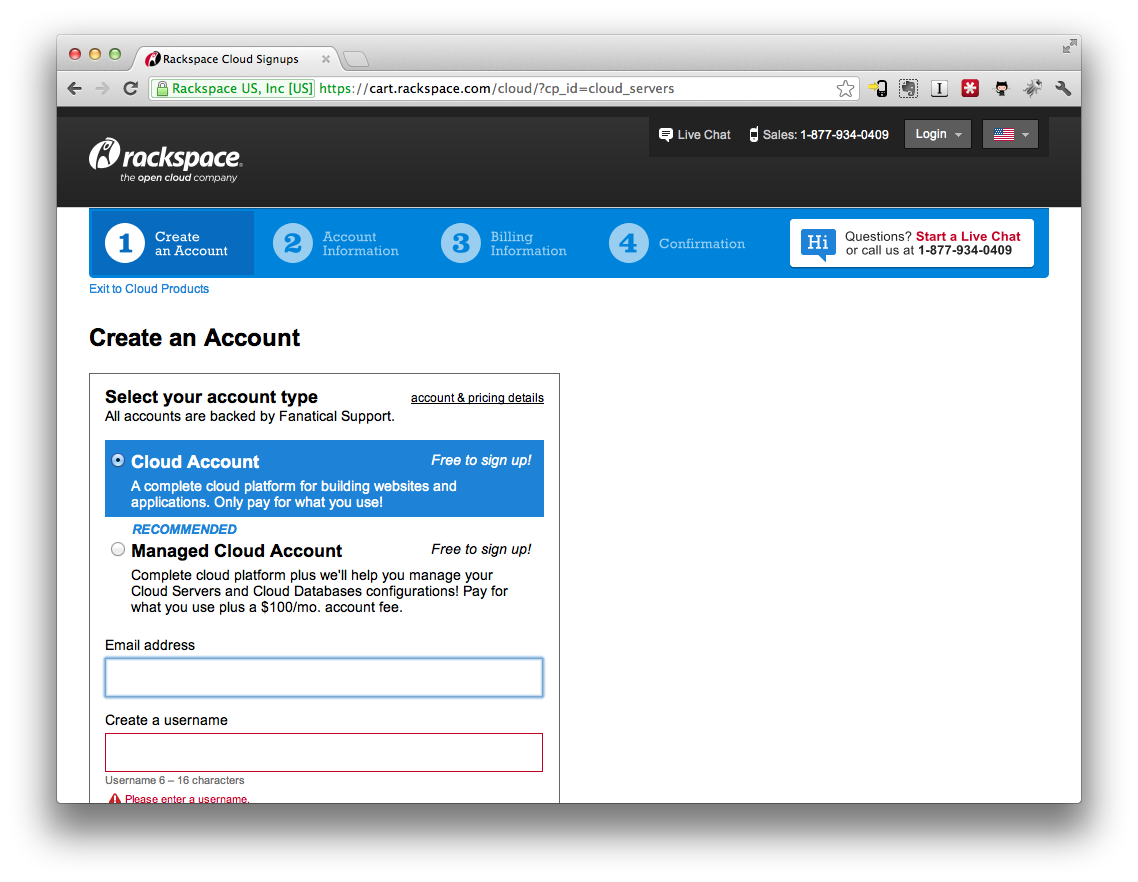
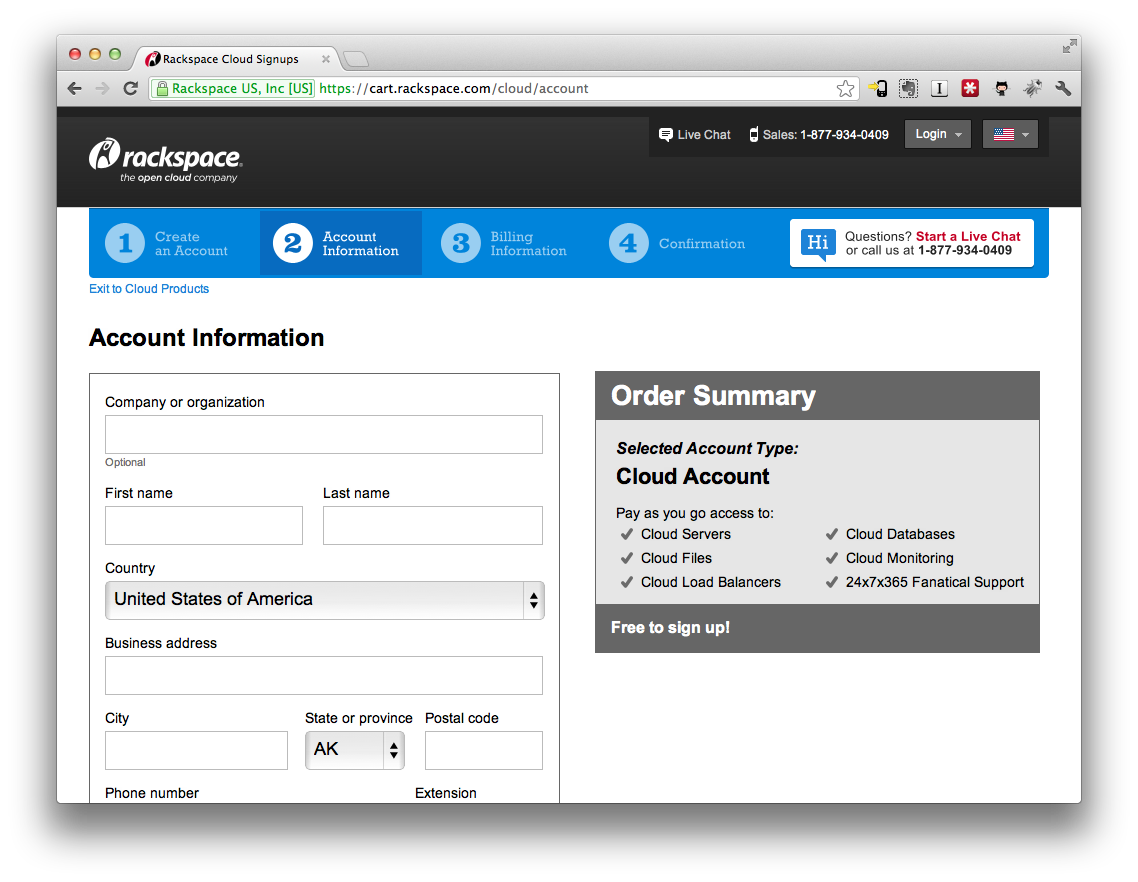
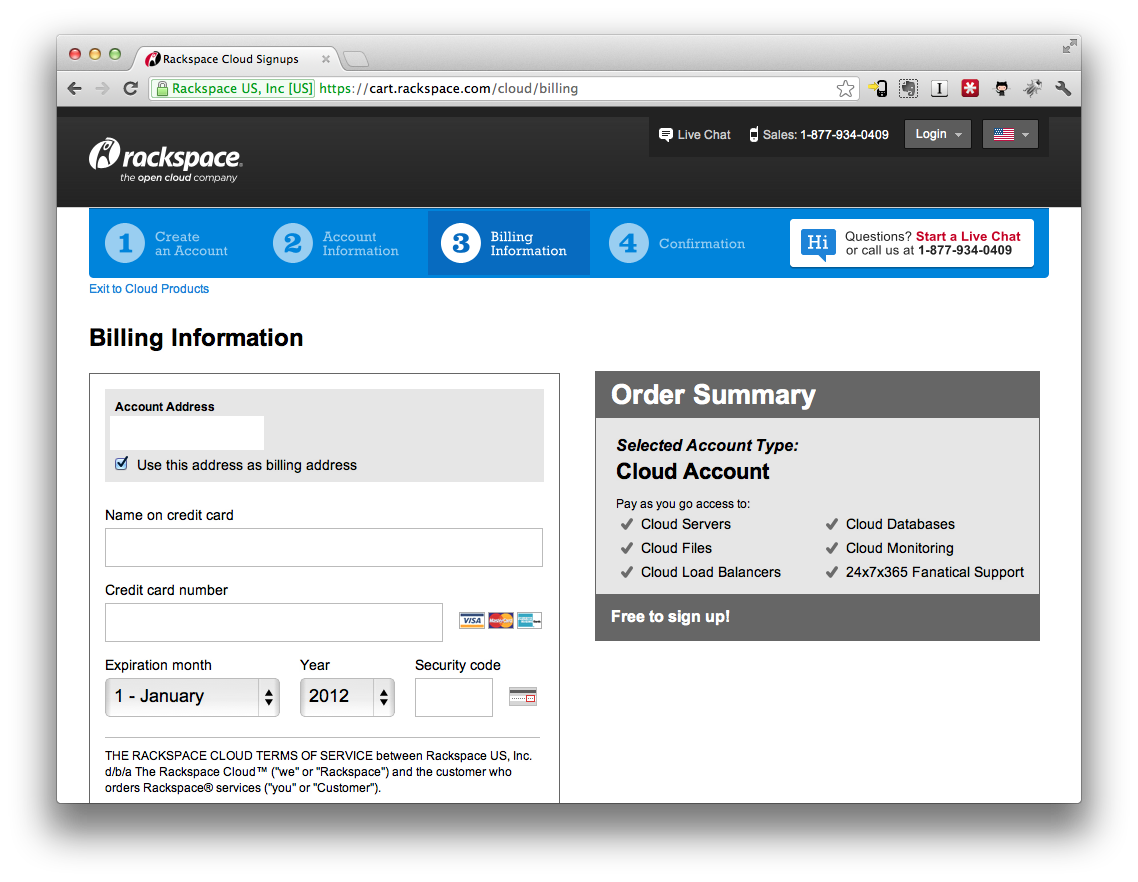
Fill out the forms and login. It really is as easy as that! They will ask you for a billing credit card. Don’t be alarmed! At $0.022 cents an hour, I’ve yet to be charged anything after a full day of createing and destroying instances for this tutorial.
Configure Knife for Rackspace
Now that we have a rackspace account, we need to configure our knife.rb file to be able to talk to the Rackspace API.
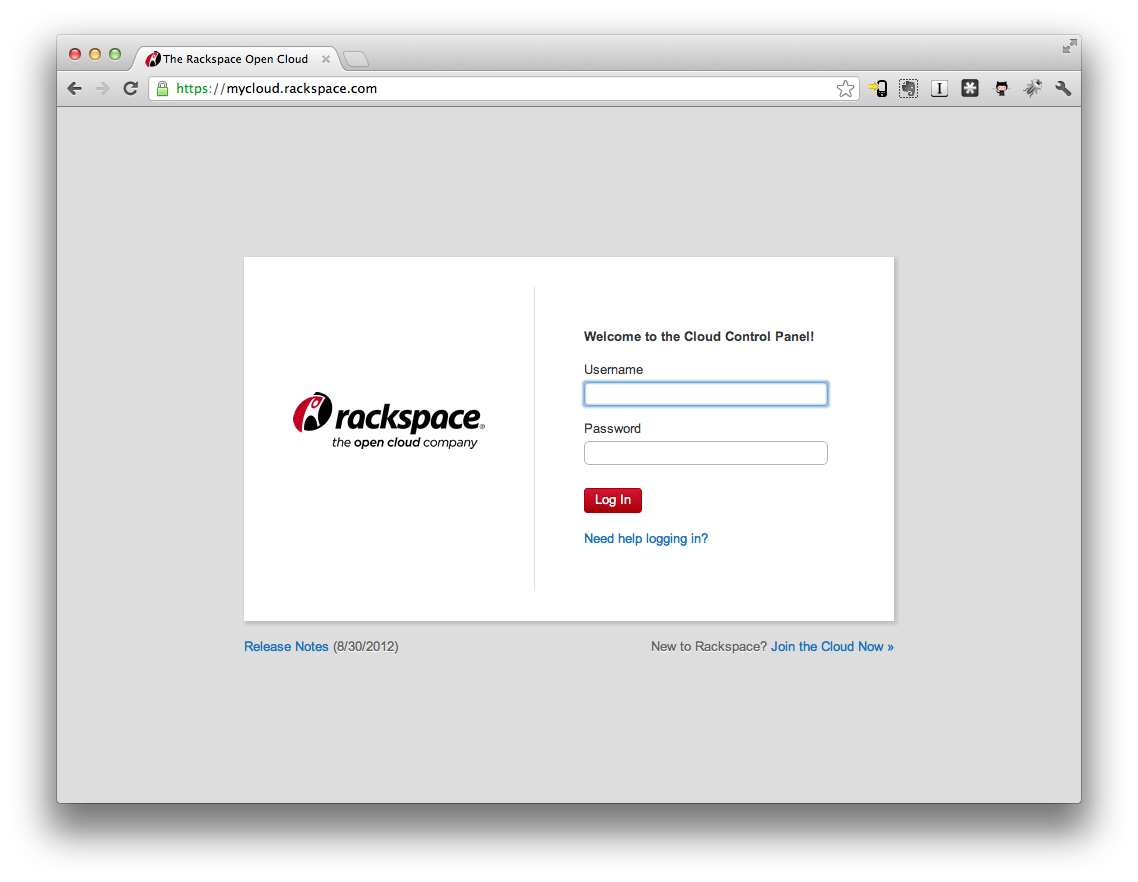
First, login to the RackCloud interface and get your API key.
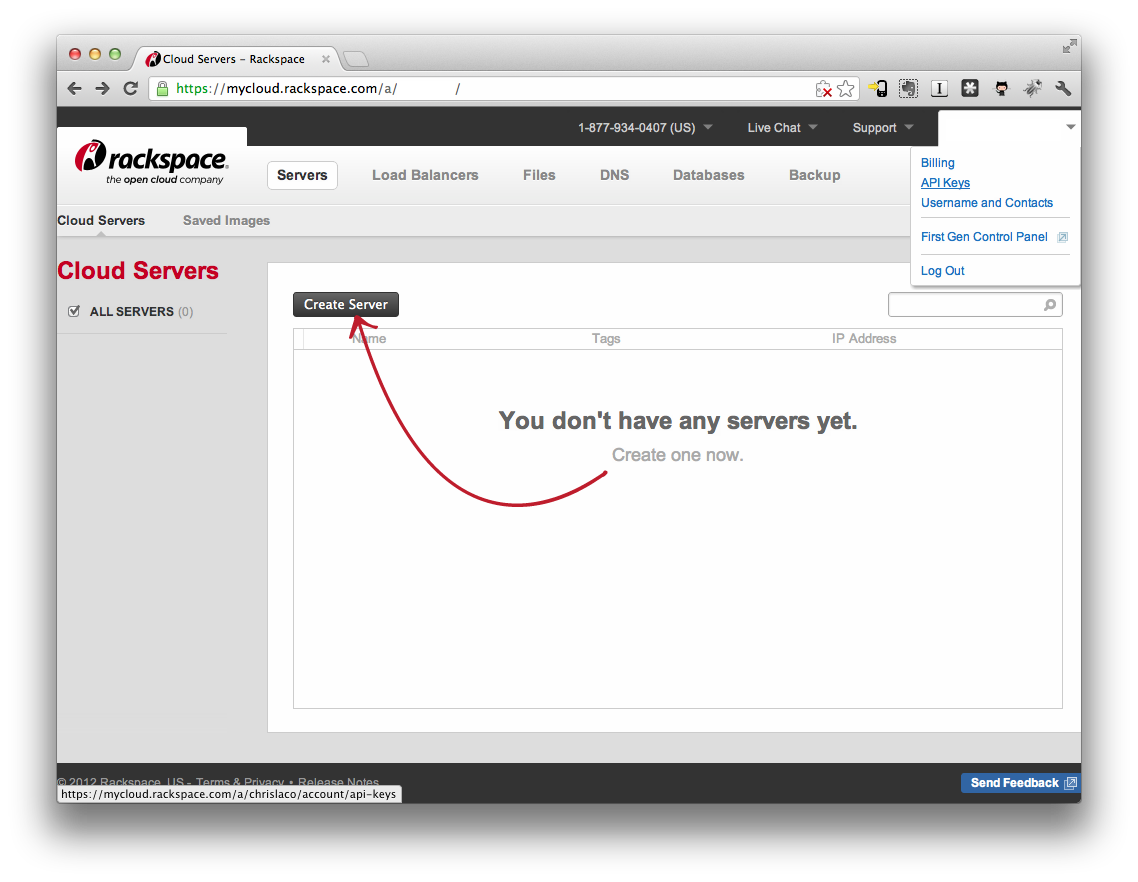
Select “API Keys” from the drop down account menu in the upper right corner.
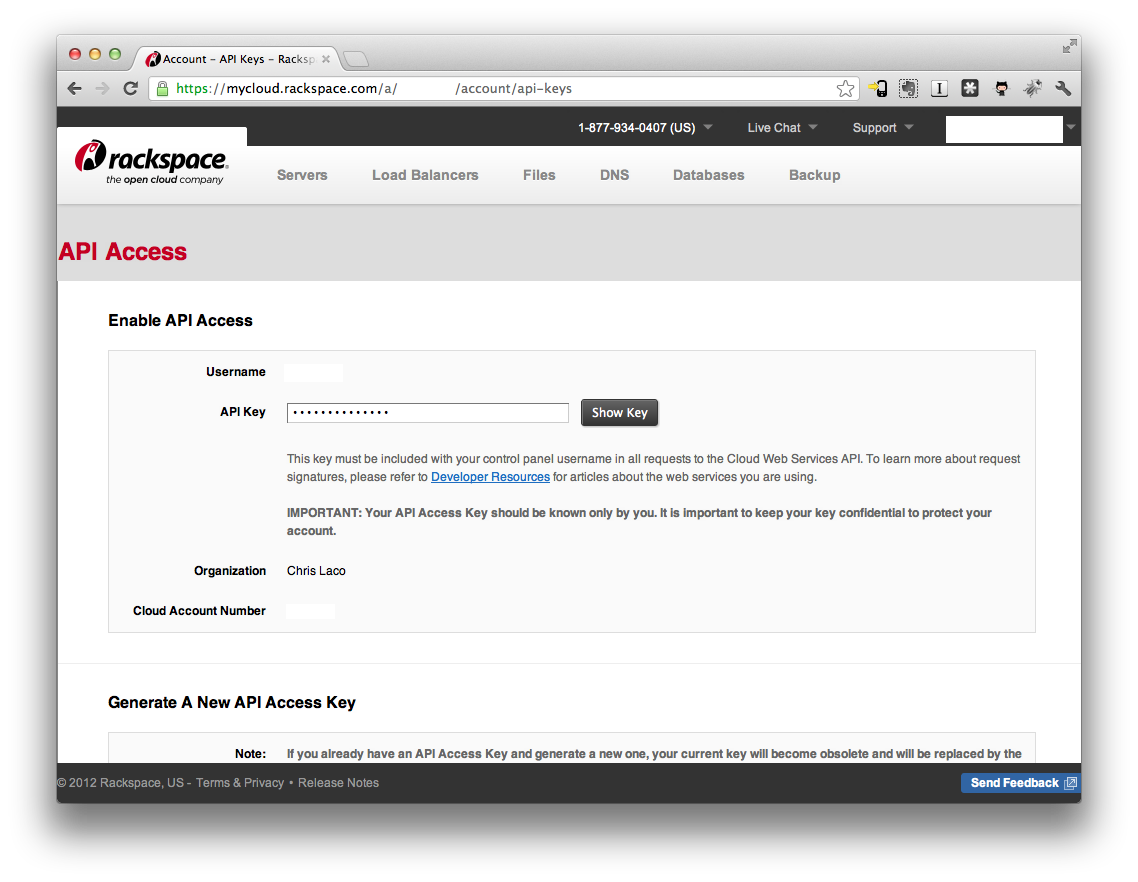
Now, at the end of your .chef/knife.rb, add the following code:
1 knife[:rackspace_username] =  "youraccountname"
2 knife[:rackspace_api_key] =   "yourapikey"   # looks likes this -> b936bd3468844f0ec1ddefa53e625fee4"
3
4 require 'excon'
5 Excon.defaults[:read_timeout] = 500
From the trenches: Due to my crappy DSL connection, I ended up with a lot of Excon timeouts errors while waiting for instancs to spin up. The last two lines extend that timeout period and make things stable for me.
Now, in your Gemfile, add the knife-rackspace gem, which allows the knife command line utility to talk to the Rackspace API, and run bundle install.
1 source :rubygems
2
3 gem 'vagrant'
4 gem 'veewee'
5 gem 'chef'
6 gem 'knife-github-cookbooks'
7 gem 'rails'
8 gem 'knife-rackspace'
 1 $ bundle install
 2 Fetching gem metadata from http://rubygems.org/.....
 3 Using rake (0.9.2.2)
 4 Using Platform (0.4.0)
 5 Using i18n (0.6.1)
 6 Using multi_json (1.3.6)
 7 Using activesupport (3.2.8)
 8 Using builder (3.0.3)
 9 Using activemodel (3.2.8)
10 Using erubis (2.7.0)
11 Using journey (1.0.4)
12 Using rack (1.4.1)
13 Using rack-cache (1.2)
14 Using rack-test (0.6.2)
15 Using hike (1.2.1)
16 Using tilt (1.3.3)
17 Using sprockets (2.1.3)
18 Using actionpack (3.2.8)
19 Using mime-types (1.19)
20 Using polyglot (0.3.3)
21 Using treetop (1.4.10)
22 Using mail (2.4.4)
23 Using actionmailer (3.2.8)
24 Using arel (3.0.2)
25 Using tzinfo (0.3.33)
26 Using activerecord (3.2.8)
27 Using activeresource (3.2.8)
28 Using archive-tar-minitar (0.5.2)
29 Using bundler (1.1.5)
30 Using bunny (0.7.9)
31 Using highline (1.6.15)
32 Using json (1.5.4)
33 Using mixlib-log (1.4.1)
34 Using mixlib-authentication (1.3.0)
35 Using mixlib-cli (1.2.2)
36 Using mixlib-config (1.1.2)
37 Using mixlib-shellout (1.1.0)
38 Using moneta (0.6.0)
39 Using net-ssh (2.2.2)
40 Using net-ssh-gateway (1.1.0)
41 Using net-ssh-multi (1.1)
42 Using ipaddress (0.8.0)
43 Using systemu (2.5.2)
44 Using yajl-ruby (1.1.0)
45 Using ohai (6.14.0)
46 Using rest-client (1.6.7)
47 Using uuidtools (2.1.3)
48 Using chef (10.14.2)
49 Using ffi (1.0.11)
50 Using childprocess (0.3.5)
51 Using configuration (1.3.2)
52 Using diff-lcs (1.1.3)
53 Using gherkin (2.11.2)
54 Using cucumber (1.2.1)
55 Installing excon (0.16.4)
56 Installing formatador (0.2.3)
57 Using net-scp (1.0.4)
58 Installing nokogiri (1.5.5) with native extensions
59 Installing ruby-hmac (0.4.0)
60 Installing fog (1.6.0)
61 Using launchy (0.4.0)
62 Using knife-github-cookbooks (0.1.7)
63 Installing knife-rackspace (0.5.16)
64 Using log4r (1.1.10)
65 Using open4 (1.3.0)
66 Using popen4 (0.1.2)
67 Using progressbar (0.11.0)
68 Using rack-ssl (1.3.2)
69 Using rdoc (3.12)
70 Using thor (0.14.6)
71 Using railties (3.2.8)
72 Using rails (3.2.8)
73 Using rspec-core (2.11.1)
74 Using rspec-expectations (2.11.3)
75 Using rspec-mocks (2.11.3)
76 Using rspec (2.11.0)
77 Using vagrant (1.0.5)
78 Using virtualbox (0.9.2)
79 Using veewee (0.2.3)
80 Your bundle is complete! Use `bundle show [gemname]` to see where a bundled gem is installed.
Let’s test out our configuration by listing out what images and flavors RackCloud supports:
 1 $ knife rackspace image list
 2 ID   Name
 3 100  Arch 2012.08
 4 114  CentOS 5.6
 5 121  CentOS 5.8
 6 118  CentOS 6.0
 7 122  CentOS 6.2
 8 127  CentOS 6.3
 9 104  Debian 6 (Squeeze)
10 120  Fedora 16
11 126  Fedora 17
12 107  FreeBSD 9.0
13 108  Gentoo 12.3
14 110  Red Hat Enterprise Linux 5.5
15 111  Red Hat Enterprise Linux 6
16 112  Ubuntu 10.04 LTS
17 115  Ubuntu 11.04
18 119  Ubuntu 11.10
19 125  Ubuntu 12.04 LTS
20 85   Windows Server 2008 R2 x64
21 86   Windows Server 2008 R2 x64 + SQL Server 2008 R2 Standard
22 89   Windows Server 2008 R2 x64 + SQL Server 2008 R2 Web
23 91   Windows Server 2008 R2 x64 + SQL Server 2012 Standard
24 92   Windows Server 2008 R2 x64 + SQL Server 2012 Web
25 24   Windows Server 2008 SP2 x64
26 57   Windows Server 2008 SP2 x64 + SQL Server 2008 R2 Standard
27 31   Windows Server 2008 SP2 x86
28 56   Windows Server 2008 SP2 x86 + SQL Server 2008 R2 Standard
29 109  openSUSE 12
30
31 $ knife rackspace flavor list
32 ID  Name           Architecture  RAM    Disk
33 1   256 server     64-bit        256    10 GB
34 2   512 server     64-bit        512    20 GB
35 3   1GB server     64-bit        1024   40 GB
36 4   2GB server     64-bit        2048   80 GB
37 5   4GB server     64-bit        4096   160 GB
38 6   8GB server     64-bit        8192   320 GB
39 7   15.5GB server  64-bit        15872  620 GB
40 8   30GB server    64-bit        30720  1200 GB
And we’re connected to the cloud!
Boostrap a Cloud Instance
Now that we can talk to Rackspace, it’s time to bootstrap a cloud image. This process is much like creating Vagrant instances. Once we’ve asked the cloud provider to create a server, knife will hand it a “bootstrap” file. This file serves the exact same purpose as the postinstall.sh file we used with Vagrant/Veewee when creating a box. The only difference is that we don’t need vagrant specific user or ssh key in the cloud, nor do we need to install the VirtualBox Guest Additions.
In fact, let’s create a bootstrap directory for knife and copy over the postinstall.sh from our box definition:
1 $ mkdir .chef/bootstrap
2 $ cp definitions/MyServer/postinstall.sh .chef/bootstrap/centos-5.6.erb
Now open .chef/bootstrap/centos-5.6.erb in your editor and remove the lines related to creating a vagrant user and installing the guest additions. You should end up with a file that looks like this:
#http://chrisadams.me.uk/2010/05/10/setting-up-a-centos-base-box-for-development-and-testing-with-vagrant/

date > /etc/vagrant_box_build_time

fail()
{
  echo "FATAL: $*"
  exit 1
}

#kernel source is needed for vbox additions
rpm -Uvh http://dl.fedoraproject.org/pub/epel/5/x86_64/epel-release-5-4.noarch.rpm
rpm -i http://vault.centos.org/5.6/os/x86_64/CentOS/kernel-devel-2.6.18-238.el5.x86_64.rpm
yum -y install gcc bzip2 make
#yum -y update
#yum -y upgrade

yum -y install gcc-c++ zlib-devel openssl-devel readline-devel sqlite-devel libyaml-devel
yum -y erase gtk2 libX11 hicolor-icon-theme avahi freetype bitstream-vera-fonts
yum -y clean all

#Installing ruby
cd /tmp
wget http://ftp.ruby-lang.org/pub/ruby/1.9/ruby-1.9.3-p194.tar.gz || fail "Could not download Ruby source"
tar xzvf ruby-1.9.3-p194.tar.gz
cd ruby-1.9.3-p194
./configure
make && make install
cd /tmp
rm -rf /tmp/ruby-1.9.3-p194
rm /tmp/ruby-1.9.3-p194.tar.gz
ln -s /usr/local/bin/ruby /usr/bin/ruby # Create a sym link for the same path
ln -s /usr/local/bin/gem /usr/bin/gem # Create a sym link for the same path

#Installing chef & Puppet
echo "Installing chef and puppet"
/usr/local/bin/gem install chef --no-ri --no-rdoc || fail "Could not install chef"
/usr/local/bin/gem install puppet --no-ri --no-rdoc || fail "Could not install puppet"

#Installing shadow password support for chef
echo "Installing ruby shadow password support for chef"
/usr/local/bin/gem install ruby-shadow --no-ri --no-rdoc || fail "Could not install ruby-shadow"

sed -i "s/^.*requiretty/#Defaults requiretty/" /etc/sudoers
sed -i "s/^\(.*env_keep = \"\)/\1PATH /" /etc/sudoers

# Disabling SELinux in config since kickstart ignores the flag
echo "Disabling SELinux"
sed -i "s/^SELINUX=enforcing/SELINUX=disabled/" /etc/selinux/config

#poweroff -h

exit
We’re not quite ready yet though. One of the things vagrant does for us automatically is configuring and running the chef client. With a custom boostrap file for knife and cloud instances, we need to ensure those same steps are performed in the bootstrap file.
At the end of centos-5.6.erb, add the following code right before the “exit” line:
 1 # Configure Chef
 2 echo "Configuring Chef Client"
 3 mkdir -p /etc/chef
 4
 5 cat << 'EOP' >> /tmp/validation.pem
 6 <%= validation_key %>
 7 EOP
 8 awk NF /tmp/validation.pem > /etc/chef/validation.pem
 9 rm /tmp/validation.pem
10
11 cat << 'EOP' >> /etc/chef/client.rb
12 <%= config_content %>
13 EOP
14
15 cat << 'EOP' >> /etc/chef/first-boot.json
16 <%= first_boot.to_json %>
17 EOP
18
19 <%= start_chef %>
From the top: This code creates the chef directory, saves the validation key, configures the client, adds the initial run list, then kicks off the Chef Client run.
Now it’s time to ask RackCloud to make us a server! We’ll do that using the knife rackspace server create command.
When you run this command, you’re going to see a lot of output. I mean a LOT. This will be the output from every command the server is running, including the yum updates, install commands, compiling ruby, etc.
Also, towards the top, you will see your temporary root password float by. Take note of it. You’ll need it. But don’t worry if you miss it. You can reset the root password in the RackCloud Control Panel on their website.
1 $ knife rackspace server create -S rackspace-db -N rackspace-db -I 114 -f 1 -d centos-5.6 -r 'role[db]' -j '{"mysql":{"server_root_password":"abcd1234"},"myapp":{"database":{"password":"myapp_1234"}}}'
From the left: The create command has a heap of options. In our case, we ask it to name the server rackspace-db (-S), name the chef node rackspace-db (-N), use image #114/CenstOS 5.6 (-I), use flavor #1/256MB server (-f) and use our custom centos5.6.erb boostrap file (-d), set the chef run list to role[db] (-r), and supply the attributes (in JSON format) for mysql server root password and out app database password (-j)
Yes, that’s a lot of command options to remember. In future posts, we’ll look at making those more manageable, namely a set of Rake tasks for developers to use without having to remember all of those options every time. More over, passing in passwords is not only awkword, but means your storing them in your task. We’ll cover how to store passwords in encrypted data bags later on.
$ knife rackspace server create -S rackspace-db -N rackspace-db -I 114 -f 1 -d centos-5.6 -r 'role[db]' -j '{"mysql":{"server_root_password":"abcd1234"},"myapp":{"database":{"password":"myapp_1234"}}}'
Instance ID: 21162952
Host ID: c33bb243be8ca28e0bd42f0583000a30
Name: rackspace-db
Flavor: 256 server
Image: CentOS 5.6
Metadata: {}

Waiting server........................................................................
Public DNS Name: 198-101-233-114.static.cloud-ips.com
Public IP Address: 198.101.233.114
Private IP Address: 10.180.147.191
Password: uhDWm72J1rackspace-db

Waiting for sshddone
Bootstrapping Chef on 198.101.233.114
198.101.233.114 Retrieving http://dl.fedoraproject.org/pub/epel/5/x86_64/epel-release-5-4.noarch.rpm
198.101.233.114 warning:
198.101.233.114 /var/tmp/rpm-xfer.4j5AaH: Header V3 DSA signature: NOKEY, key ID 217521f6
198.101.233.114 Preparing...
198.101.233.114 ####################                        (100%)
...
198.101.233.114 2012-09-28 19:16:06 (1.23 MB/s) - `ruby-1.9.3-p194.tar.gz' saved [12432239/12432239]
198.101.233.114
198.101.233.114 ruby-1.9.3-p194/
198.101.233.114 ruby-1.9.3-p194/doc/
198.101.233.114 ruby-1.9.3-p194/defs/
198.101.233.114 ruby-1.9.3-p194/goruby.c
198.101.233.114 ruby-1.9.3-p194/complex.c
198.101.233.114 ruby-1.9.3-p194/regparse.c
198.101.233.114 ruby-1.9.3-p194/README.EXT
...
198.101.233.114 Configuring Chef Client
198.101.233.114 [2012-09-28T19:23:19+00:00] INFO: *** Chef 10.14.4 ***
198.101.233.114 [2012-09-28T19:23:21+00:00] INFO: Client key /etc/chef/client.pem is not present - registering
198.101.233.114 [2012-09-28T19:23:23+00:00] INFO: Setting the run_list to ["role[db]"] from JSON
198.101.233.114 [2012-09-28T19:23:23+00:00] INFO: Run List is [role[db]]
198.101.233.114 [2012-09-28T19:23:23+00:00] INFO: Run List expands to [mysql::server, myapp::db]
198.101.233.114 [2012-09-28T19:23:23+00:00] INFO: Starting Chef Run for rackspace-db
198.101.233.114 [2012-09-28T19:23:23+00:00] INFO: Running start handlers
198.101.233.114 [2012-09-28T19:23:23+00:00] INFO: Start handlers complete.
198.101.233.114 [2012-09-28T19:23:24+00:00] INFO: Loading cookbooks [apache2, build-essential, database, iptables, myapp, mysql, openssh, openssl, passenger_apache2]
198.101.233.114 [2012-09-28T19:23:24+00:00] INFO: Storing updated cookbooks/mysql/recipes/client.rb in the cache.
198.101.233.114 [2012-09-28T19:23:25+00:00] INFO: Storing updated cookbooks/mysql/recipes/default.rb in the cache.
198.101.233.114 [2012-09-28T19:23:25+00:00] INFO: Storing updated cookbooks/mysql/recipes/ruby.rb in the cache.
...
198.101.233.114 [2012-09-28T19:24:56+00:00] INFO: Chef Run complete in 92.387689 seconds
198.101.233.114 [2012-09-28T19:24:56+00:00] INFO: Running report handlers
198.101.233.114 [2012-09-28T19:24:56+00:00] INFO: Report handlers complete

Instance ID: 21162952
Host ID: c33bb243be8ca28e0bd42f0583000a30
Name: rackspace-db
Flavor: 256 server
Image: CentOS 5.6
Metadata: {}
Public DNS Name: 198-101-233-114.static.cloud-ips.com
Public IP Address: 198.101.233.114
Private IP Address: 10.180.147.191
Password: uhDWm72J1rackspace-db
Environment: _default
Run List: role[db]
Let’s login to our new instance and check things out.
ssh root@198.101.233.114
root@198.101.233.114's password: uhDWm72J1rackspace-db
Last login: Fri Sep 28 19:13:49 2012 from adsl-76-253-135-65.dsl.akrnoh.sbcglobal.net

[root@rackspace-db ~]# mysql -u root -p
Enter password: abcd1234
Welcome to the MySQL monitor.  Commands end with ; or \g.
Your MySQL connection id is 7
Server version: 5.0.95-log Source distribution

Copyright (c) 2000, 2011, Oracle and/or its affiliates. All rights reserved.

Oracle is a registered trademark of Oracle Corporation and/or its
affiliates. Other names may be trademarks of their respective
owners.

Type 'help;' or '\h' for help. Type '\c' to clear the current input statement.

mysql> use myapp;
Database changed
mysql> exit

[root@rackspace-db ~]# grep bind /etc/my.cnf
bind-address            = 10.180.147.191

[root@rackspace-db ~]# /sbin/service iptables status
Table: filter
Chain INPUT (policy ACCEPT)
num  target     prot opt source               destination
1    FWR        all  --  0.0.0.0/0            0.0.0.0/0

Chain FORWARD (policy ACCEPT)
num  target     prot opt source               destination

Chain OUTPUT (policy ACCEPT)
num  target     prot opt source               destination

Chain FWR (1 references)
num  target     prot opt source               destination
1    ACCEPT     all  --  0.0.0.0/0            0.0.0.0/0
2    ACCEPT     all  --  0.0.0.0/0            0.0.0.0/0           state RELATED,ESTABLISHED
3    ACCEPT     icmp --  0.0.0.0/0            0.0.0.0/0
4    ACCEPT     tcp  --  0.0.0.0/0            0.0.0.0/0           tcp dpt:3306
5    ACCEPT     udp  --  0.0.0.0/0            0.0.0.0/0           udp dpt:3306
6    ACCEPT     tcp  --  0.0.0.0/0            0.0.0.0/0           tcp dpt:22
7    REJECT     tcp  --  0.0.0.0/0            0.0.0.0/0           tcp flags:0x16/0x02 reject-with icmp-port-unreachable
8    REJECT     udp  --  0.0.0.0/0            0.0.0.0/0           reject-with icmp-port-unreachable
MySQL is running, root password is set, and MySQL has bound to the Rackspace Private IP address, which is what we want. (The web server and db server can talk to each other using the private internal IP addresses). The iptables firewall rules are in place as well.
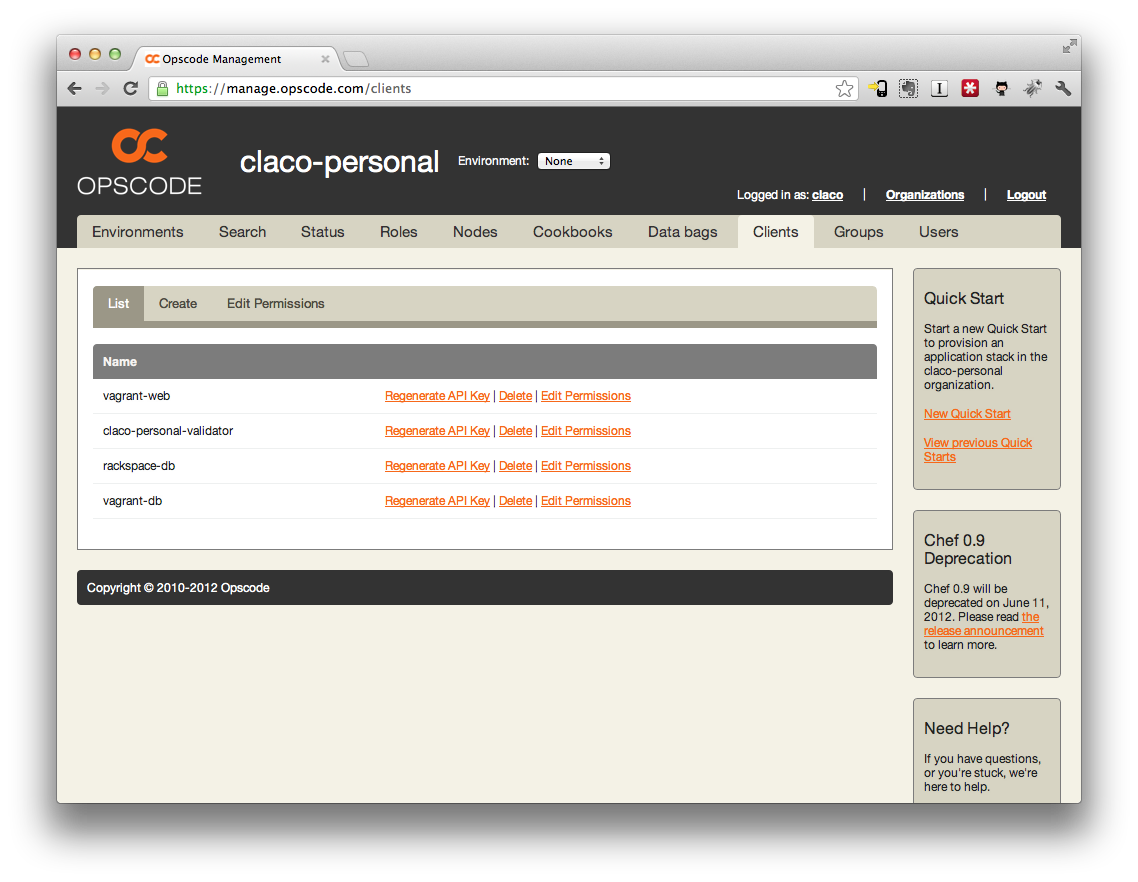
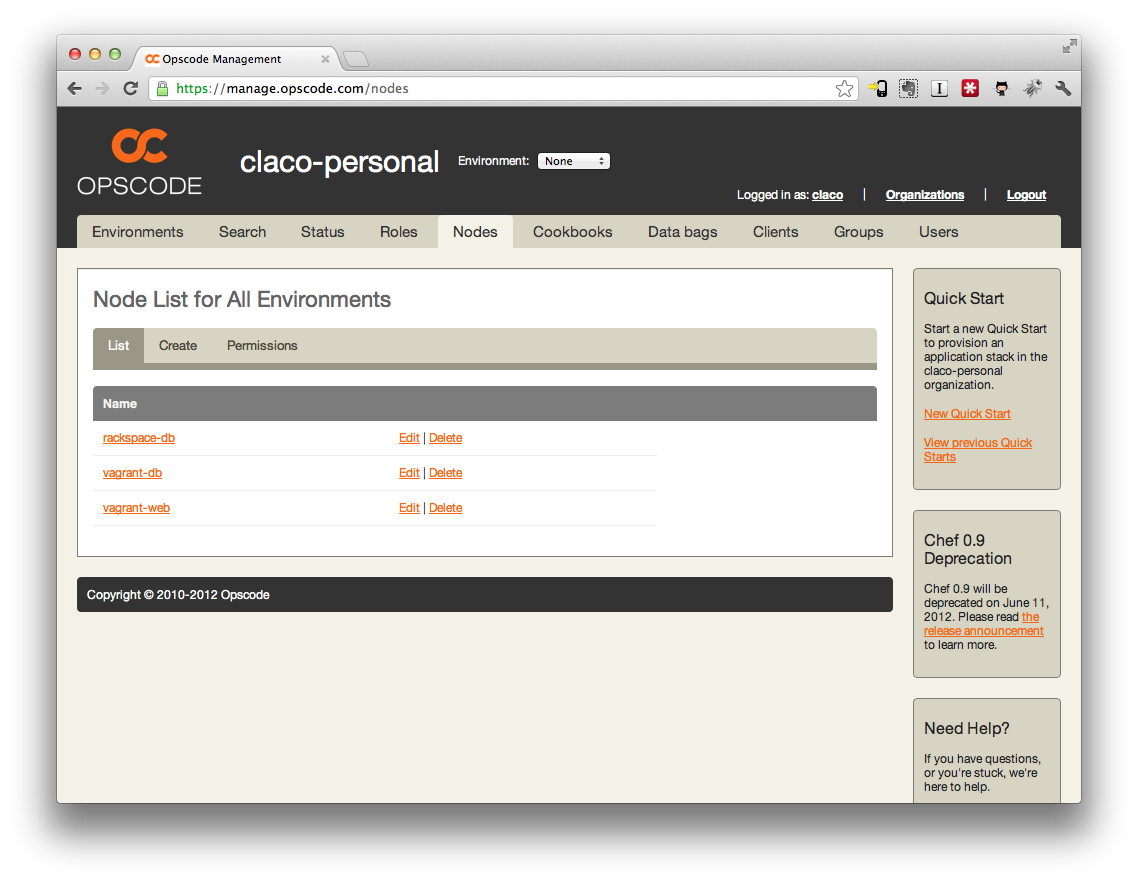
Now in your OpsCode site, you should see the rackspace-db machine under the clients and nodes tabs as well as within the knife utility itself:
 1 $ knife client list
 2   claco-personal-validator
 3   rackspace-db
 4   vagrant-db
 5   vagrant-web
 6
 7 $ knife node list
 8   rackspace-db
 9   vagrant-db
10   vagrant-web
Now, let’s create a cloud server for our web role in the same manner:
1 $ knife rackspace server create -S rackspace-web -N rackspace-web -I 114 -f 1 -d centos-5.6 -r 'role[web]' -j '{"myapp":{"database":{"host":"10.180.147.191","password":"myapp_1234"}}}'
From the left: In this case, we ask it to name the server rackspace-web (-S), name the chef node rackspace-web (-N), use image #114/CenstOS 5.6 (-I), use flavor #1/256MB server (-f) and use our custom centos5.6.erb boostrap file (-d), set the chef run list to role[web] (-r), and supply the attributes (in JSON format) for myapp database password and host (-j)
$ knife rackspace server create -S rackspace-web -N rackspace-web -I 114 -f 1 -d centos-5.6 -r 'role[web]' -j '{"myapp":{"database":{"host":"10.180.147.191","password":"myapp_1234"}}}'
Instance ID: 21163069
Host ID: 039a7acde829ad51d7f8405103db4ed6
Name: rackspace-web
Flavor: 256 server
Image: CentOS 5.6
Metadata: {}

Waiting server.........................................................
Public DNS Name: 198-61-206-121.static.cloud-ips.com
Public IP Address: 198.61.206.121
Private IP Address: 10.178.109.29
Password: g6XsP7uS7rackspace-web

Waiting for sshddone
Bootstrapping Chef on 198.61.206.121
198.61.206.121 Retrieving http://dl.fedoraproject.org/pub/epel/5/x86_64/epel-release-5-4.noarch.rpm
198.61.206.121 warning:
198.61.206.121 /var/tmp/rpm-xfer.ljhMwC: Header V3 DSA signature: NOKEY, key ID 217521f6
198.61.206.121 Preparing...
198.61.206.121 ####################                        (100%)
...
198.61.206.121 Saving to: `ruby-1.9.3-p194.tar.gz'
198.61.206.121
100%[======================================>] 12,432,239   723K/s   in 13s
198.61.206.121
198.61.206.121 2012-09-28 20:22:06 (906 KB/s) - `ruby-1.9.3-p194.tar.gz' saved [12432239/12432239]
198.61.206.121
198.61.206.121 ruby-1.9.3-p194/
198.61.206.121 ruby-1.9.3-p194/doc/
198.61.206.121 ruby-1.9.3-p194/defs/
198.61.206.121 ruby-1.9.3-p194/goruby.c
198.61.206.121 ruby-1.9.3-p194/complex.c
198.61.206.121 ruby-1.9.3-p194/regparse.c
...
198.61.206.121 Configuring Chef Client
198.61.206.121 [2012-09-28T20:29:09+00:00] INFO: *** Chef 10.14.4 ***
198.61.206.121 [2012-09-28T20:29:11+00:00] INFO: Client key /etc/chef/client.pem is not present - registering
198.61.206.121 [2012-09-28T20:29:13+00:00] INFO: Setting the run_list to ["role[web]"] from JSON
198.61.206.121 [2012-09-28T20:29:14+00:00] INFO: Run List is [role[web]]
198.61.206.121 [2012-09-28T20:29:14+00:00] INFO: Run List expands to [apache2, passenger_apache2::mod_rails, mysql::client, myapp::web]
198.61.206.121 [2012-09-28T20:29:14+00:00] INFO: Starting Chef Run for rackspace-web
198.61.206.121 [2012-09-28T20:29:14+00:00] INFO: Running start handlers
198.61.206.121 [2012-09-28T20:29:14+00:00] INFO: Start handlers complete.
198.61.206.121 [2012-09-28T20:29:15+00:00] INFO: Loading cookbooks [apache2, build-essential, database, iptables, myapp, mysql, openssh, openssl, passenger_apache2]
...
198.61.206.121 [2012-09-28T20:35:11+00:00] INFO: Chef Run complete in 357.585831 seconds
198.61.206.121 [2012-09-28T20:35:11+00:00] INFO: Running report handlers
198.61.206.121 [2012-09-28T20:35:11+00:00] INFO: Report handlers complete

Instance ID: 21163069
Host ID: 039a7acde829ad51d7f8405103db4ed6
Name: rackspace-web
Flavor: 256 server
Image: CentOS 5.6
Metadata: {}
Public DNS Name: 198-61-206-121.static.cloud-ips.com
Public IP Address: 198.61.206.121
Private IP Address: 10.178.109.29
Password: g6XsP7uS7rackspace-web
Environment: _default
Run List: role[web]
Let’s login to the new server and chack things out:
 1 $ ssh root@198.61.206.121
 2 root@198.61.206.121's password:
 3 Last login: Fri Sep 28 20:20:11 2012 from adsl-76-253-135-65.dsl.akrnoh.sbcglobal.net
 4
 5 [root@rackspace-web ~]# cat /var/www/myapp/shared/database.yml
 6 development:
 7   adapter: mysql2
 8   encoding: utf8
 9   reconnect: true
10   database: myapp
11   pool: 5
12   username: myapp
13   password: myapp_1234
14   host: 10.180.147.191
15
16 [root@rackspace-web ~]# mysql -u myapp -p -D myapp -h 10.180.147.191
17 Enter password:
18 Welcome to the MySQL monitor.  Commands end with ; or \g.
19 Your MySQL connection id is 8
20 Server version: 5.0.95-log Source distribution
21
22 Copyright (c) 2000, 2011, Oracle and/or its affiliates. All rights reserved.
23
24 Oracle is a registered trademark of Oracle Corporation and/or its
25 affiliates. Other names may be trademarks of their respective
26 owners.
27
28 Type 'help;' or '\h' for help. Type '\c' to clear the current input statement.
29
30 mysql> exit
31 Bye
32
33 [root@rackspace-web ~]# cat /etc/httpd/sites-enabled/myapp.conf
34 <VirtualHost *:80>
35   ServerName 198.61.206.121
36   ServerAlias 198.61.206.121
37   DocumentRoot /var/www/myapp/current/public
38
39   RailsBaseURI /
40   RailsEnv development
41
42   <Directory /var/www/myapp/current/public>
43     Options FollowSymLinks
44     AllowOverride None
45     Order allow,deny
46     Allow from all
47   </Directory>
48
49   LogLevel info
50   ErrorLog /var/log/httpd/myapp-error.log
51   CustomLog /var/log/httpd/myapp-access.log combined
52
53   RewriteEngine On
54   RewriteLog /var/log/httpd/myapp-rewrite.log
55   RewriteLogLevel 0
56   # Canonical host
57   RewriteCond %{HTTP_HOST}   !^198.61.206.121 [NC]
58   RewriteCond %{HTTP_HOST}   !^$
59   RewriteRule ^/(.*)$        http://198.61.206.121/$1 [L,R=301]
60
61   RewriteCond %{DOCUMENT_ROOT}/system/maintenance.html -f
62   RewriteCond %{SCRIPT_FILENAME} !maintenance.html
63   RewriteRule ^.*$ /system/maintenance.html [L]
64
65 </VirtualHost>
Our database.yml is setup correctly. We can login to the rackspace-db server, so the firewall works. Our application apache conf file is configured with the public ip address.
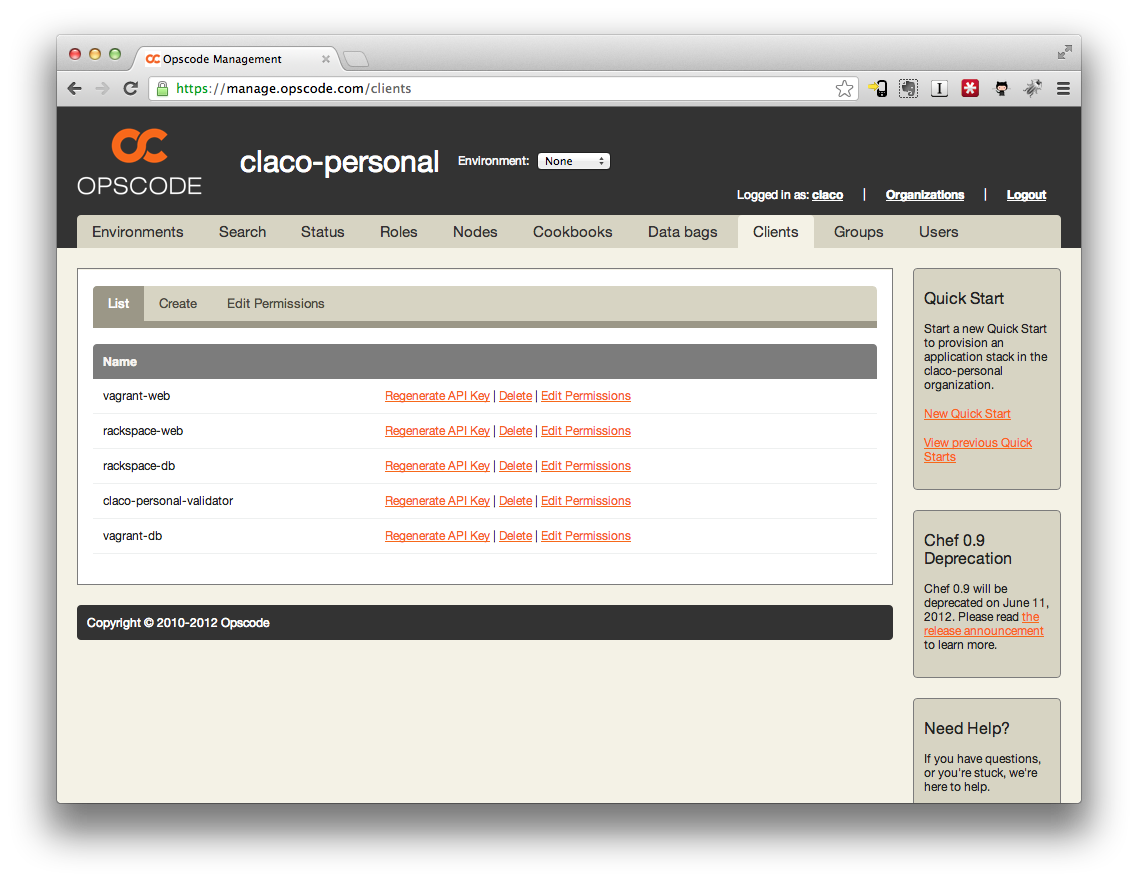
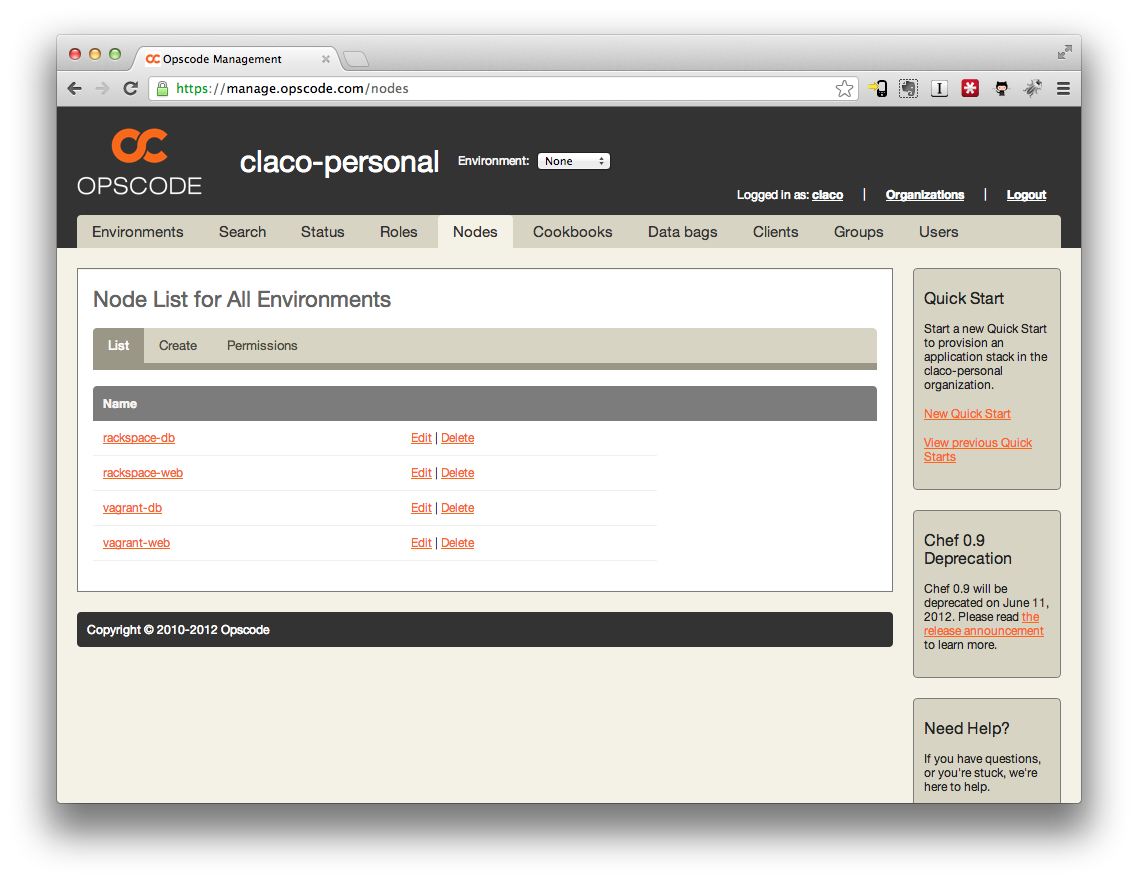
We should now have another client/node in knife and on the website.
 1 $ knife client list
 2   claco-personal-validator
 3   rackspace-db
 4   rackspace-web
 5   vagrant-db
 6   vagrant-web
 7
 8 $ knife node list
 9   rackspace-db
10   rackspace-web
11   vagrant-db
12   vagrant-web
In your browser, go to the public ip address of the web server, in this case http://198.61.206.121/
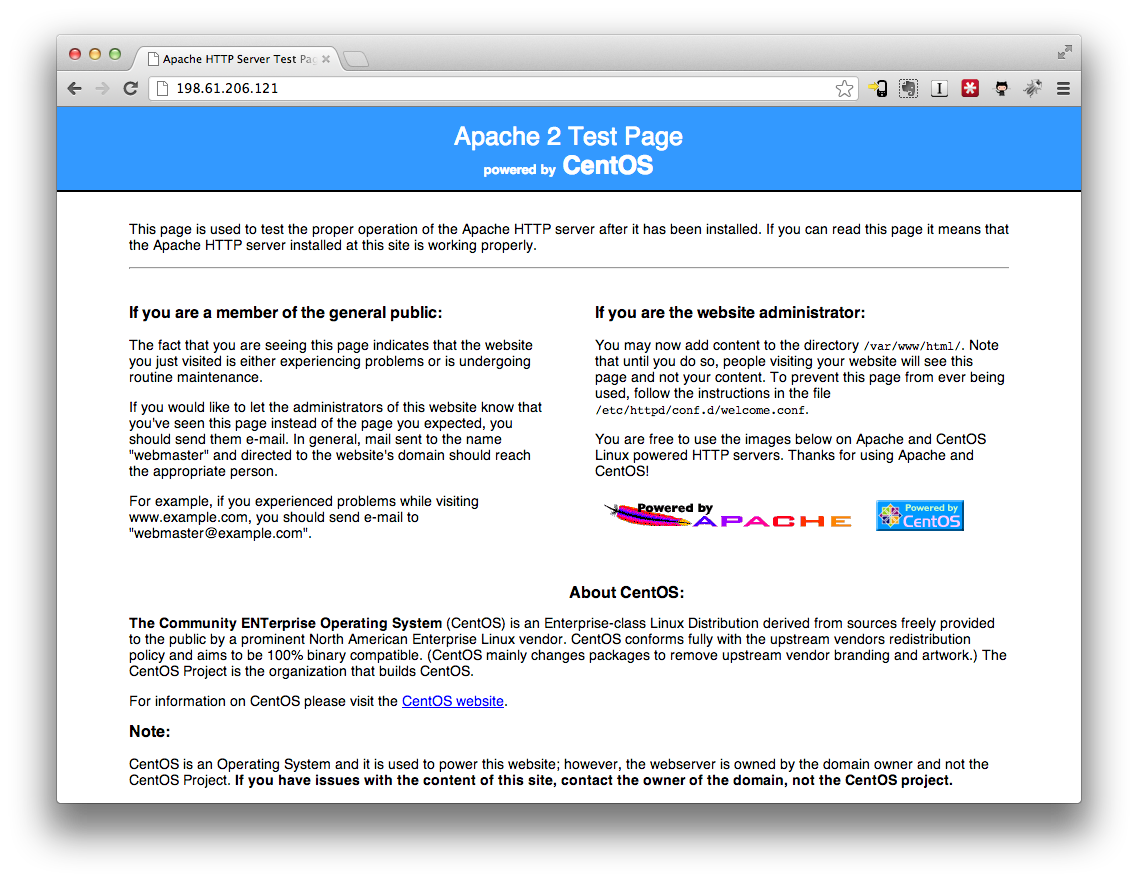
Uh oh! That should be our System Maint. page, not the apache default. What happened? Good quesiton. I don’t know. :-) My guess is that it has something to do with apache binging to port 80, and the difference in the order that happens between machines with one network card (our Vagrant instances) and two network cards (Rackspace instances).
In either case, the solution is simple. Disabled the default site in apache. Now we could login and simple delete this file: /etc/httpd/sites-enabled/000-default. The proper way given we’re using Chef/Knife is to change the nodes apache.default_site_enabled property to false, then rereun the apache recipe.
We can do that using the knife node edit command:
1 $ knife node edit rackspace-web
Doing so will open the nodes attributes, in JSON format, in your editor:
 1 {
 2   "name": "rackspace-web",
 3   "chef_environment": "_default",
 4   "normal": {
 5     "myapp": {
 6       "database": {
 7         "host": "10.180.147.191",
 8         "password": "myapp_1234"
 9       }
10     },
11     "tags": [
12
13     ],
14     "mysql": {
15       "conf_dir": "/etc",
16       "confd_dir": "/etc/mysql/conf.d",
17       "socket": "/var/lib/mysql/mysql.sock",
18       "pid_file": "/var/run/mysqld/mysqld.pid",
19       "old_passwords": 1,
20       "grants_path": "/etc/mysql_grants.sql",
21       "tunable": {
22         "innodb_adaptive_flushing": false
23       }
24     },
25     "platform?": "ubuntu",
26     "apache": {
27       "root_group": "root",
28       "package": "httpd",
29       "dir": "/etc/httpd",
30       "log_dir": "/var/log/httpd",
31       "error_log": "error.log",
32       "user": "apache",
33       "group": "apache",
34       "binary": "/usr/sbin/httpd",
35       "icondir": "/var/www/icons",
36       "cache_dir": "/var/cache/httpd",
37       "pid_file": "/var/run/httpd.pid",
38       "lib_dir": "/usr/lib64/httpd",
39       "libexecdir": "/usr/lib64/httpd/modules",
40       "default_site_enabled": false
41     }
42   },
43   "run_list": [
44     "role[web]"
45   ]
46 }
Find the default_site_enabled on line 40 and change it false. Then save and close your editor. Knife will then upload the changes to your node.
1 Saving updated normal on node rackspace-web
Now let’s run a remote comand using knife to trigger another run of the chec client:
$ knife ssh "name:rackspace-web" "chef-client" -V -x root -P g6XsP7uS7rackspace-web -a ipaddress
198.61.206.121 [2012-09-28T21:16:52+00:00] INFO: *** Chef 10.14.4 ***
198.61.206.121 [2012-09-28T21:16:54+00:00] INFO: Run List is [role[web]]
198.61.206.121 [2012-09-28T21:16:54+00:00] INFO: Run List expands to [apache2, passenger_apache2::mod_rails, mysql::client, myapp::web]
198.61.206.121 [2012-09-28T21:16:54+00:00] INFO: Starting Chef Run for rackspace-web
...
From the top: The knife ssh command search for a list of nodes, then runs the specified command. We search for nodes with the name rackspace-web, run chef-client, then pass in options to tell ssh what username/password to use, and what ip address attribute to connect to. As your toolkit matures, you’ll probably install a company ssh account/key rather than using the root credentials.
If you check your browser again, you’ll see… that this didn’t work. :-( That’s ok. I think it’s a bug in the cookbook itself. But we needed to see how to run remote commands anyways. In the future, this is how you would update recipes/attribues and kick off new provisioning with chef-client.
For now, let’s implement our original idea and just remote the file from sites-enabled:
$ knife ssh "name:rackspace-web" "rm /etc/httpd/sites-enabled/000-default" -V -x root -P g6XsP7uS7rackspace-web -a ipaddress
$ knife ssh "name:rackspace-web" "/sbin/service httpd restart" -V -x root -P g6XsP7uS7rackspace-web -a ipaddress
198.61.206.121 Stopping httpd:
198.61.206.121                                             [
198.61.206.121   OK
198.61.206.121 ]
198.61.206.121
198.61.206.121 Starting httpd:
198.61.206.121 httpd: Could not reliably determine the server's fully qualified domain name, using 198.61.206.121 for ServerName
198.61.206.121                                             [
198.61.206.121   OK
198.61.206.121 ]
198.61.206.121
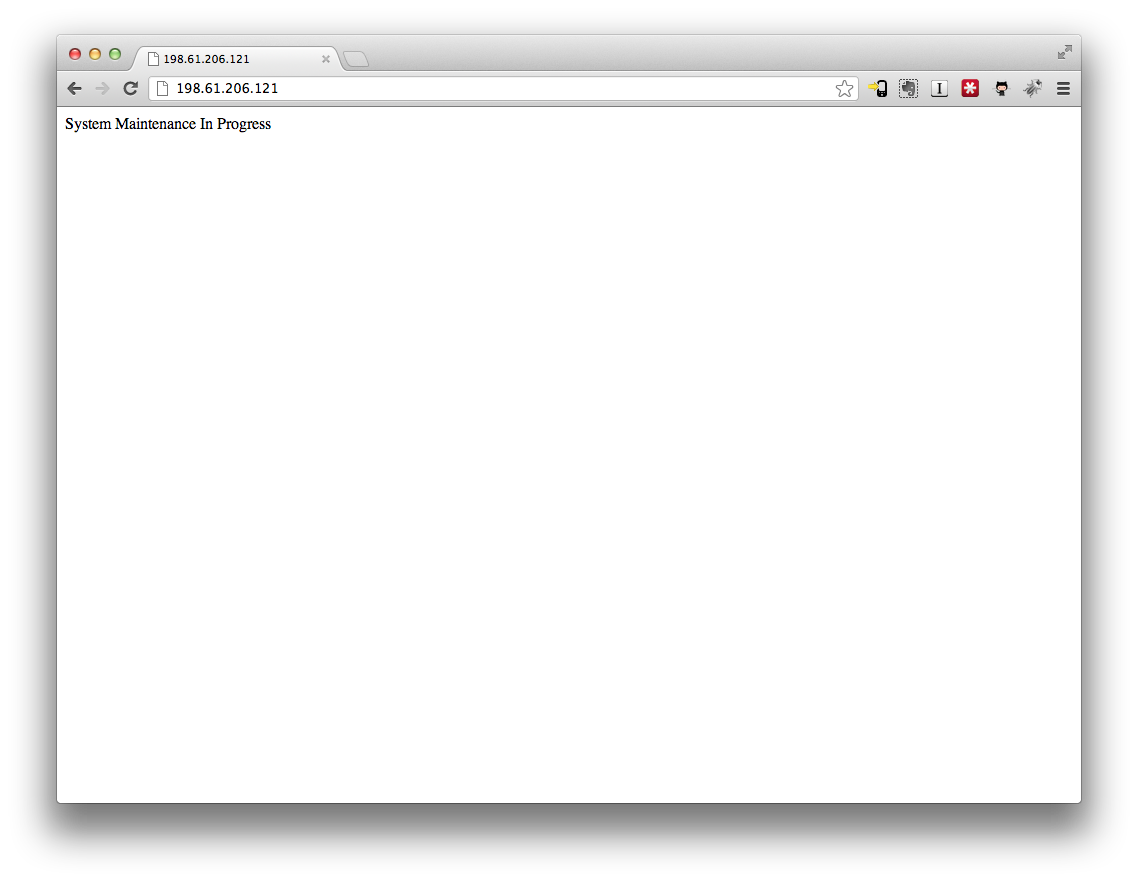
Now, this time, you’ll see the system maint. page.
Convert Deployment Process
The last thing we need to do is deploy our app. Now that we have two possible destinations, vagrant, and rackcloud, let’s tweak our myapp/config/deploy.app file:
 1 require "bundler/capistrano"
 2
 3 set :application, "myapp"
 4 set :deploy_to, "/var/www/myapp"
 5 set :deploy_via, :copy
 6 set :user, "myapp"
 7
 8 set :rails_env, "development"
 9 set :use_sudo, false
10
11 set :scm, :none
12 set :repository, "./"
13
14 task :vagrant do
15   role :web, "10.10.10.10"                          # Your HTTP server, Apache/etc
16   role :app, "10.10.10.10"                          # This may be the same as your `Web` server
17   role :db,  "10.10.10.10", :primary => true # This is where Rails migrations will run
18 end
19
20 task :rackspace do
21   role :web, ENV['address']                          # Your HTTP server, Apache/etc
22   role :app, ENV['address']                          # This may be the same as your `Web` server
23   role :db,  ENV['address'], :primary => true # This is where Rails migrations will run
24 end
25
26 after "deploy:finalize_update", "deploy:copy_database_yml"
27
28 namespace :deploy do
29   task :start do ; end
30   task :stop do ; end
31   task :restart, :roles => :app, :except => { :no_release => true } do
32     run "#{try_sudo} touch #{File.join(current_path,'tmp','restart.txt')}"
33   end
34
35   task :copy_database_yml do
36     run "cp #{shared_path}/database.yml #{release_path}/config/database.yml"
37   end
38 end
From the top: We’ve added a rackspace task to the deployment file and moved the vagrant settings into a vagrant task. Running this task in conjunction with the deploy commands simple overrides the default vagrant ip addresses with whatever address we send in ENV.
Now, let’s go for the gold and deploy out application to rackspace!
 1 $ cd myapp
 2 $ cap rackspace deploy:setup address=198.61.206.121
 3   * executing `rackspace'
 4   * executing `deploy:setup'
 5   * executing "mkdir -p /var/www/myapp /var/www/myapp/releases /var/www/myapp/shared /var/www/myapp/shared/system /var/www/myapp/shared/log /var/www/myapp/shared/pids"
 6     servers: ["198.61.206.121"]
 7 Password: myapp_1234
 8     [198.61.206.121] executing command
 9     command finished in 768ms
10   * executing "chmod g+w /var/www/myapp /var/www/myapp/releases /var/www/myapp/shared /var/www/myapp/shared/system /var/www/myapp/shared/log /var/www/myapp/shared/pids"
11     servers: ["198.61.206.121"]
12     [198.61.206.121] executing command
13     command finished in 240ms
 1 $ cap rackspace deploy:cold address=198.61.206.121
 2   * executing `rackspace'
 3   * executing `deploy:cold'
 4   * executing `deploy:update'
 5  ** transaction: start
 6   * executing `deploy:update_code'
 7   * getting (via checkout) revision  to /var/folders/nf/zwnznxhj35n_143061ppg9rr0000gn/T/20120928215119
 8     executing locally: cp -R ./ /var/folders/nf/zwnznxhj35n_143061ppg9rr0000gn/T/20120928215119
 9     command finished in 72ms
10   * Compressing /var/folders/nf/zwnznxhj35n_143061ppg9rr0000gn/T/20120928215119 to /var/folders/nf/zwnznxhj35n_143061ppg9rr0000gn/T/20120928215119.tar.gz
11     executing locally: tar czf 20120928215119.tar.gz 20120928215119
12     command finished in 114ms
13     servers: ["198.61.206.121"]
14 Password:
15  ** sftp upload /var/folders/nf/zwnznxhj35n_143061ppg9rr0000gn/T/20120928215119.tar.gz -> /tmp/20120928215119.tar.gz
16     [198.61.206.121] /tmp/20120928215119.tar.gz
17     [198.61.206.121] done
18   * sftp upload complete
19   * executing "cd /var/www/myapp/releases && tar xzf /tmp/20120928215119.tar.gz && rm /tmp/20120928215119.tar.gz"
20     servers: ["198.61.206.121"]
21     [198.61.206.121] executing command
22     command finished in 374ms
23   * executing `deploy:finalize_update'
24     triggering before callbacks for `deploy:finalize_update'
25   * executing `bundle:install'
26   * executing "cd /var/www/myapp/releases/20120928215119 && bundle install --gemfile /var/www/myapp/releases/20120928215119/Gemfile --path /var/www/myapp/shared/bundle --deployment --quiet --without development test"
27     servers: ["198.61.206.121"]
28     [198.61.206.121] executing command
29     command finished in 33040ms
30   * executing "chmod -R g+w /var/www/myapp/releases/20120928215119"
31     servers: ["198.61.206.121"]
32     [198.61.206.121] executing command
33     command finished in 330ms
34   * executing "rm -rf /var/www/myapp/releases/20120928215119/public/system && mkdir -p /var/www/myapp/releases/20120928215119/public/"
35     servers: ["198.61.206.121"]
36     [198.61.206.121] executing command
37     command finished in 229ms
38   * executing "ln -s /var/www/myapp/shared/system /var/www/myapp/releases/20120928215119/public/system"
39     servers: ["198.61.206.121"]
40     [198.61.206.121] executing command
41     command finished in 228ms
42   * executing "rm -rf /var/www/myapp/releases/20120928215119/log"
43     servers: ["198.61.206.121"]
44     [198.61.206.121] executing command
45     command finished in 228ms
46   * executing "ln -s /var/www/myapp/shared/log /var/www/myapp/releases/20120928215119/log"
47     servers: ["198.61.206.121"]
48     [198.61.206.121] executing command
49     command finished in 227ms
50   * executing "rm -rf /var/www/myapp/releases/20120928215119/tmp/pids && mkdir -p /var/www/myapp/releases/20120928215119/tmp/"
51     servers: ["198.61.206.121"]
52     [198.61.206.121] executing command
53     command finished in 230ms
54   * executing "ln -s /var/www/myapp/shared/pids /var/www/myapp/releases/20120928215119/tmp/pids"
55     servers: ["198.61.206.121"]
56     [198.61.206.121] executing command
57     command finished in 235ms
58   * executing "find /var/www/myapp/releases/20120928215119/public/images /var/www/myapp/releases/20120928215119/public/stylesheets /var/www/myapp/releases/20120928215119/public/javascripts -exec touch -t 201209282152.06 {} ';'; true"
59     servers: ["198.61.206.121"]
60     [198.61.206.121] executing command
61 *** [err :: 198.61.206.121] find:
62 *** [err :: 198.61.206.121] /var/www/myapp/releases/20120928215119/public/images
63 *** [err :: 198.61.206.121] : No such file or directory
64 *** [err :: 198.61.206.121]
65 *** [err :: 198.61.206.121] find:
66 *** [err :: 198.61.206.121] /var/www/myapp/releases/20120928215119/public/stylesheets
67 *** [err :: 198.61.206.121] : No such file or directory
68 *** [err :: 198.61.206.121]
69 *** [err :: 198.61.206.121] find:
70 *** [err :: 198.61.206.121] /var/www/myapp/releases/20120928215119/public/javascripts
71 *** [err :: 198.61.206.121] : No such file or directory
72 *** [err :: 198.61.206.121]
73     command finished in 335ms
74     triggering after callbacks for `deploy:finalize_update'
75   * executing `deploy:copy_database_yml'
76   * executing "cp /var/www/myapp/shared/database.yml /var/www/myapp/releases/20120928215119/config/database.yml"
77     servers: ["198.61.206.121"]
78     [198.61.206.121] executing command
79     command finished in 239ms
80   * executing `deploy:create_symlink'
81   * executing "rm -f /var/www/myapp/current && ln -s /var/www/myapp/releases/20120928215119 /var/www/myapp/current"
82     servers: ["198.61.206.121"]
83     [198.61.206.121] executing command
84     command finished in 229ms
85  ** transaction: commit
86   * executing `deploy:migrate'
87   * executing "cd /var/www/myapp/releases/20120928215119 && bundle exec rake RAILS_ENV=development  db:migrate"
88     servers: ["198.61.206.121"]
89     [198.61.206.121] executing command
90  ** [out :: 198.61.206.121] ==  CreatePeople: migrating ===================================================
91  ** [out :: 198.61.206.121] -- create_table(:people)
92  ** [out :: 198.61.206.121] -> 0.0091s
93  ** [out :: 198.61.206.121] ==  CreatePeople: migrated (0.0092s) ==========================================
94  ** [out :: 198.61.206.121]
95     command finished in 6495ms
96   * executing `deploy:start'
Congratualtions! You’re app is in the cloud! Go to the website and check it out!
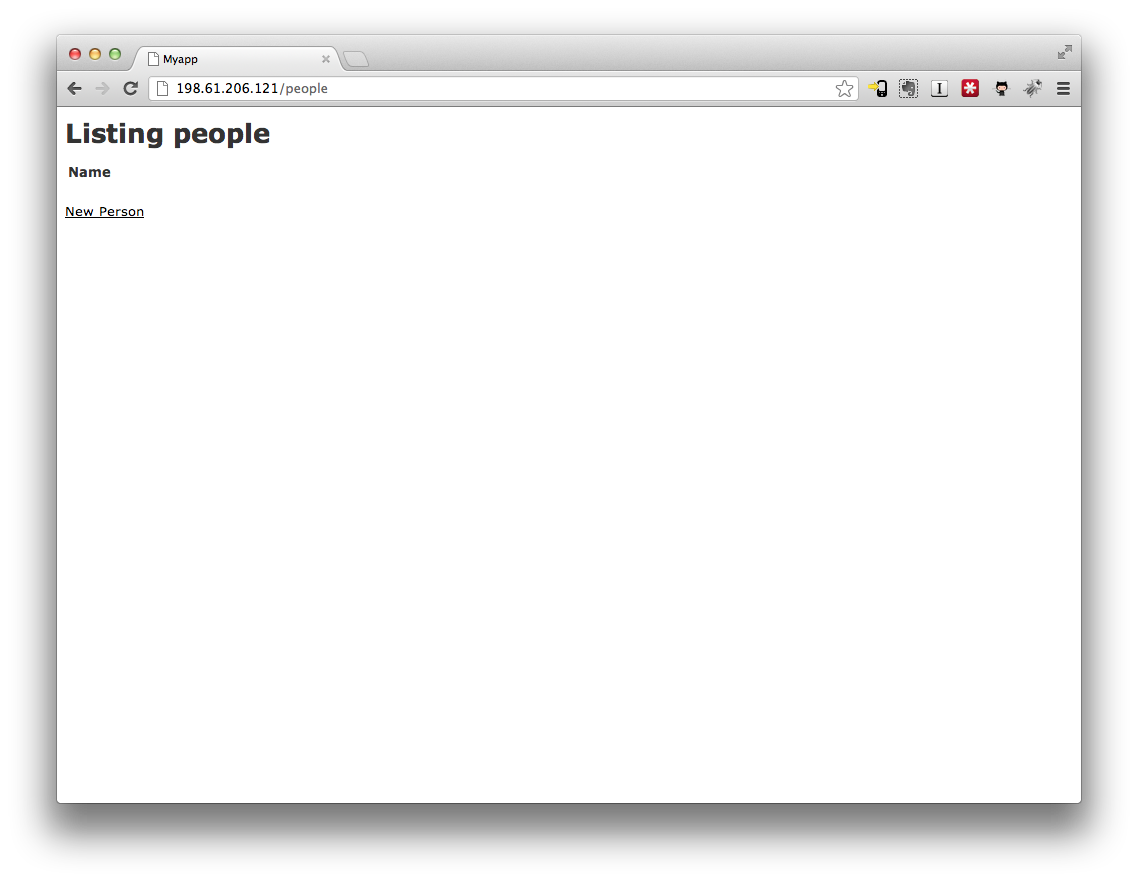
Don’t forget to delete your cloud instances when you’re done! Although I suspect at 2.2 cents an hour, you’re not going to go broken any time soon.
Whenever you’re ready to do that, pass in the node name and Chef will also delete the client/node from the OpsCode website:
$ knife rackspace server list
Instance ID  Public IP        Private IP      Flavor  Image  Name           State
21163069     198.61.206.121   10.178.109.29   1       114    rackspace-web  active
21162952     198.101.233.114  10.180.147.191  1       114    rackspace-db   active

$ knife rackspace server delete 21163069 -N rackspace-web
Instance ID: 21163069
Host ID: 039a7acde829ad51d7f8405103db4ed6
Name: rackspace-web
Flavor: 256 server
Image: CentOS 5.6
Public IP Address: 198.61.206.121
Private IP Address: 10.178.109.29

Do you really want to delete this server? (Y/N) Y
Commit Our Work
Let’s commit all of our changes to git.
1 $ cd ~/devops_toolbox
2 $ git add .
3 $ git commit -m "Added cloud boostrap"
4 [master 3cda16c] Added cloud boostrap
5  5 files changed, 110 insertions(+), 3 deletions(-)
6  create mode 100644 .chef/bootstrap/centos-5.6.erb
To Continue…
- Introduction – Introduction
- Installing Prerequisites – XCode, CommandLineTools, Homebrew, RVM, Ruby, and VirtualBox
- Project Setup – Create the git repository and directory structure for Vagrant, Chef, etc.
- Vagrant/Veewee Installation – Install Vagrant/Vewee to create/control VirtualBox machines
- Define/Create a Vagrant Box – Define and Create a Vagrant Box for use i VirtualBox
- Provisioning Machines with Vagrant – Provision a cluster (Web/DB) of machines using Vagrant
- Configuring Machines Using Chef Solo – Configuring our new machine instances using Chef Solo
- Customizing Recipes for Our Application – Customize the recipes we have to prepare for our application deployment
- Create and Deploy a Rails Applications – Create a simple Rails application and deploy it to our Vagrant instances
- Migrate from Chef Solo to Hosted Chef – Migrate from using Chef Solo to hosted Chef at OpsCode
- Migrate Servers to RackCloud – Migrate your servers from VirtualBox to “The Cloud” using Rackspace.